Creating Dynamic Fantasy Fight Scenes From Start to Finish
Summary
Fantasy Fight Scene Process
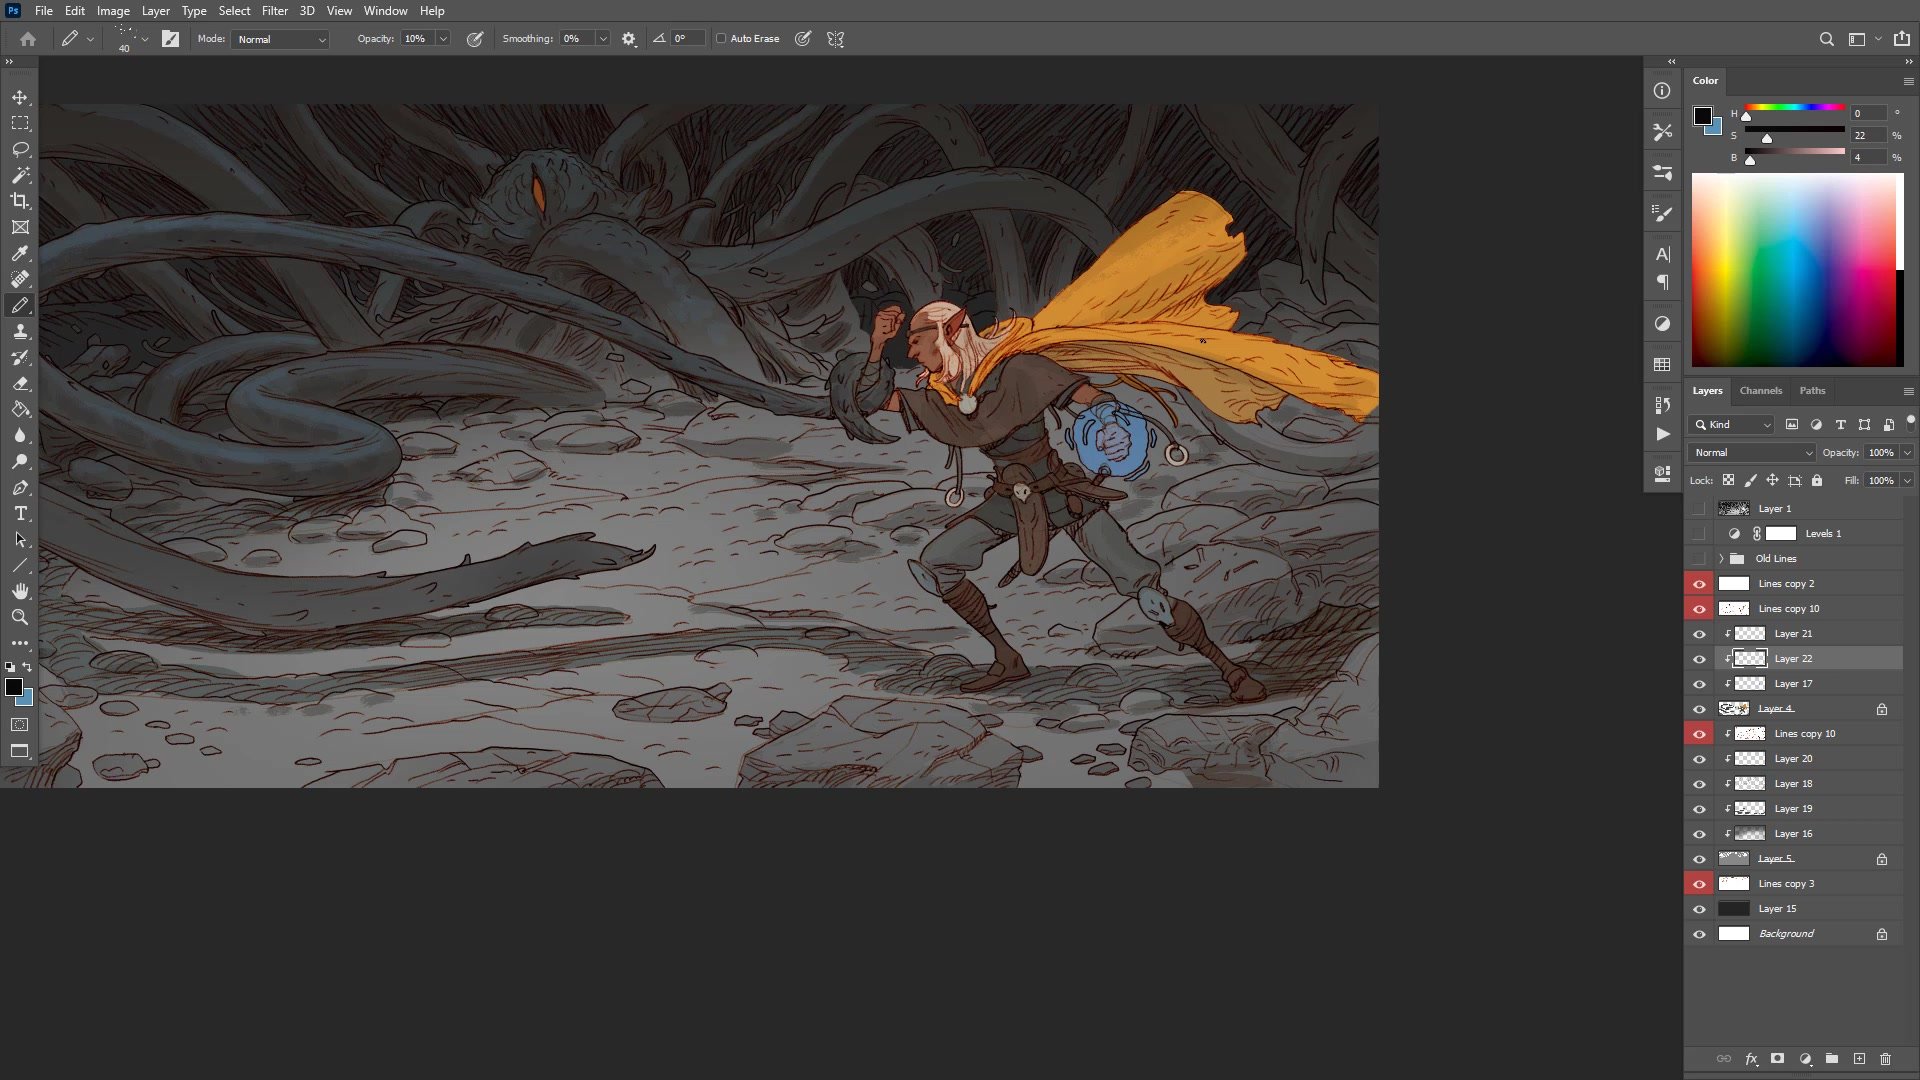
This nearly four-hour real-time demonstration walks through the complete process of creating a fantasy fight scene illustration featuring an elf mage battling a giant Cthulhu-esque tentacle creature in a dark dungeon setting. Every phase is covered from the initial thumbnail sketch through character and creature design, refined line work, layer separation, and full color rendering in Photoshop.
The session reveals the honest reality of building complex multi-figure compositions. Decisions about camera angle, visual hierarchy, and creature design unfold in real time, including the moments of uncertainty and experimentation that edited tutorials typically hide. The line and color workflow demonstrated here prioritizes solving structural problems during the drawing phase so the color phase can focus purely on mood and atmosphere.
Thumbnailing and Composition

Composition Through Thumbnails
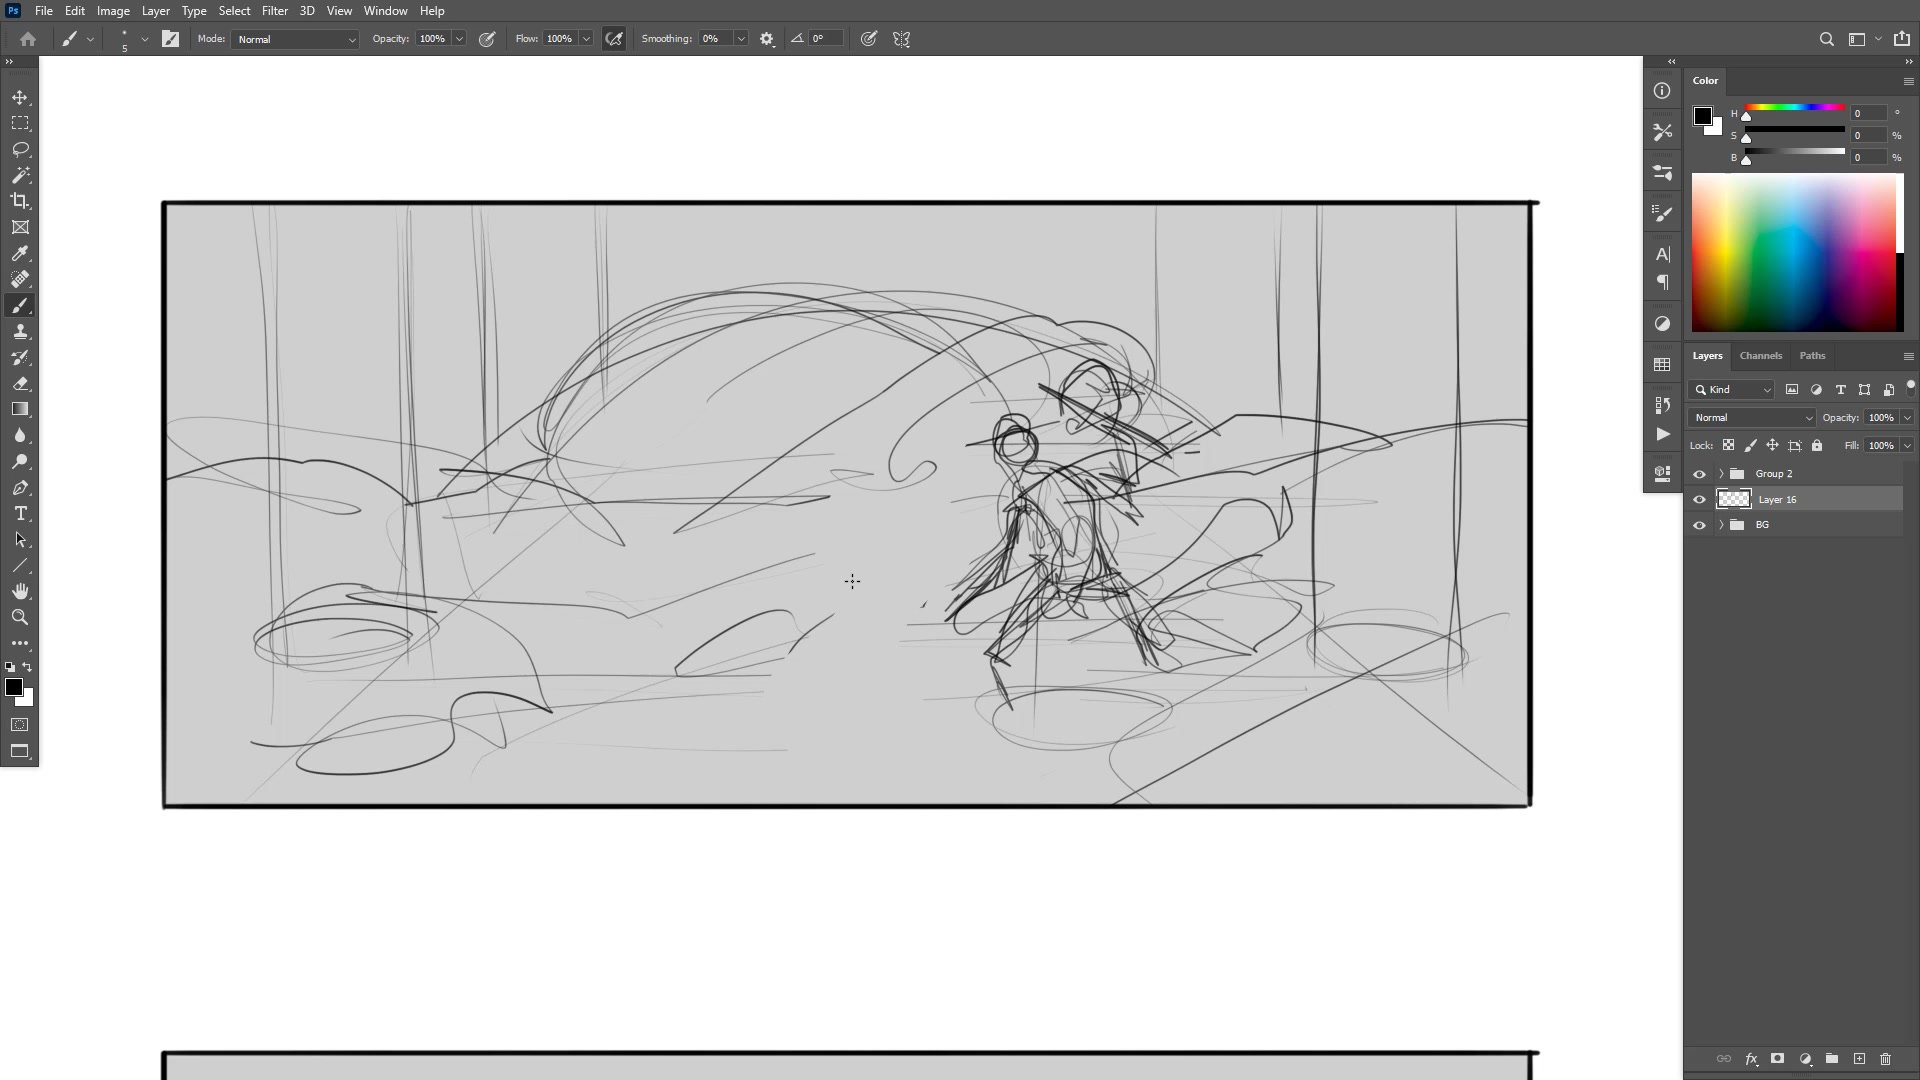
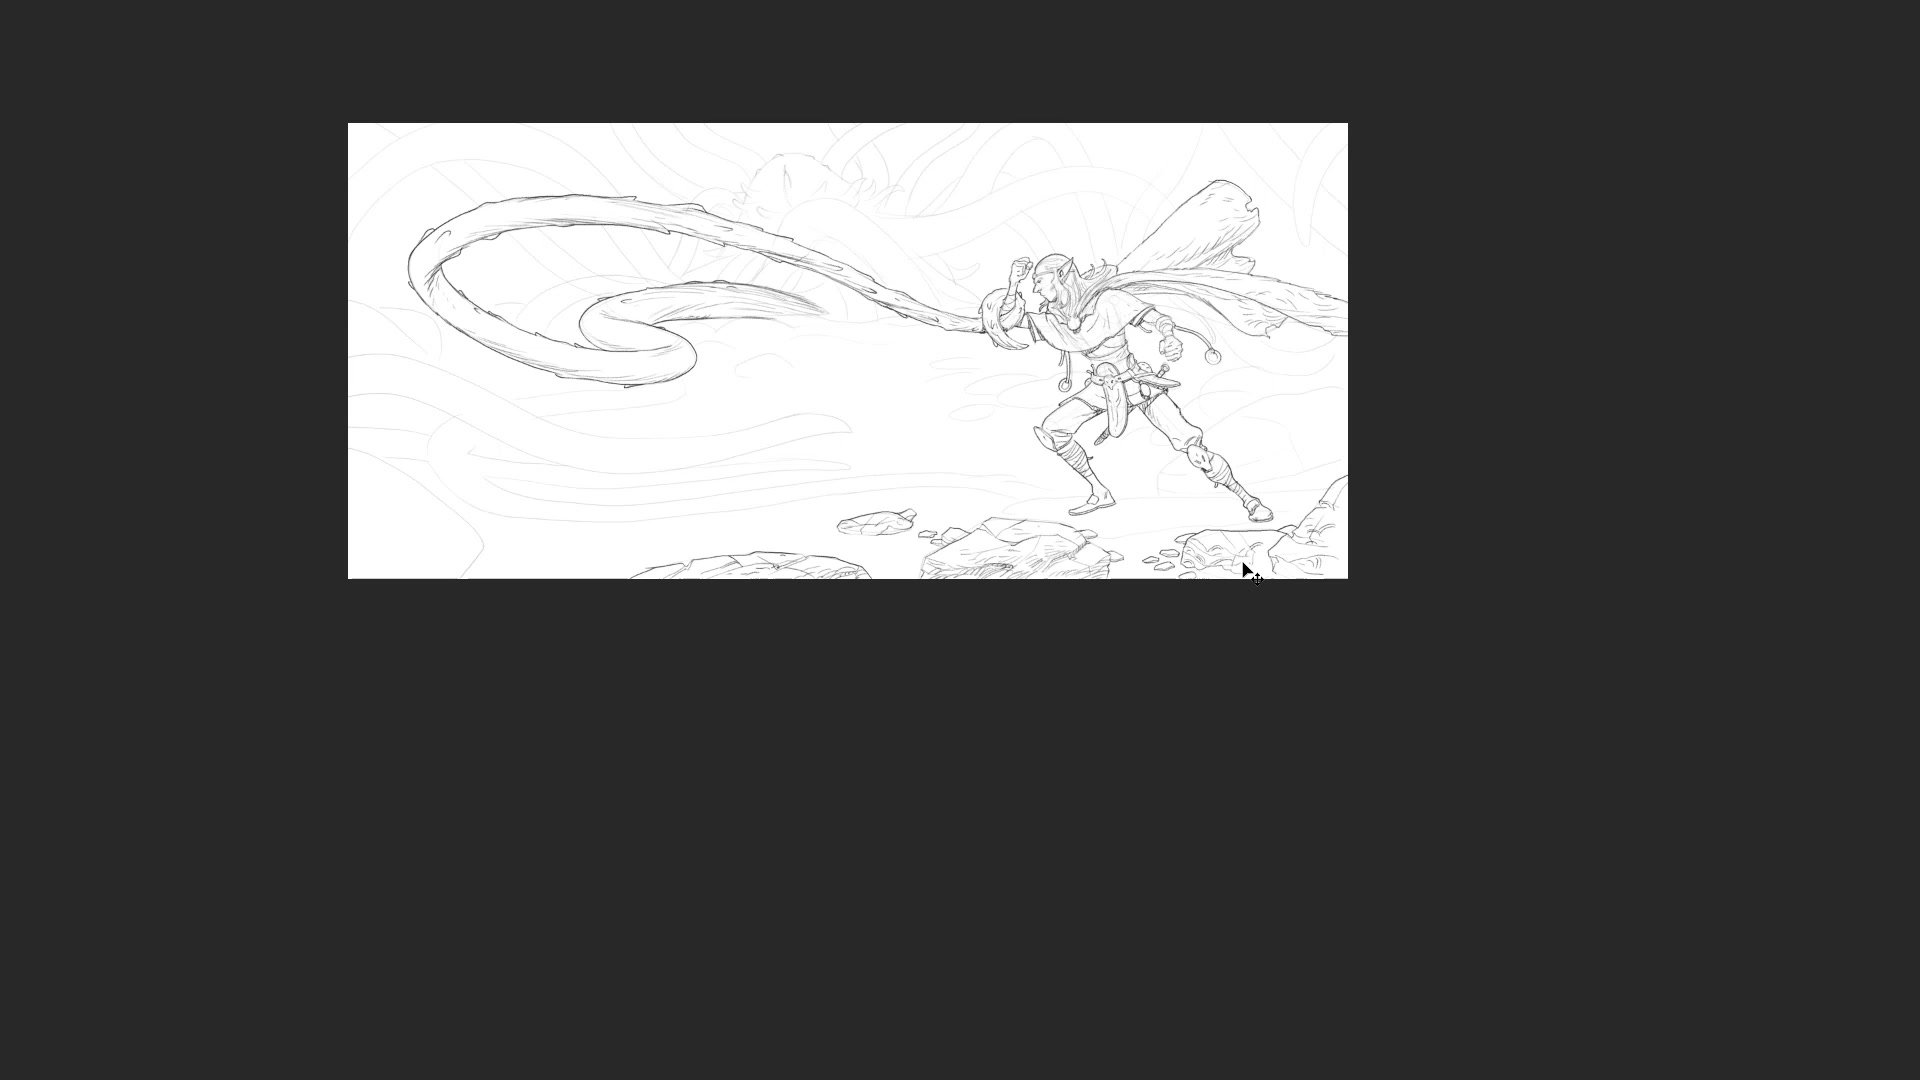
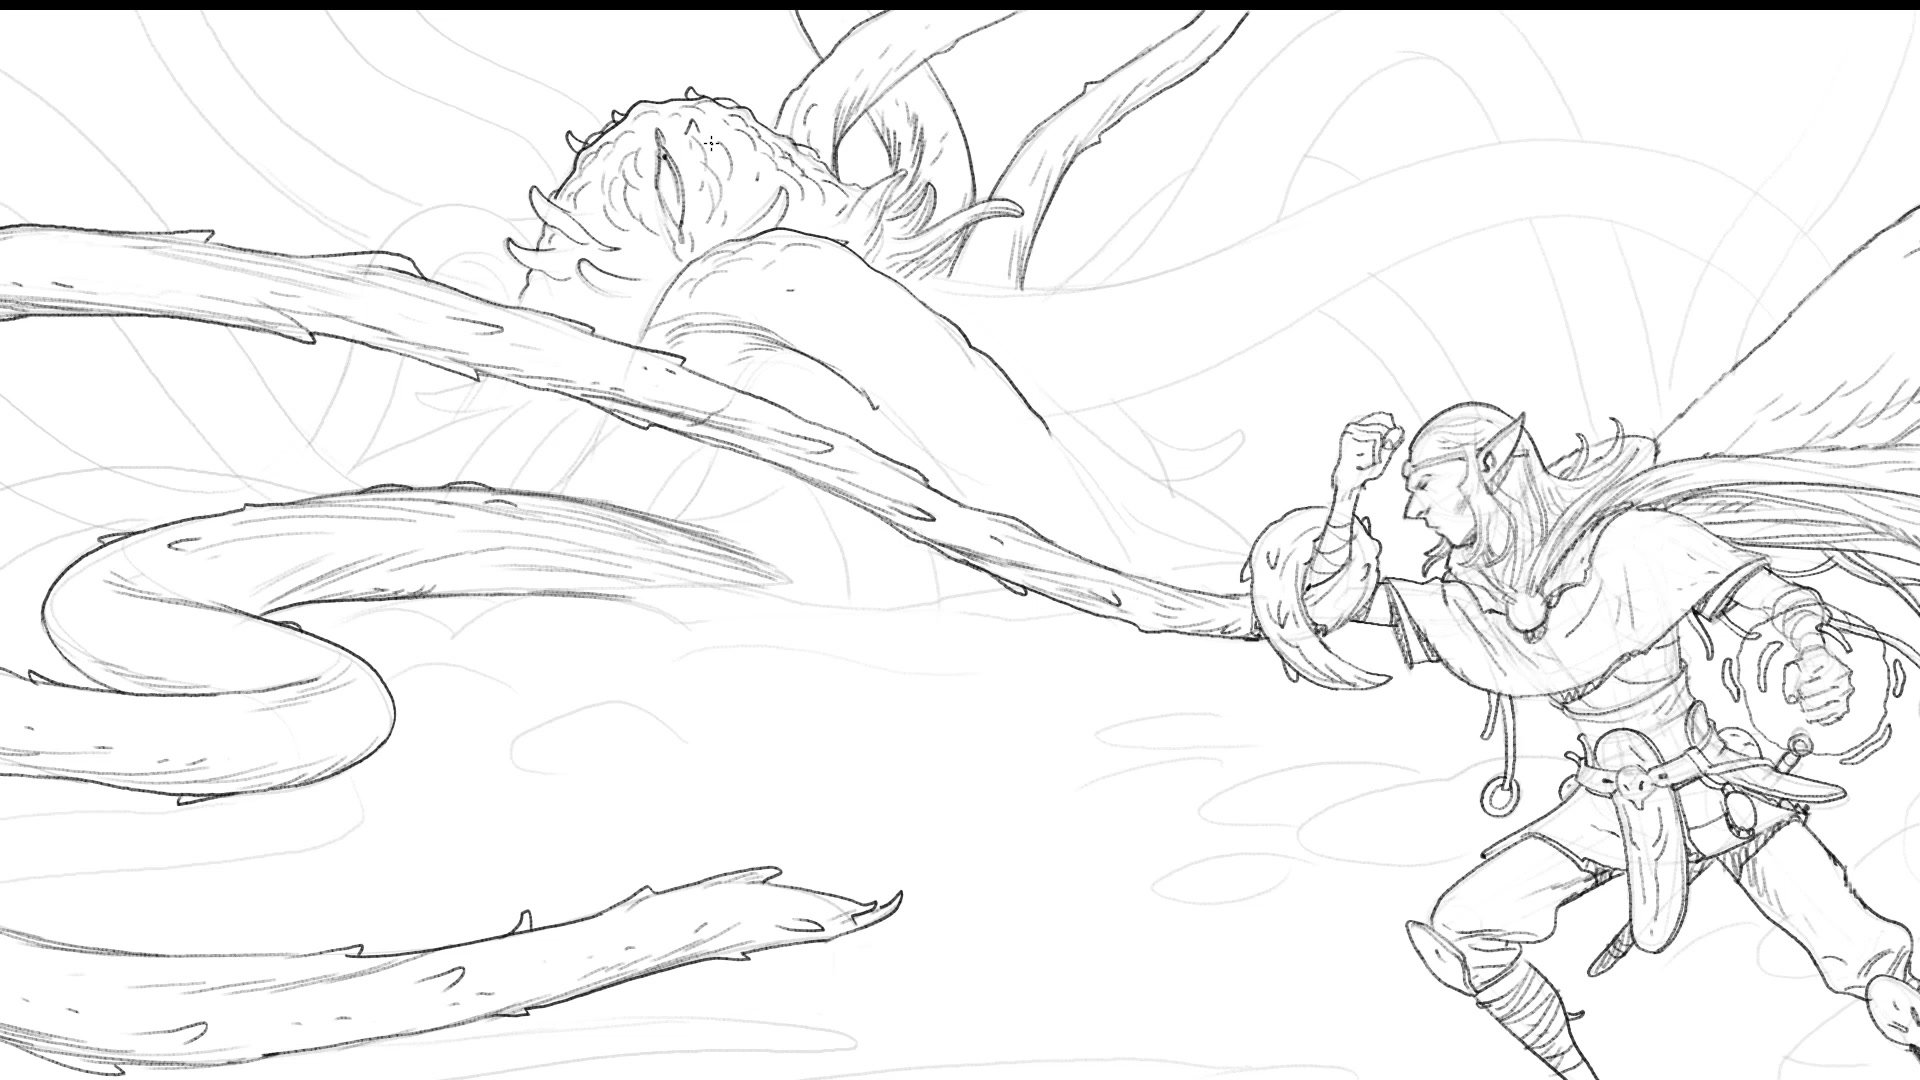
The process begins with a thumbnail phase that takes roughly fifty minutes to resolve. The initial idea is deliberately vague, featuring a single figure facing off against a massive tentacle creature in a dark space. Working within a thumbnail template frame, the composition develops through experimentation with camera angle, character placement, and the tonal relationship between foreground action and background darkness.
A critical decision during this phase involves establishing the value structure. The creature emerges from deep shadow while the elf mage character sits relatively light in comparison, creating a natural focal point. The thumbnail also establishes the sense of scale, with the tentacle creature filling the upper portion of the frame while smaller tentacles and environmental debris create chaos around the foreground figure. The thumbnail is intentionally rough because over-planning at this stage makes the next phase harder, not easier.
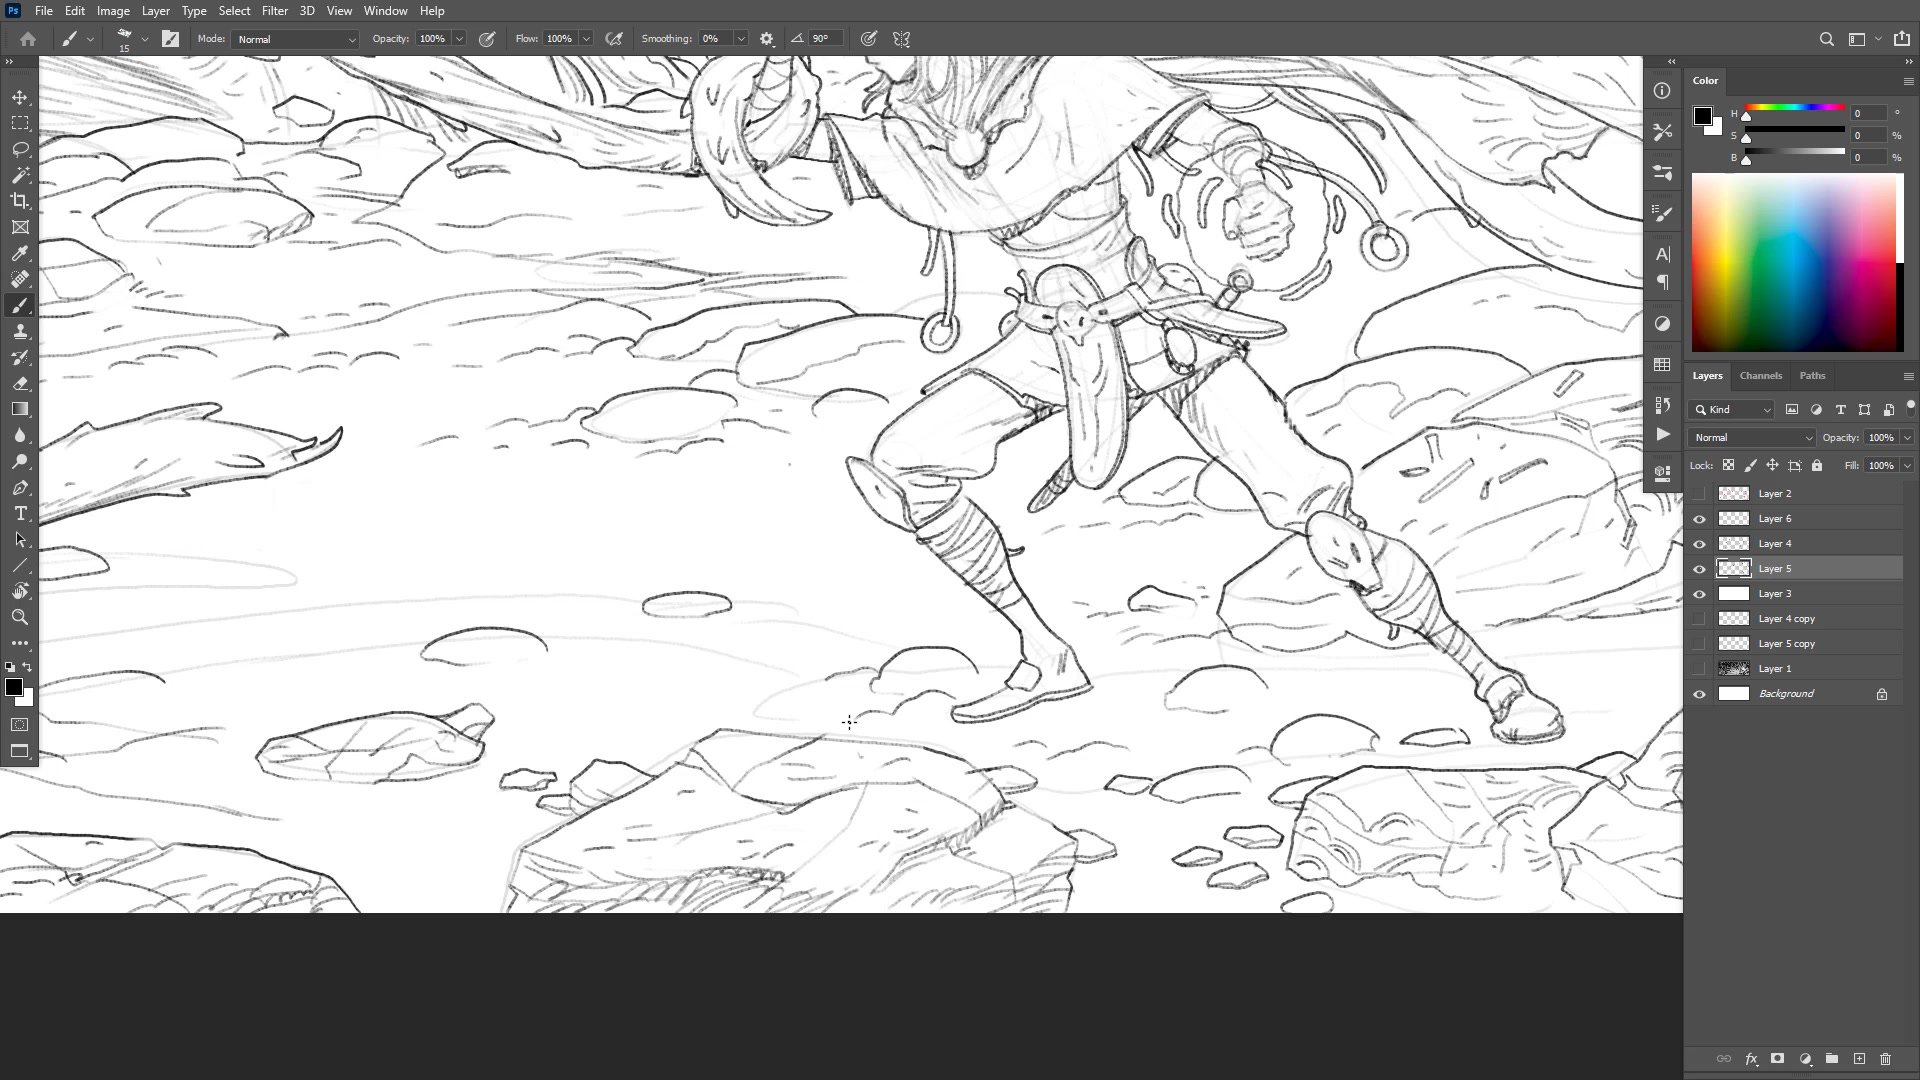
Character and Line Development
Line Work and Layer Strategy
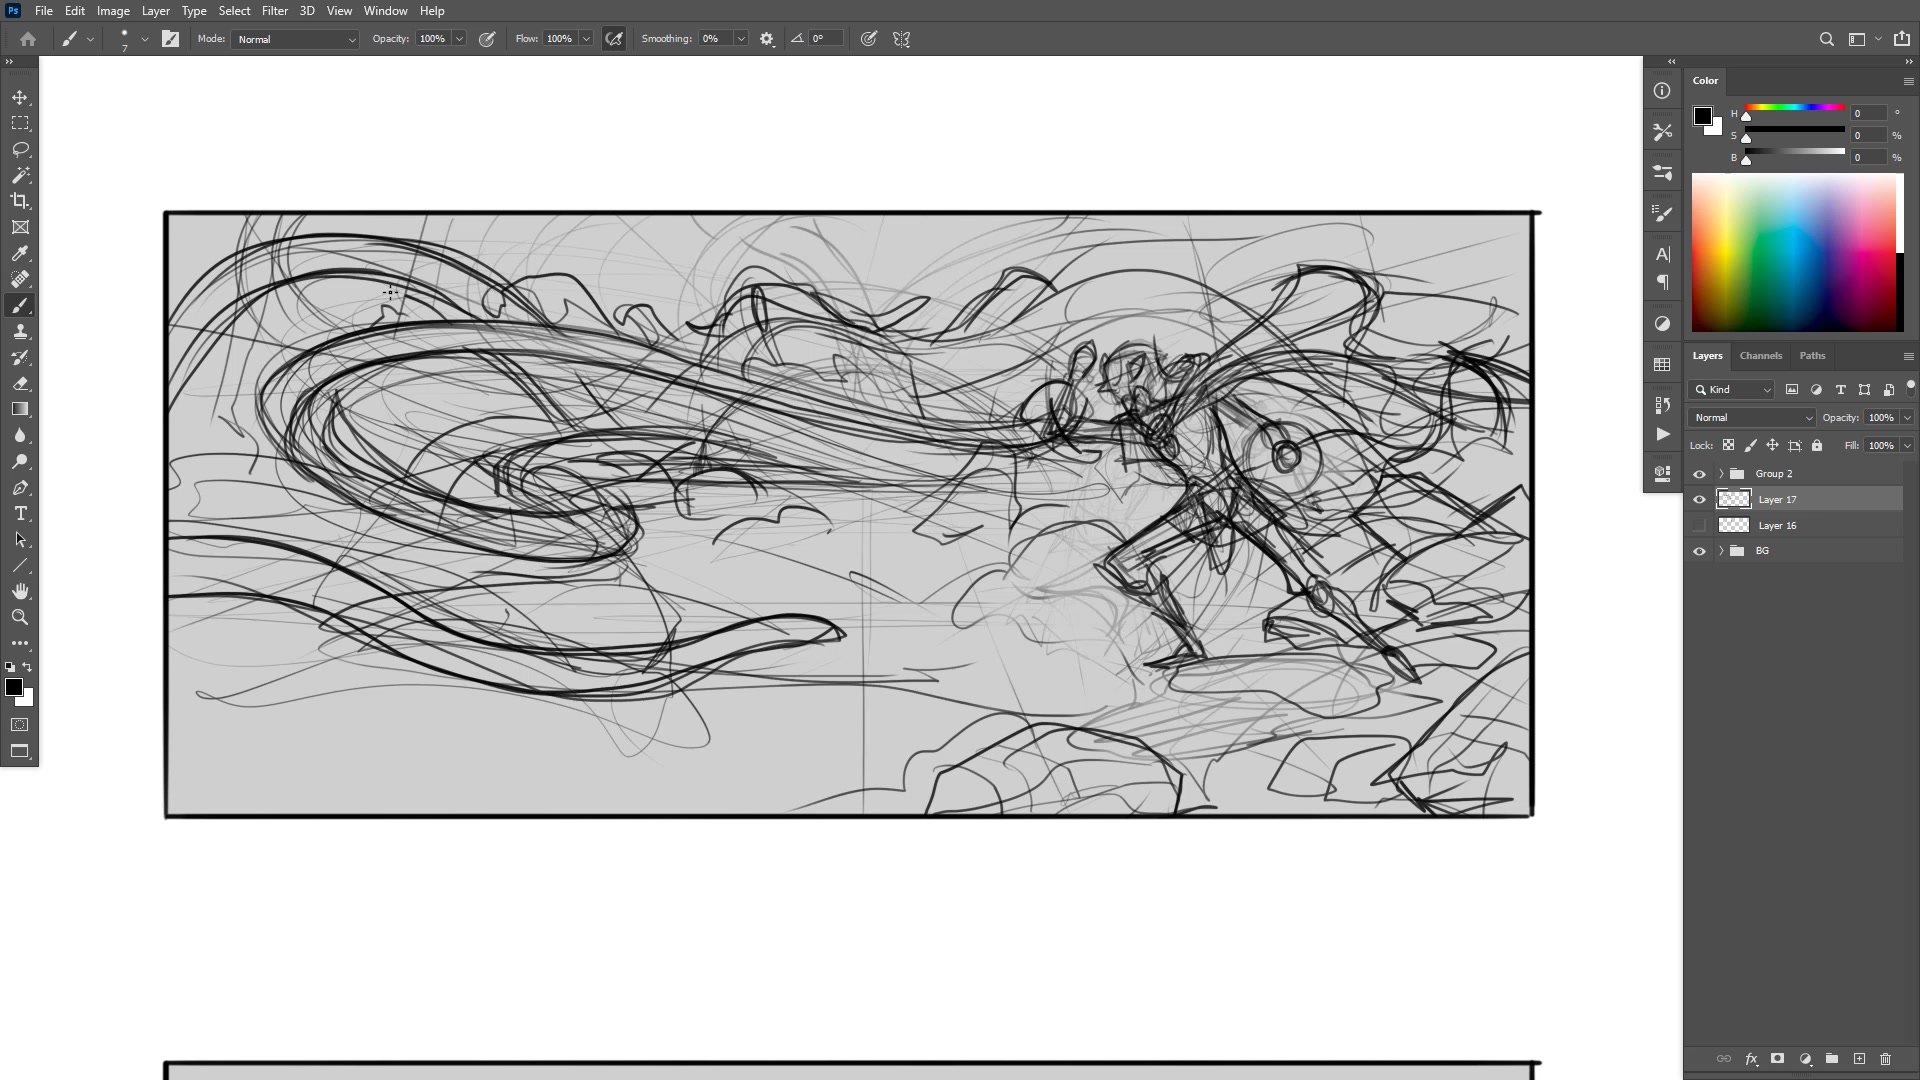
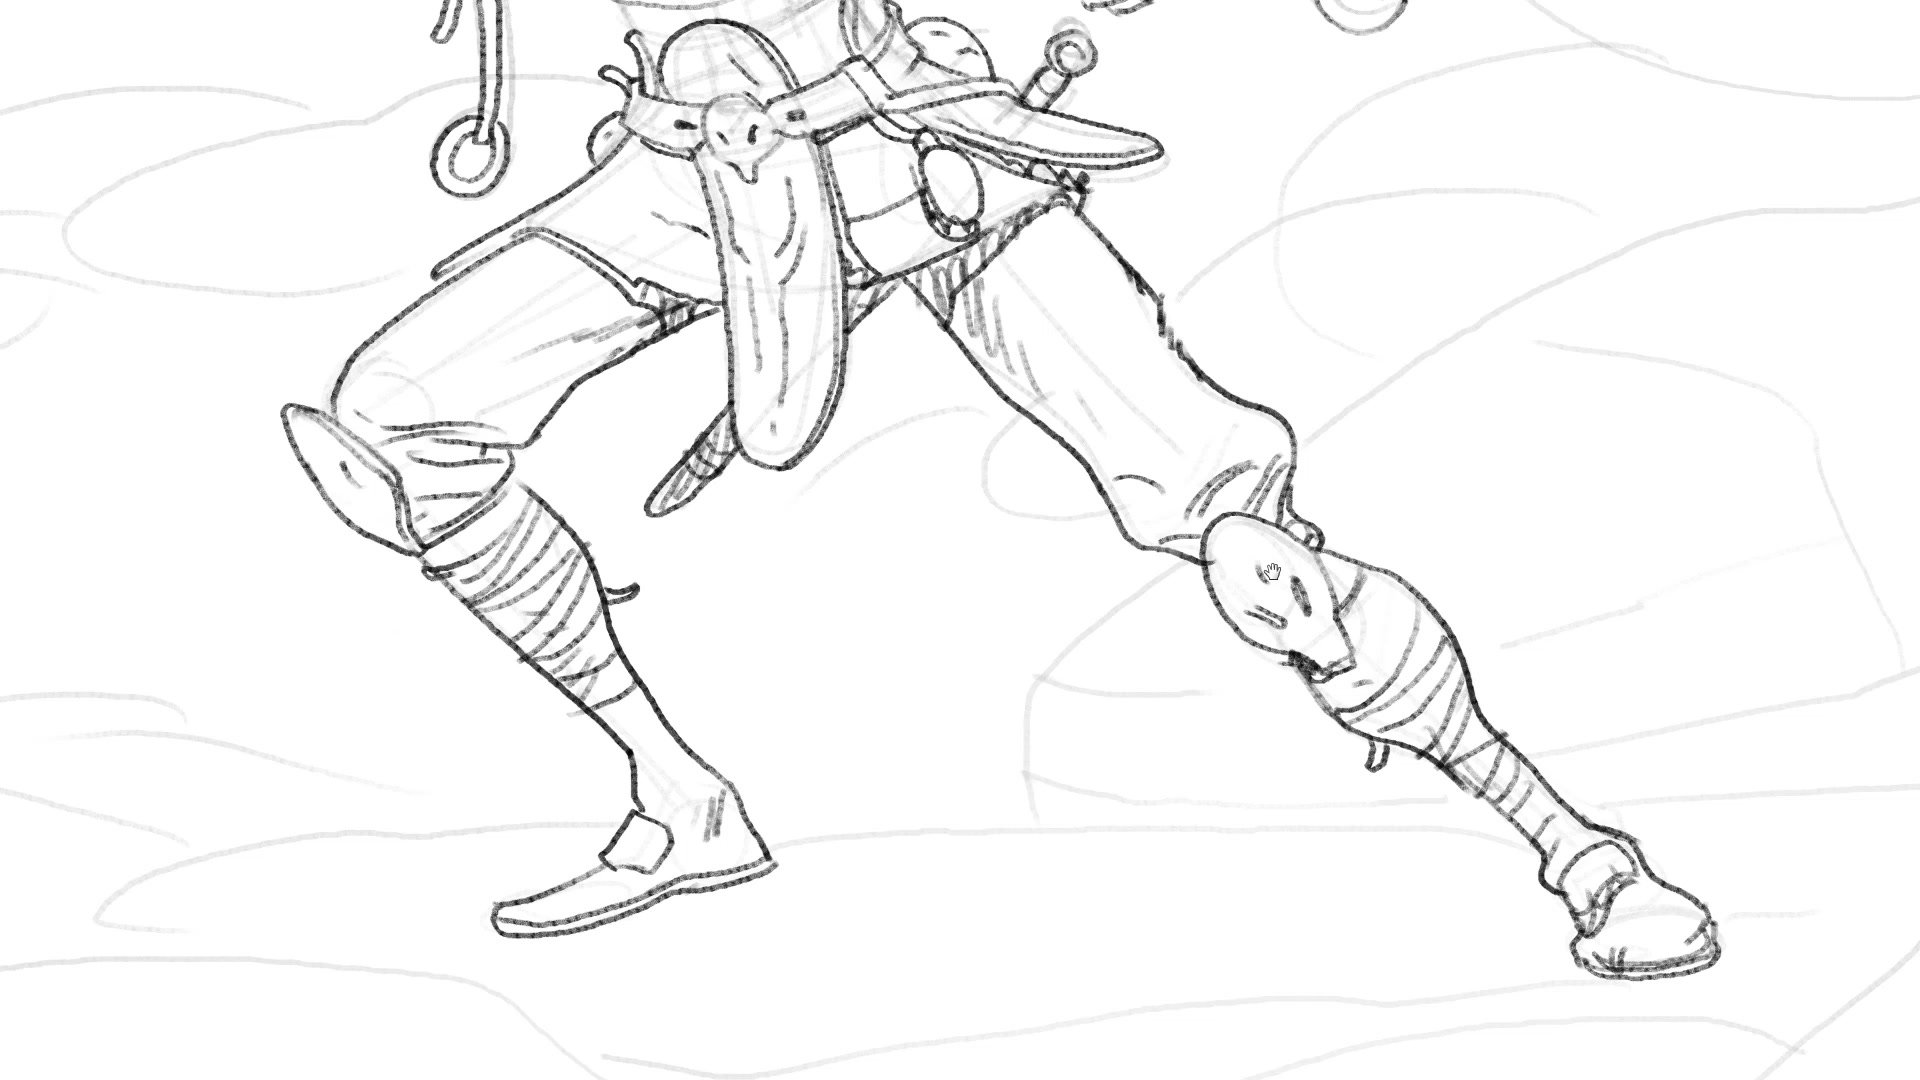
Moving from thumbnail to the full-size 12,000-pixel canvas, the approach to layers is deliberately minimal. The character and the primary tentacle share one layer, the background creature and environment form a second, and foreground rocks get their own layer for selection flexibility during coloring. This restraint prevents the common trap of over-organizing layers at the expense of actually drawing.
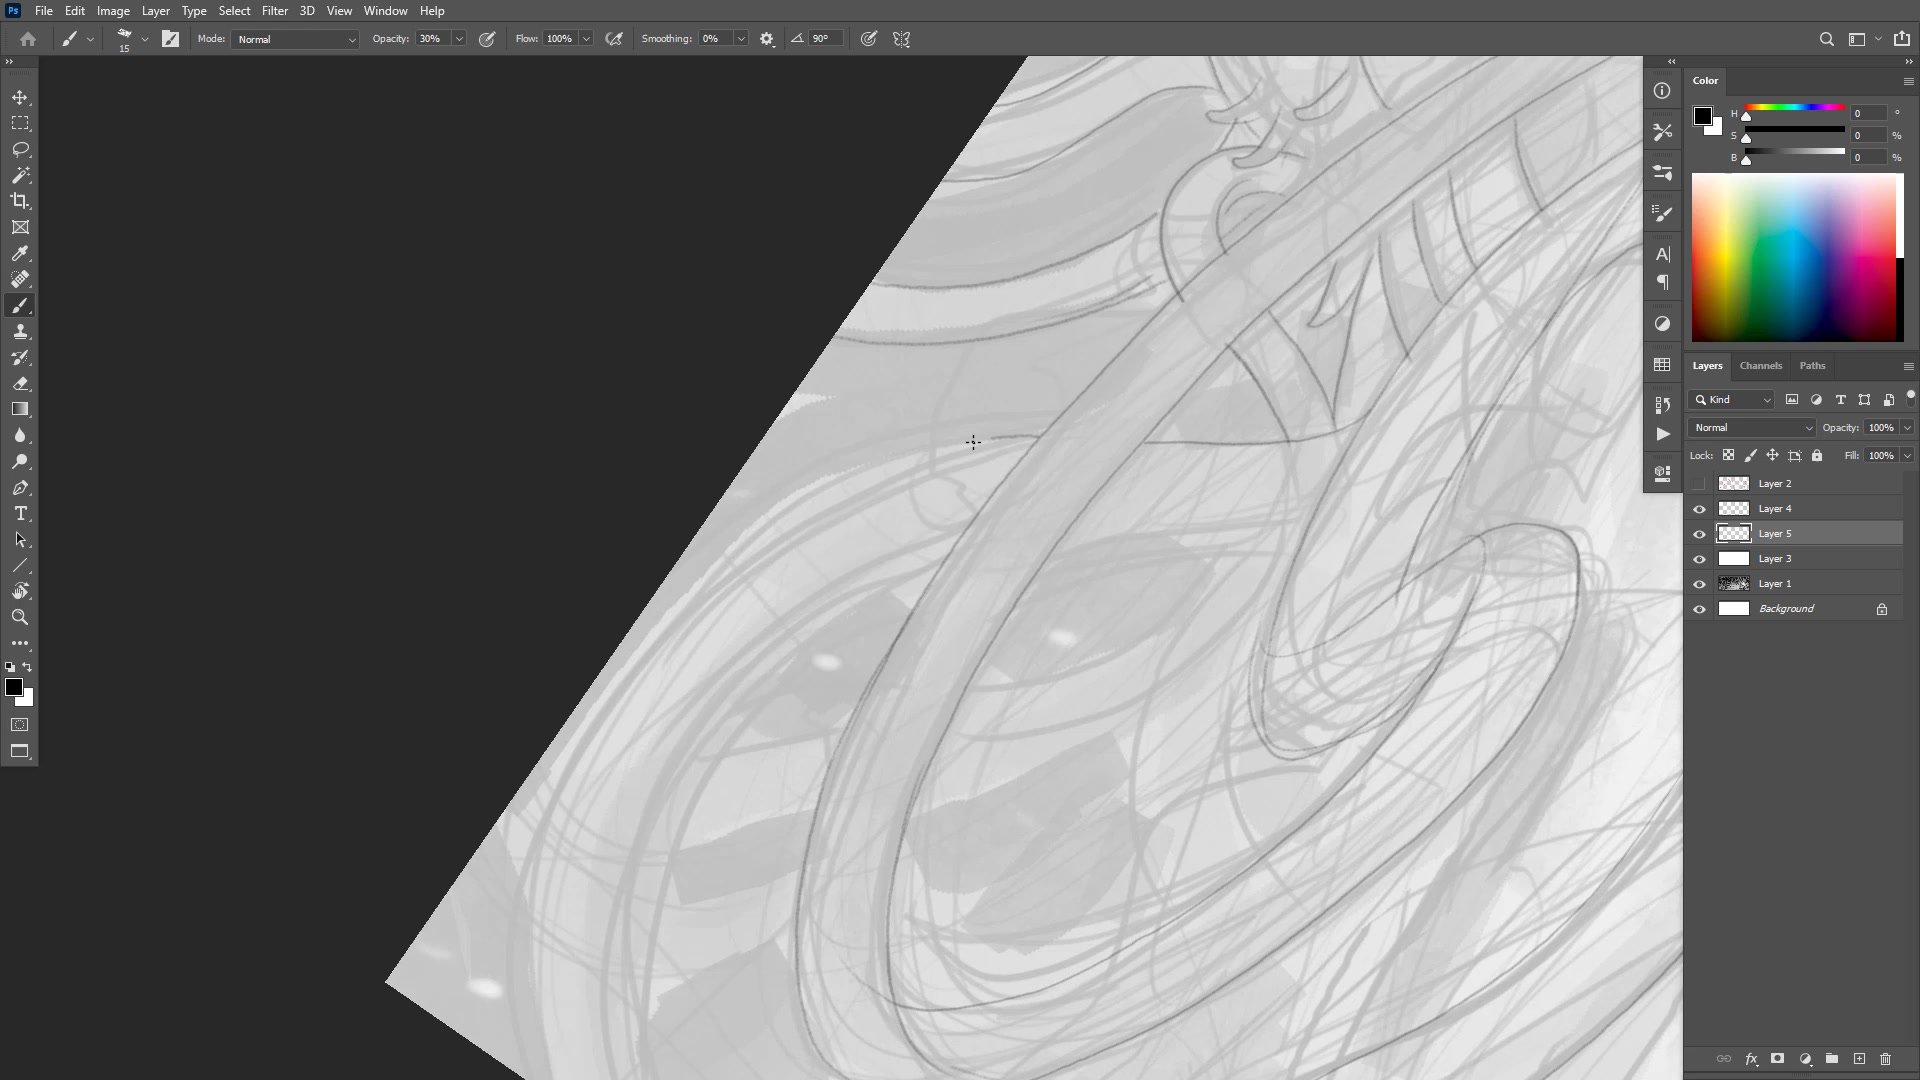
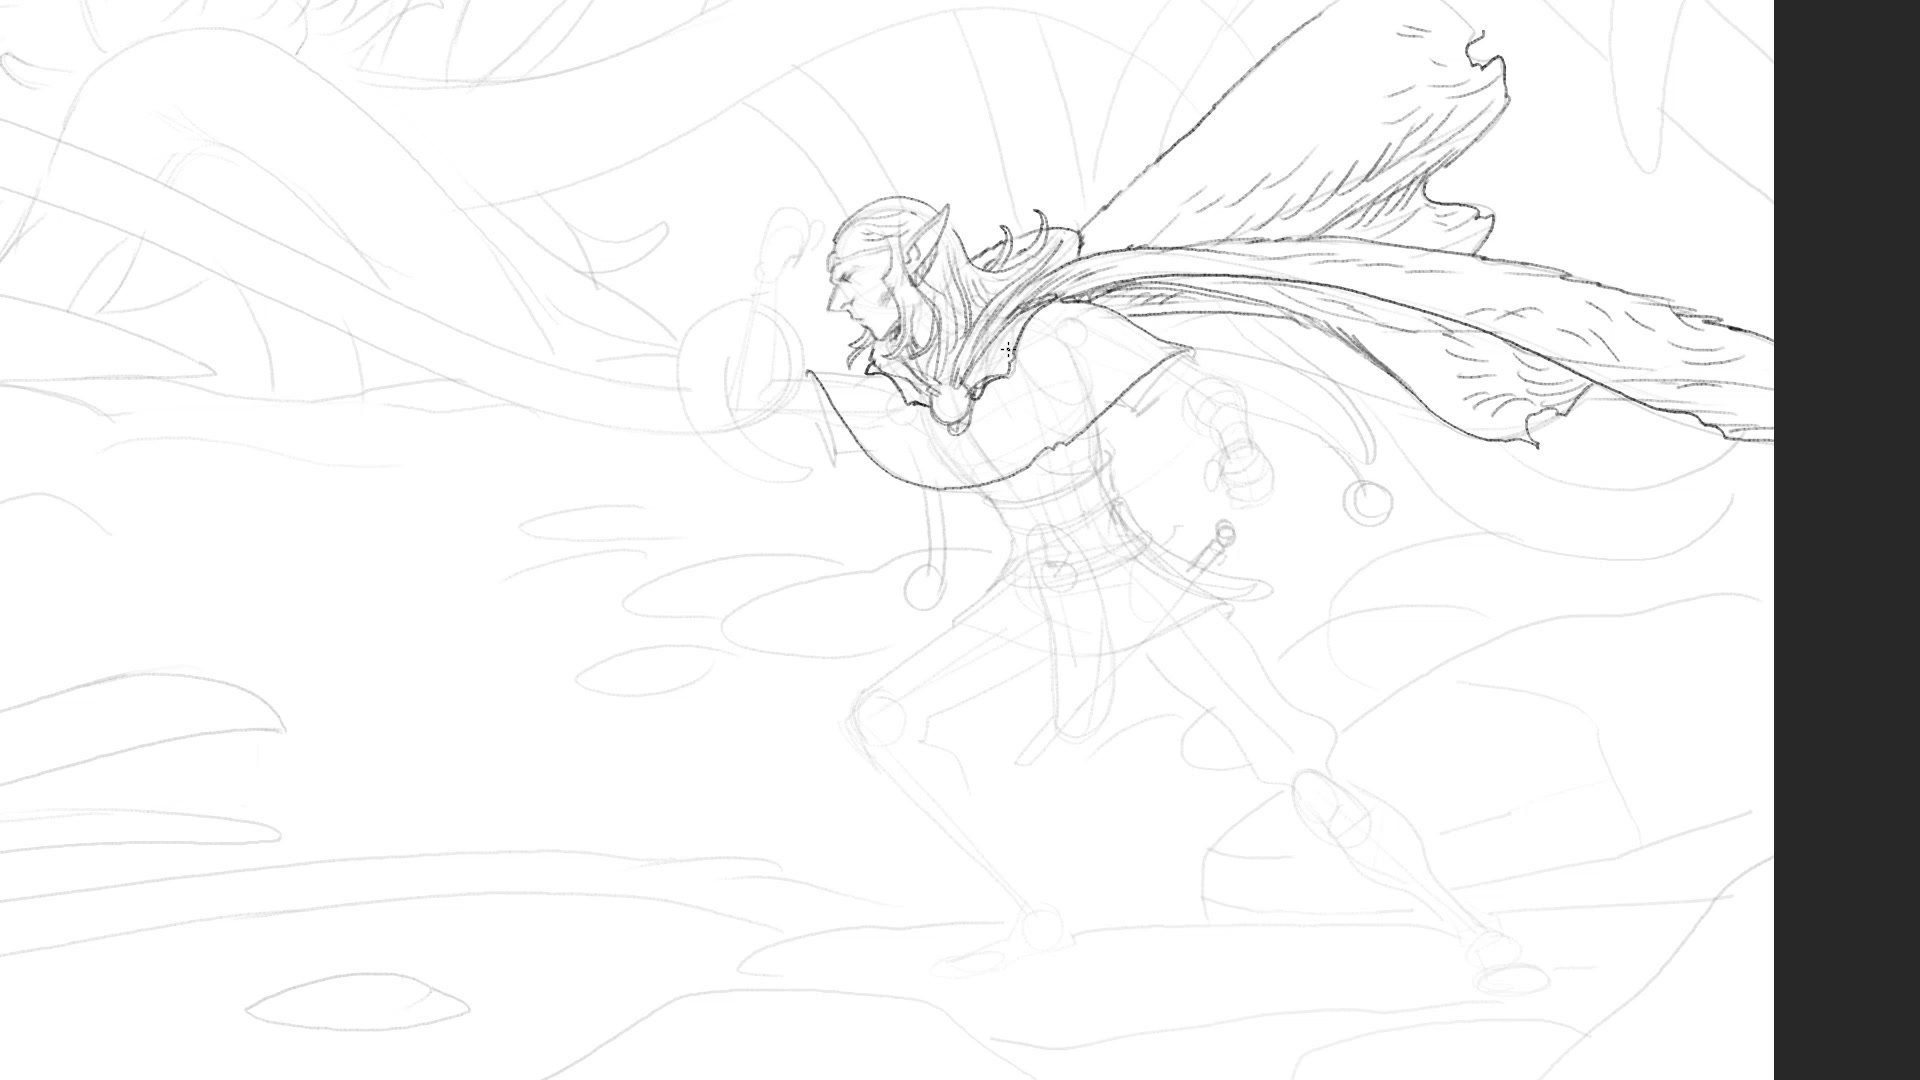
The character design draws from classic fantasy archetypes, featuring a travel-worn cape, leather gear, and a DnD-style headband. Each element is refined at the working zoom level rather than zooming in and out constantly. A second monitor displays the full composition at all times, providing a constant reference for whether detail levels are balanced across the image. This practice prevents the common problem of over-rendering one area while neglecting others.
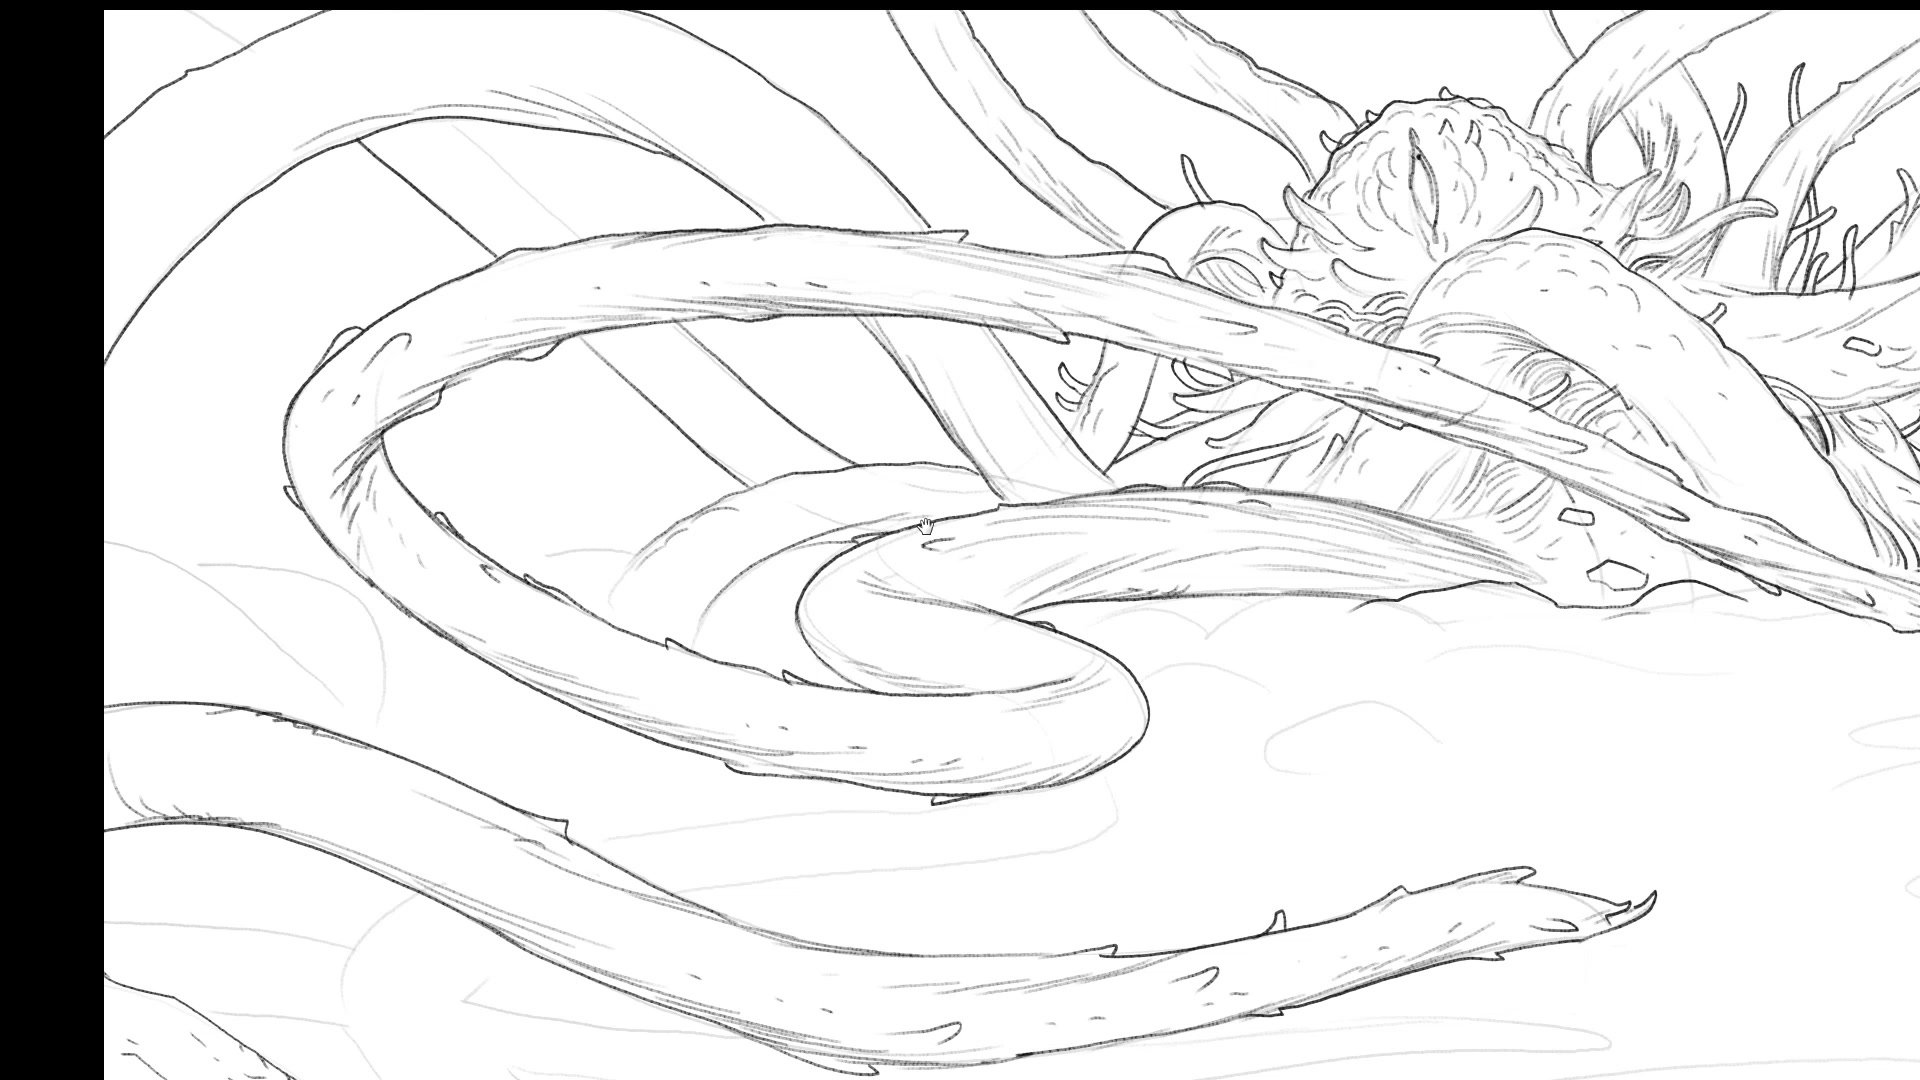
Creature Design and Refinement
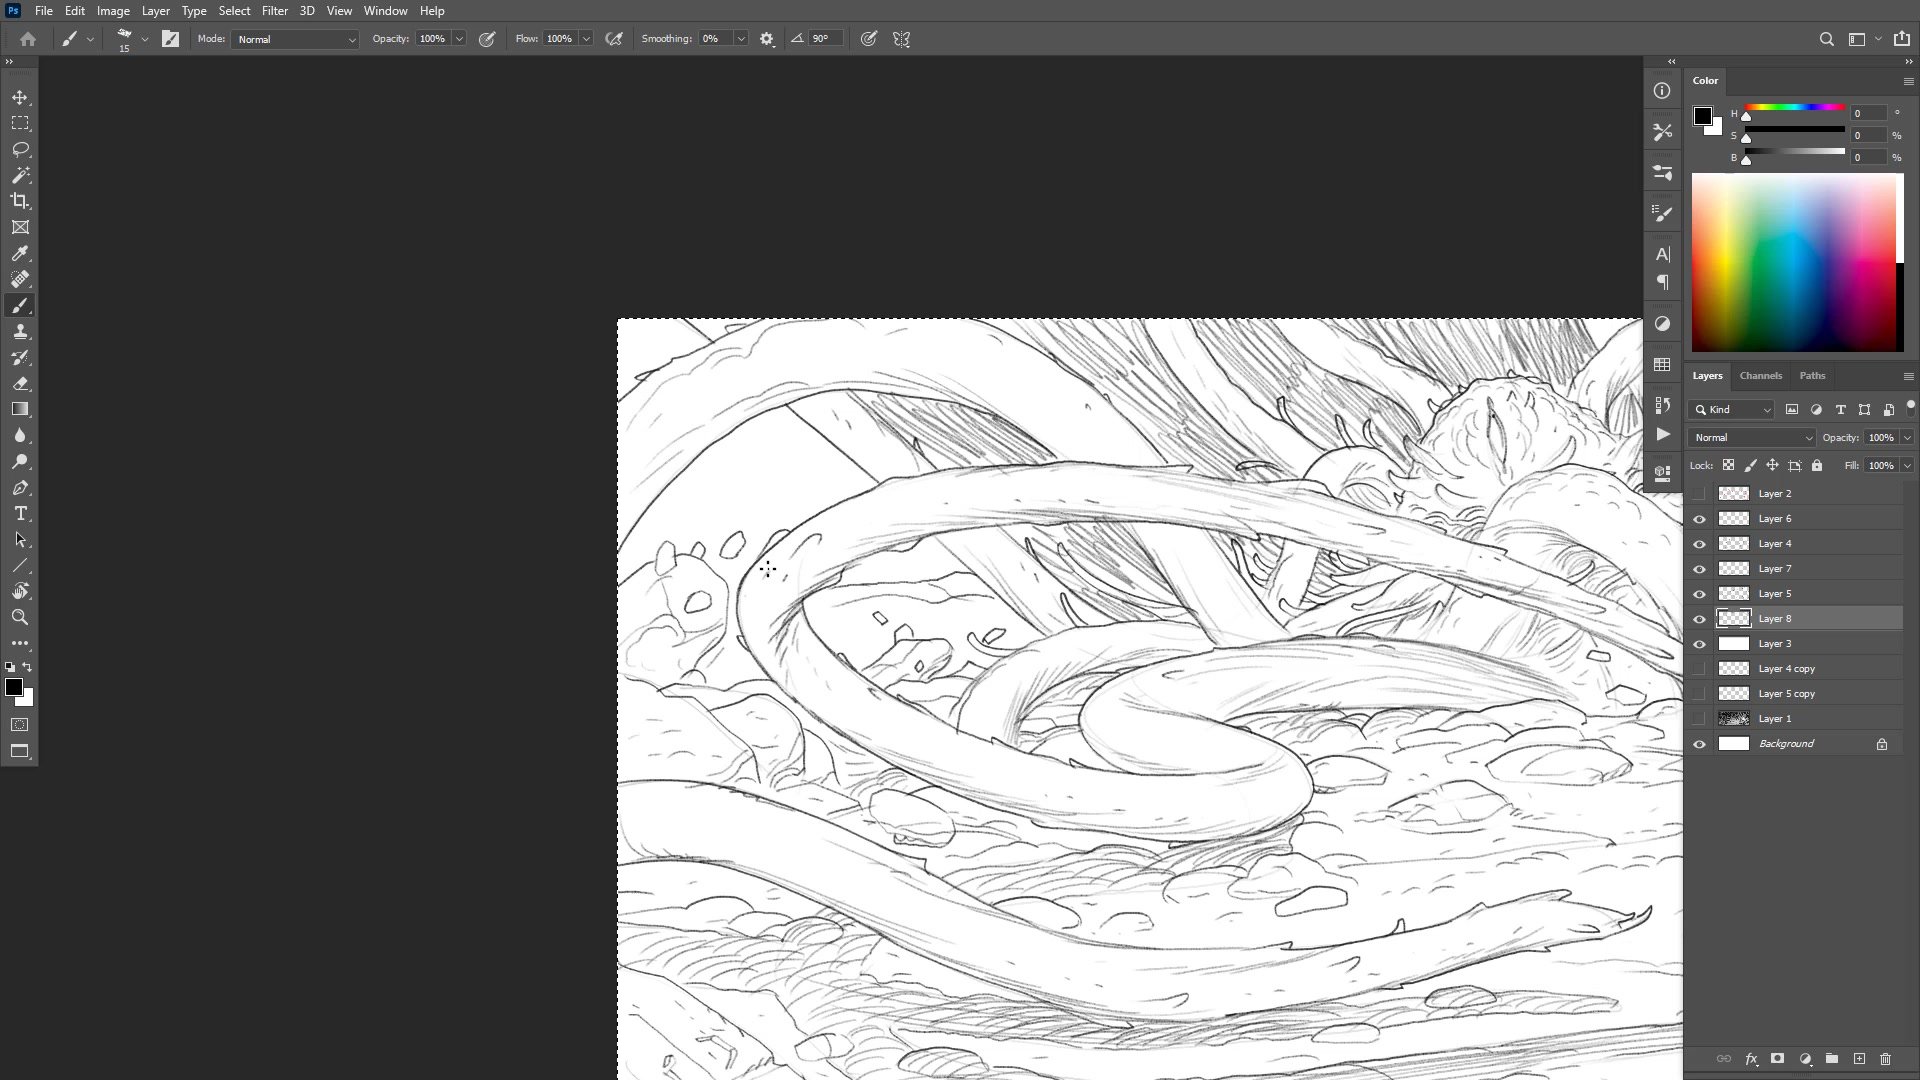
Color Blocking and Atmosphere
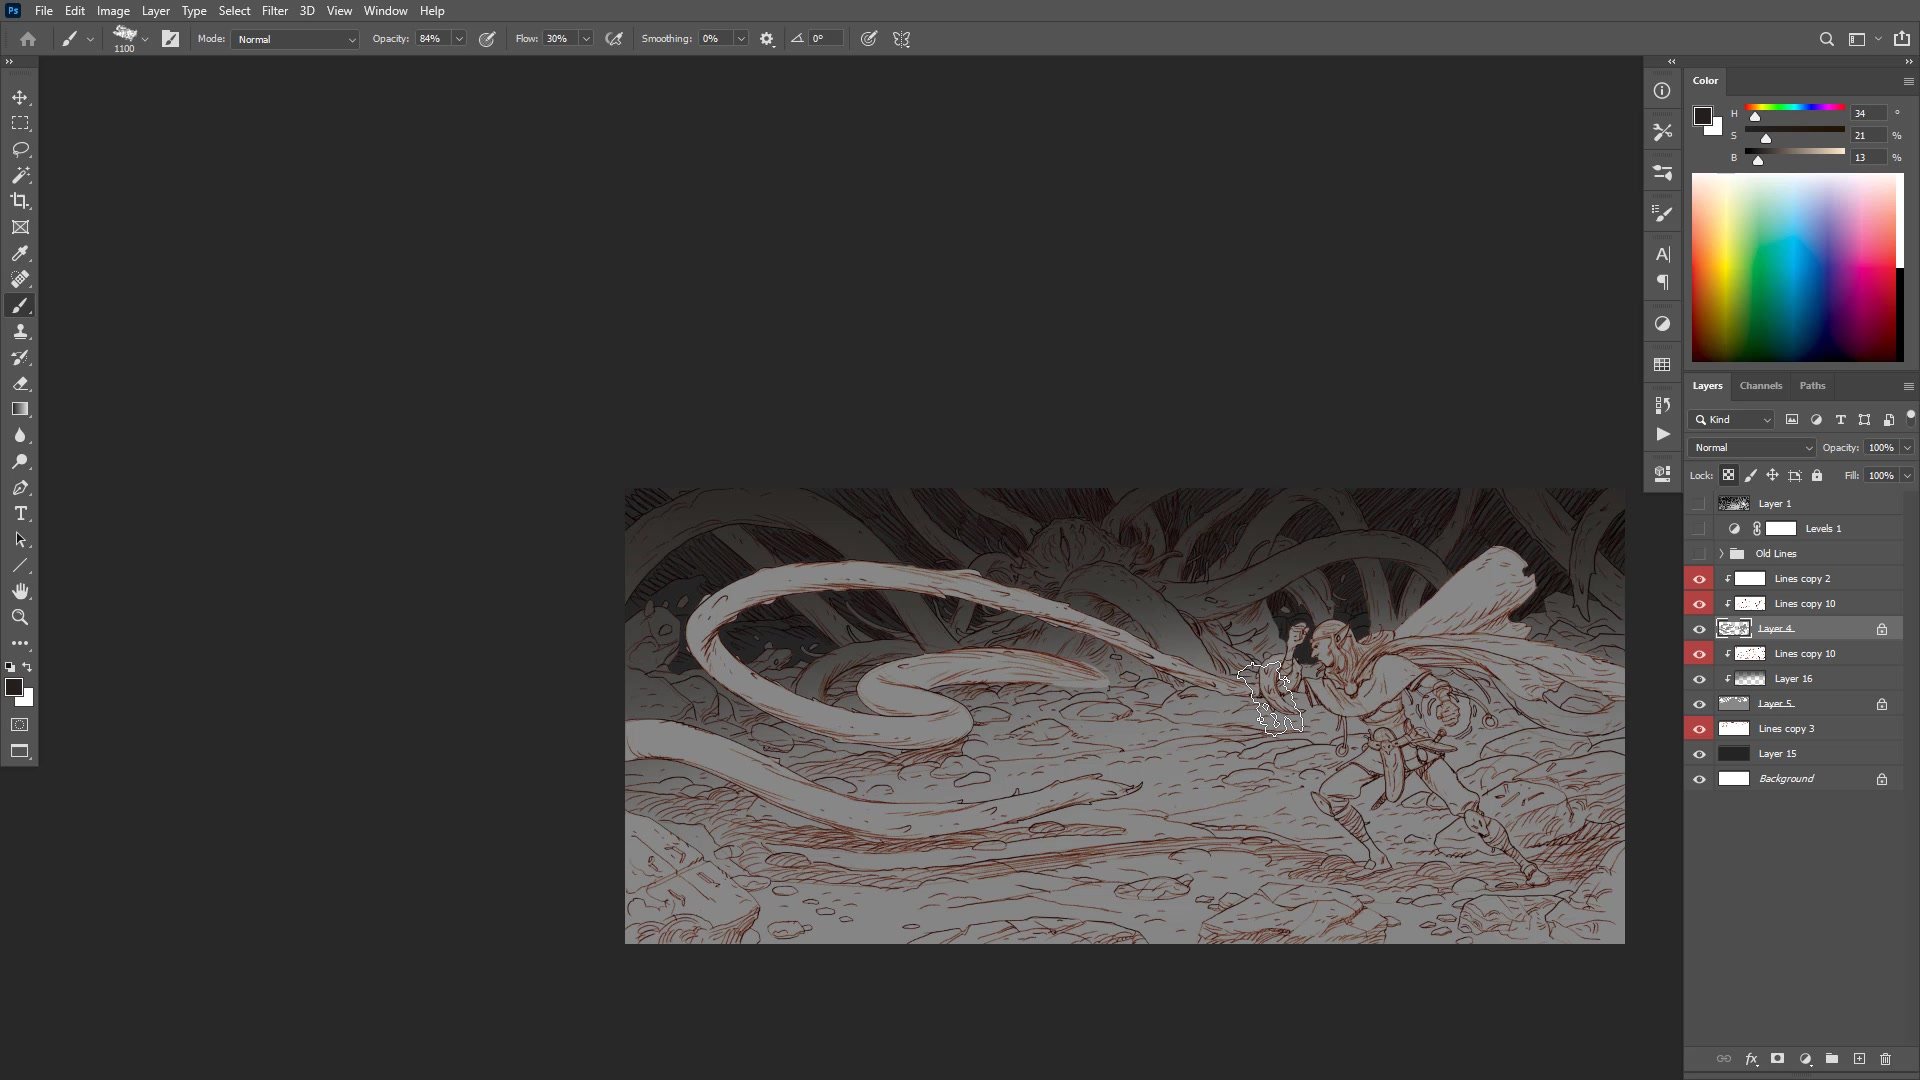
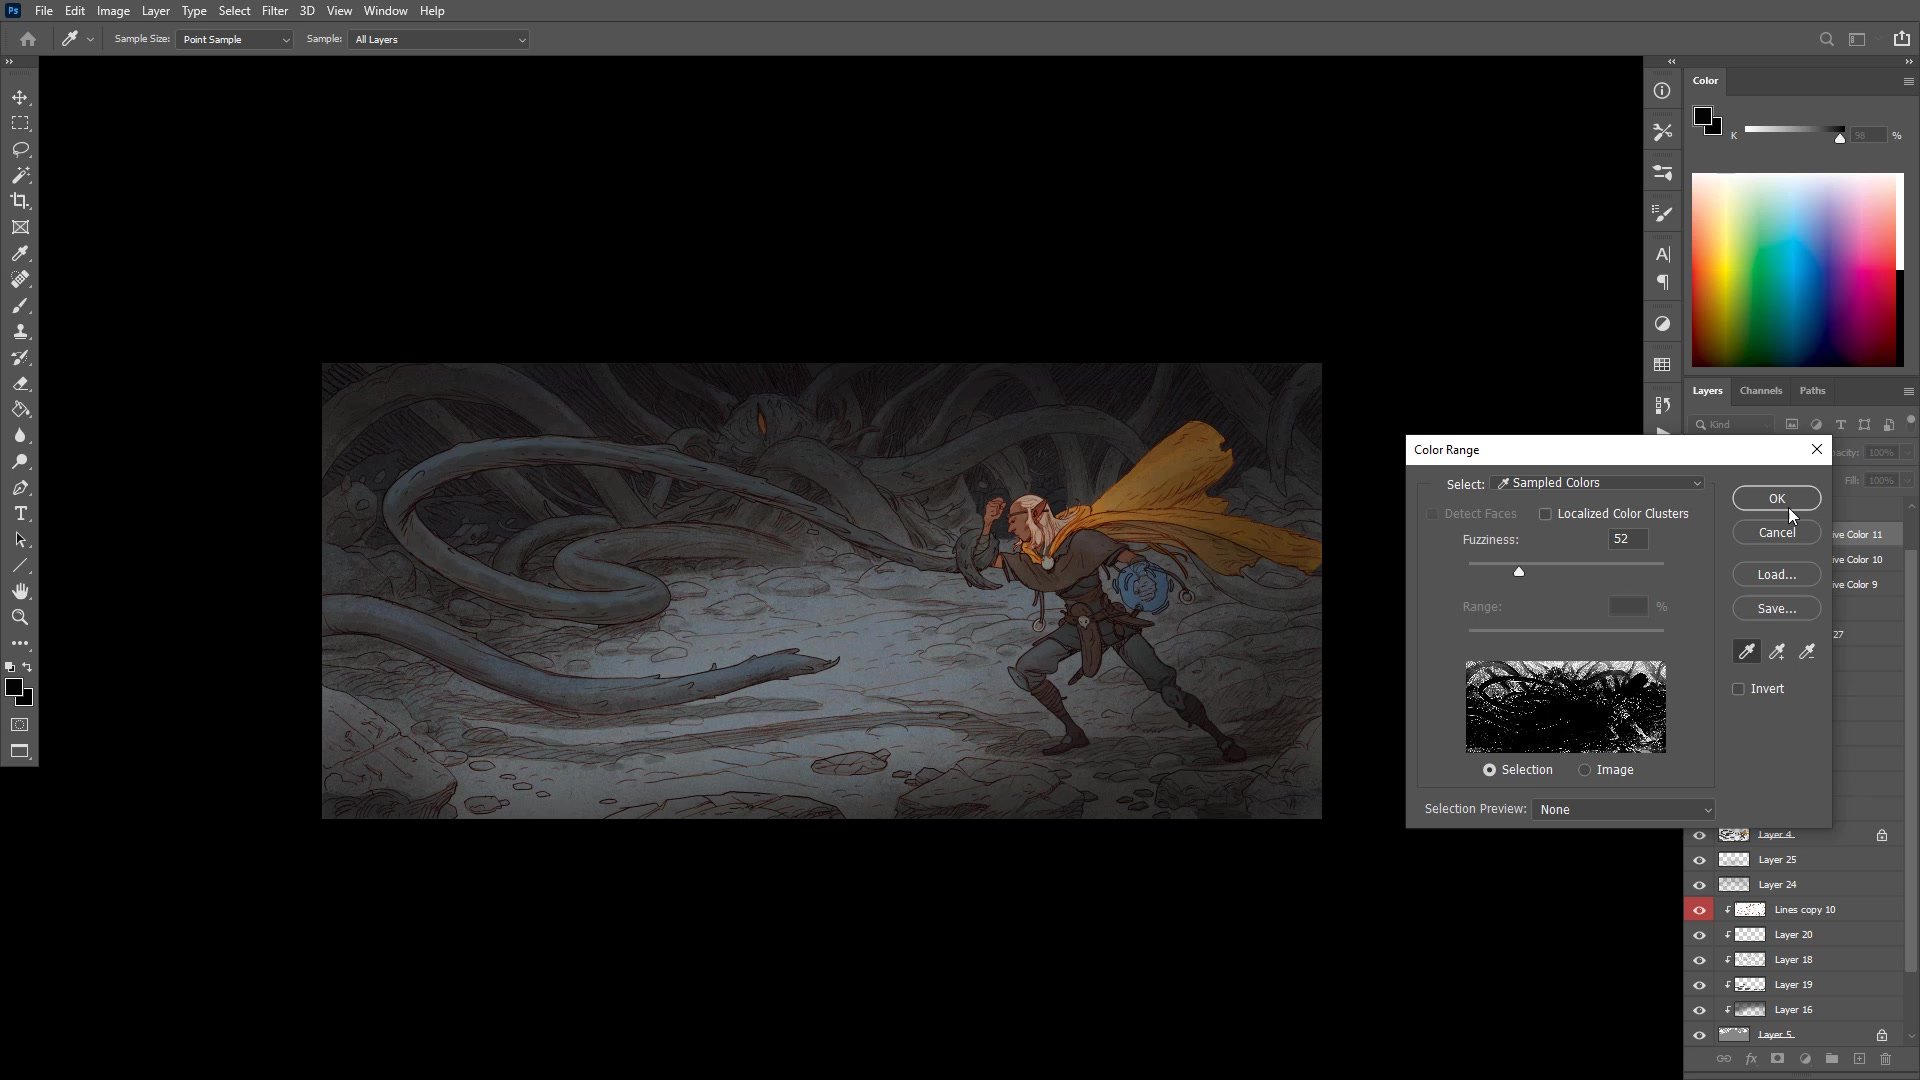
The color phase begins by separating line art into selectable flat shapes using Photoshop's quick mask tools. Rather than painting flats by hand, selections are created from the line work itself, providing clean shapes that can be independently adjusted with hue and saturation controls. This technique allows rapid experimentation with color relationships without committing to any single approach.
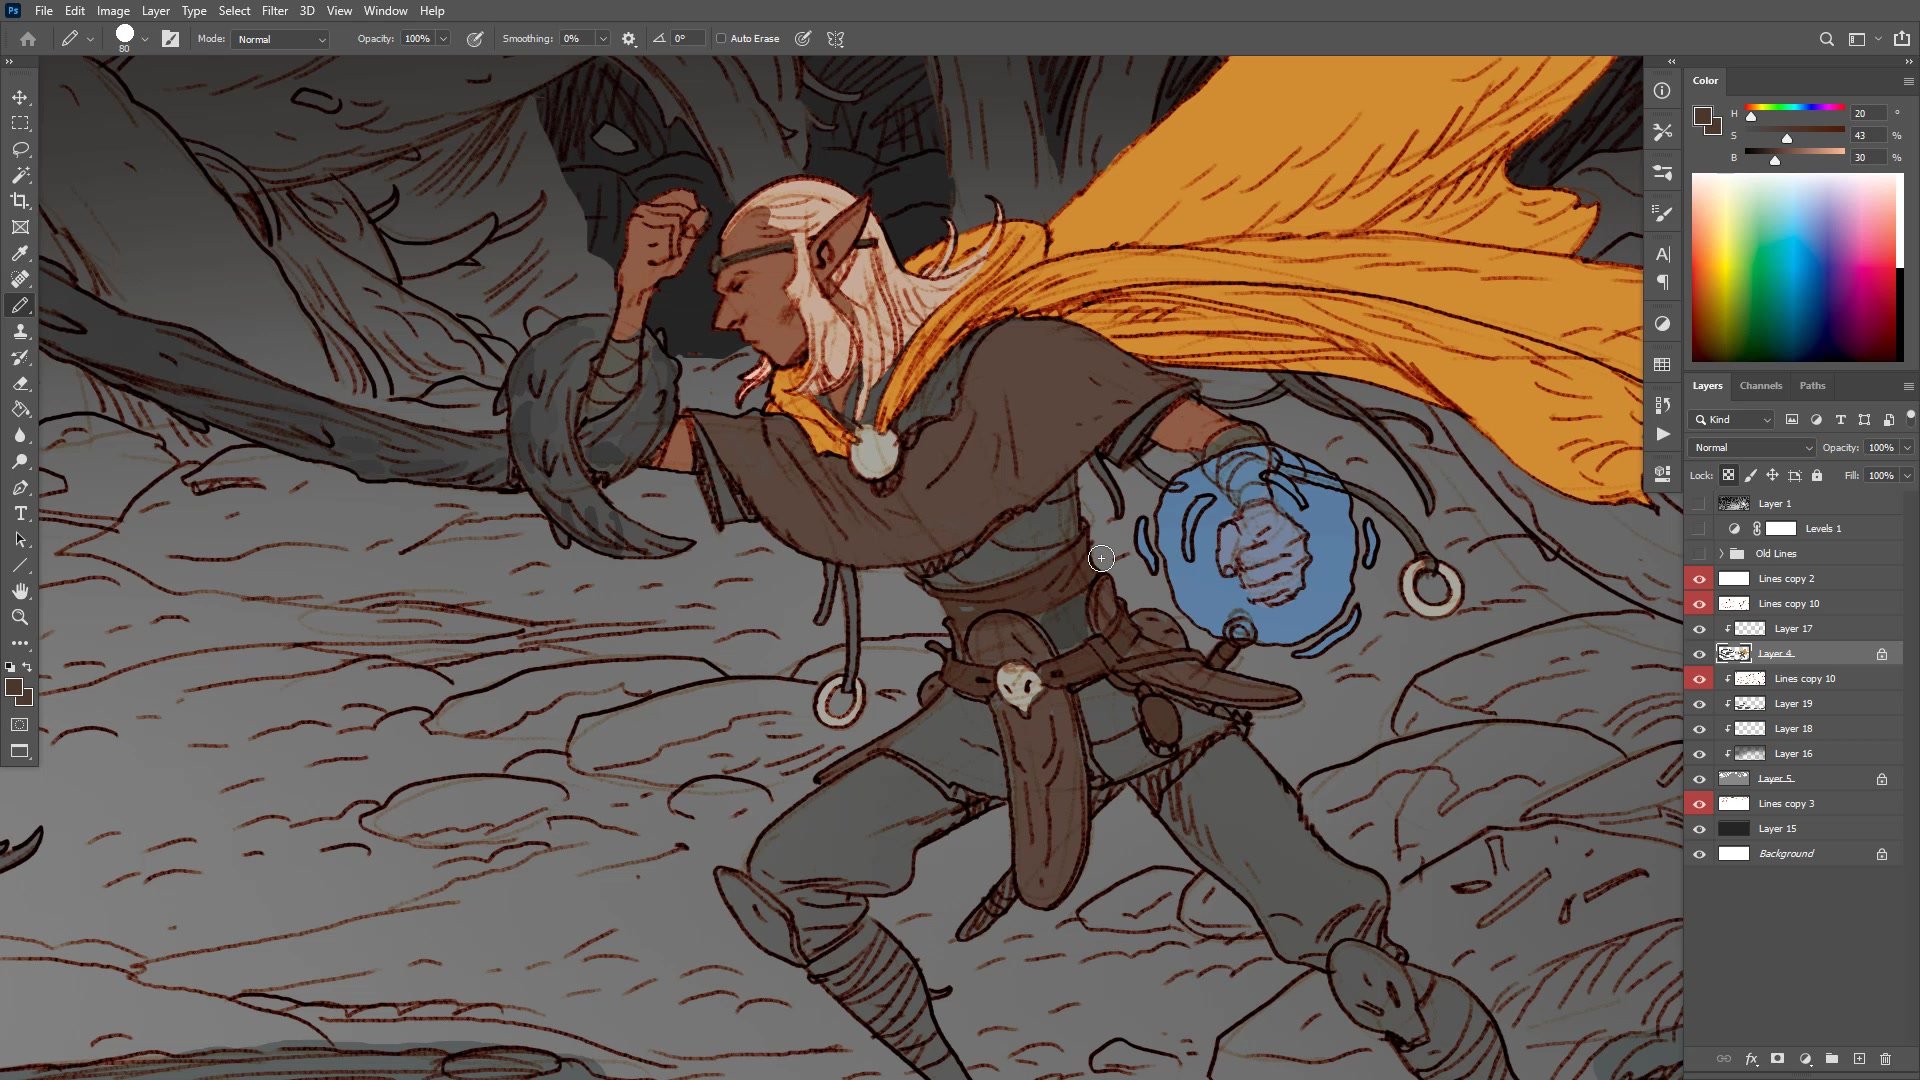
The palette stays deliberately muted and dark, reflecting the underground dungeon setting. A warm orange-gold cape provides the primary color statement against an otherwise gray-brown figure. The creature and background push into deep shadow with subtle cool-warm temperature shifts to suggest depth. Color dodge on a separate layer creates the magical glow effect, and atmospheric texture overlays using noise and blur help unify the rough painting with the cleaner line work. The final adjustments use selective color and levels to push the overall mood toward a creepy, otherworldly atmosphere.
Color and Final Polish

Key Techniques
Minimal Layer Strategy: Limiting layers to just a few groups prevents organizational overhead and keeps the focus on drawing. The character, background, and foreground rocks each get one layer, with selections handling the rest during color.
Second Monitor Composition Check: Keeping the full image visible on a second display at all times prevents over-detailing any single area and maintains visual hierarchy across the entire composition.
Quick Mask Flat Separation: Using Photoshop's quick mask to create selections from line art provides clean, adjustable flat color shapes without painting each area by hand.
Atmospheric Unification: Texture overlays, noise, and blur applied at the end help blend rough painting marks with cleaner line work, creating a cohesive concept illustration finish.
Try This Approach
Start With a Tonal Thumbnail: Before drawing any detail, spend thirty minutes establishing the composition and value structure in a small thumbnail. Decide where the darkest darks and lightest lights will fall, and commit to that hierarchy before scaling up.
Limit Your Layers: Choose two or three layers maximum for your line work. Having fewer layers forces better decision-making and prevents the organizational overhead that slows down the actual drawing.
Use a Reference Monitor: If possible, keep the full composition visible on a second screen or zoomed-out window while working at detail level. This single habit prevents the most common problem in complex illustrations: unbalanced detail distribution.


