Structural Character Drawing - Link
Summary
Structural Construction Through Character
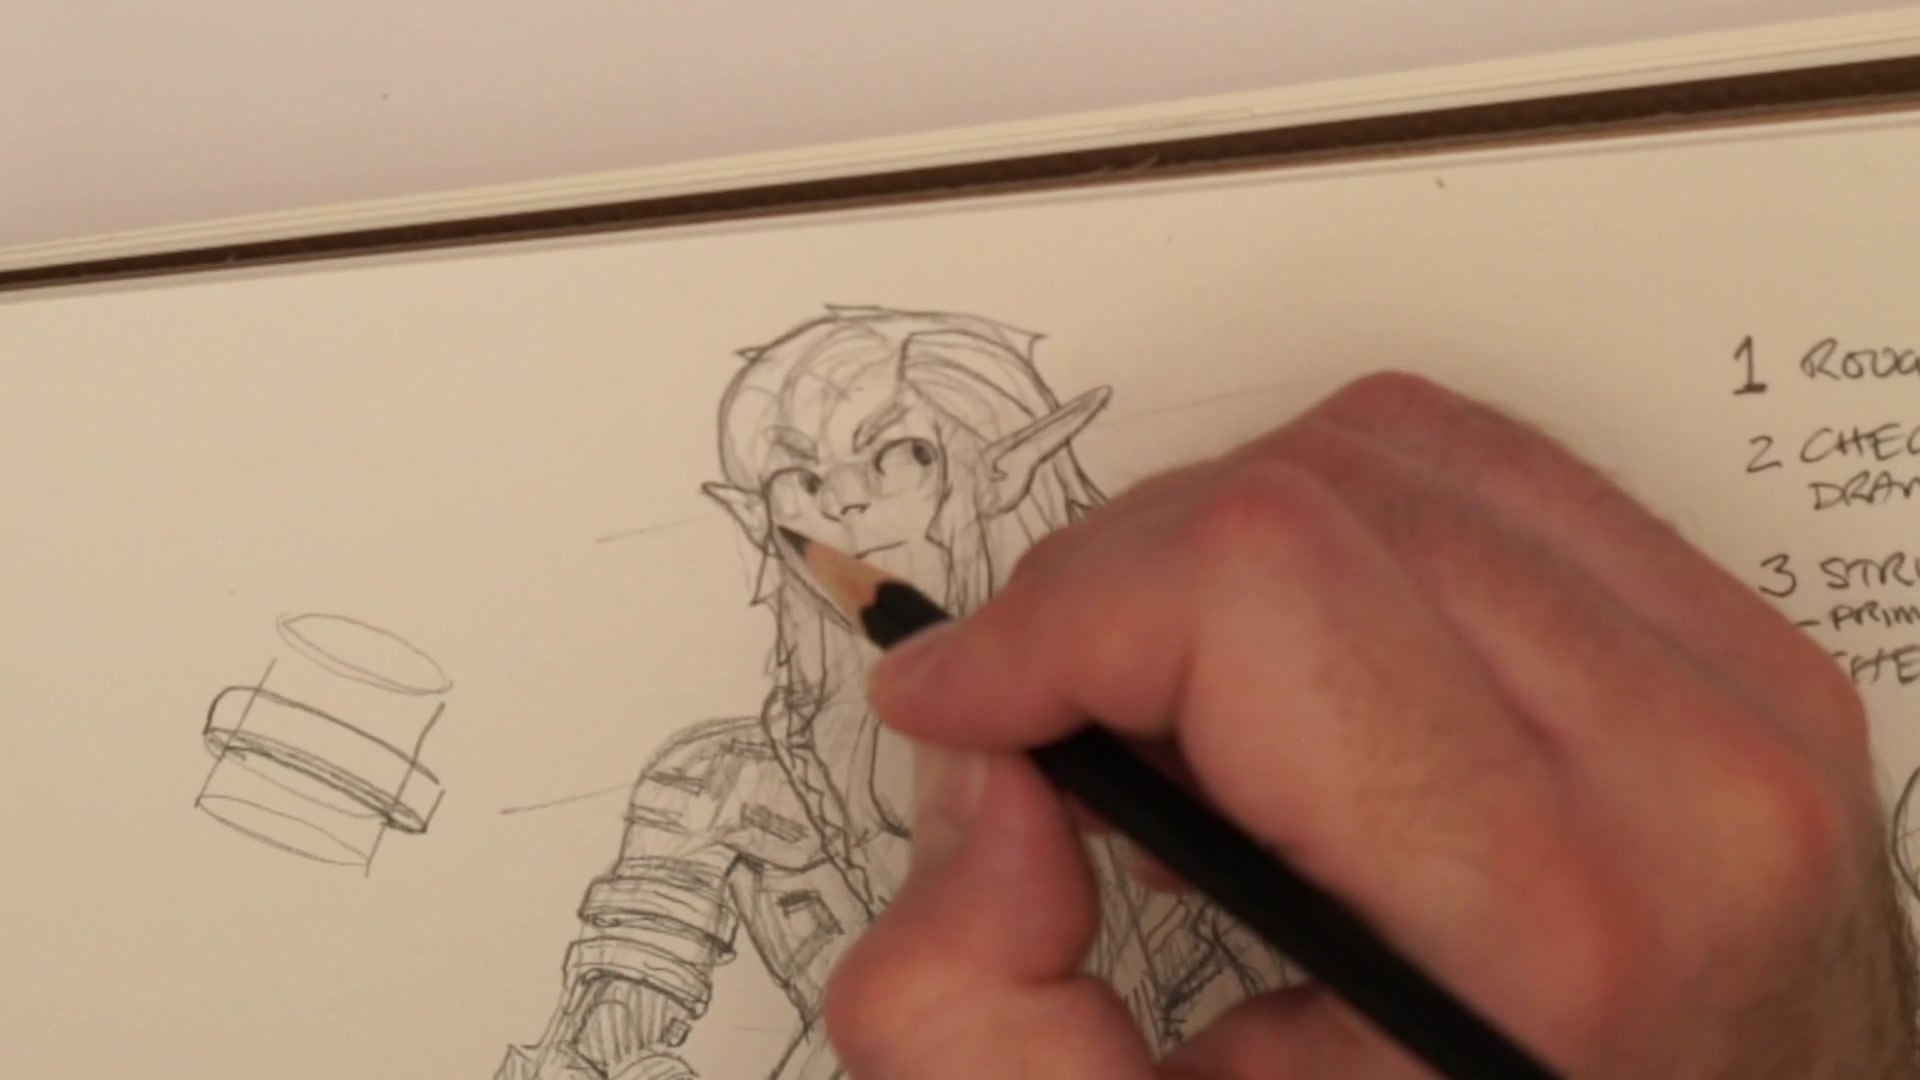
Drawing a character like Link from Zelda: Tears of the Kingdom means managing anatomical structure and complex costume details simultaneously. Most artists try to copy what they see on the surface, drawing contours and details without building the three-dimensional foundation underneath. The result is characters that look flat regardless of how much rendering gets applied.
This demonstration teaches structural character construction by building Link from the skeleton out. Starting with proportional analysis of the character's boyish, athletic build, the process moves through primary forms, center lines, and crossing points before any costume detail gets added. Complex elements like strapped boots and patterned belts become manageable geometry problems when approached through construction rather than contour copying.
Proportional Setup
Building Proportions That Feel Right
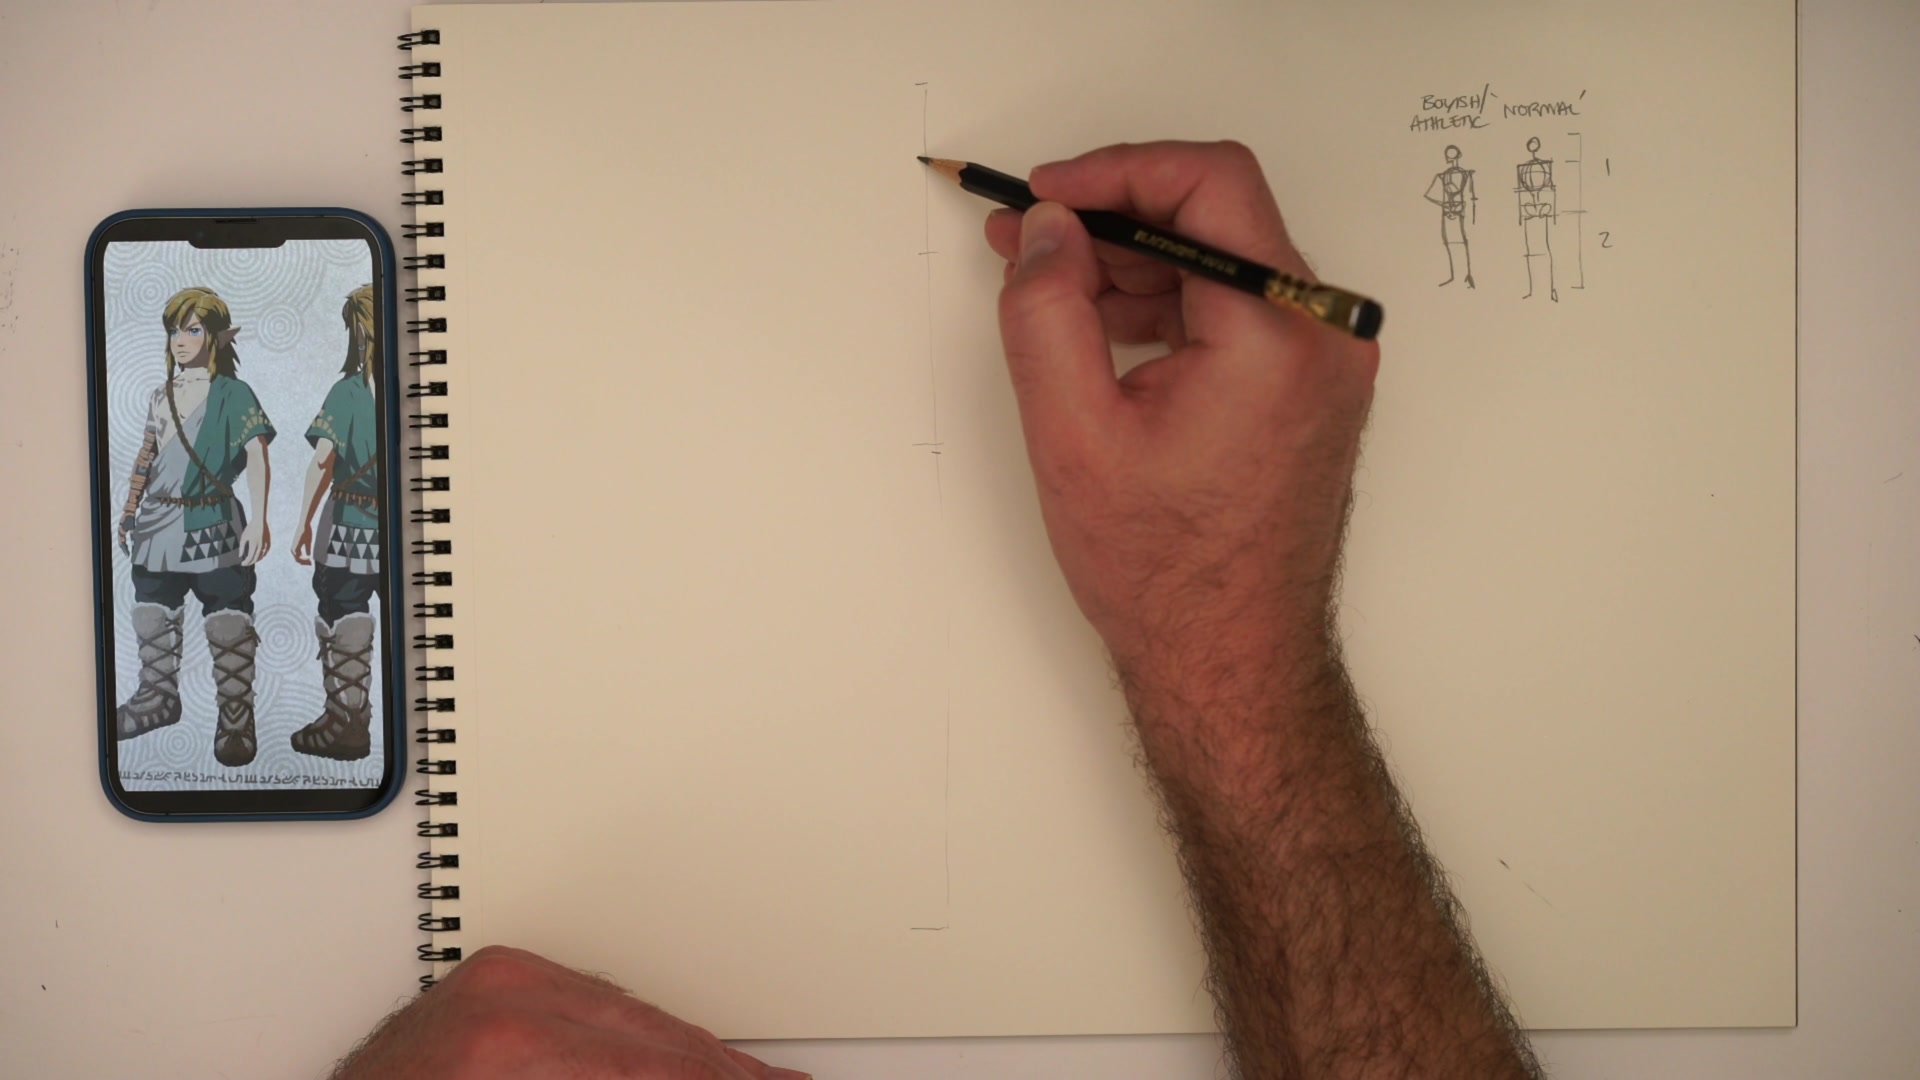
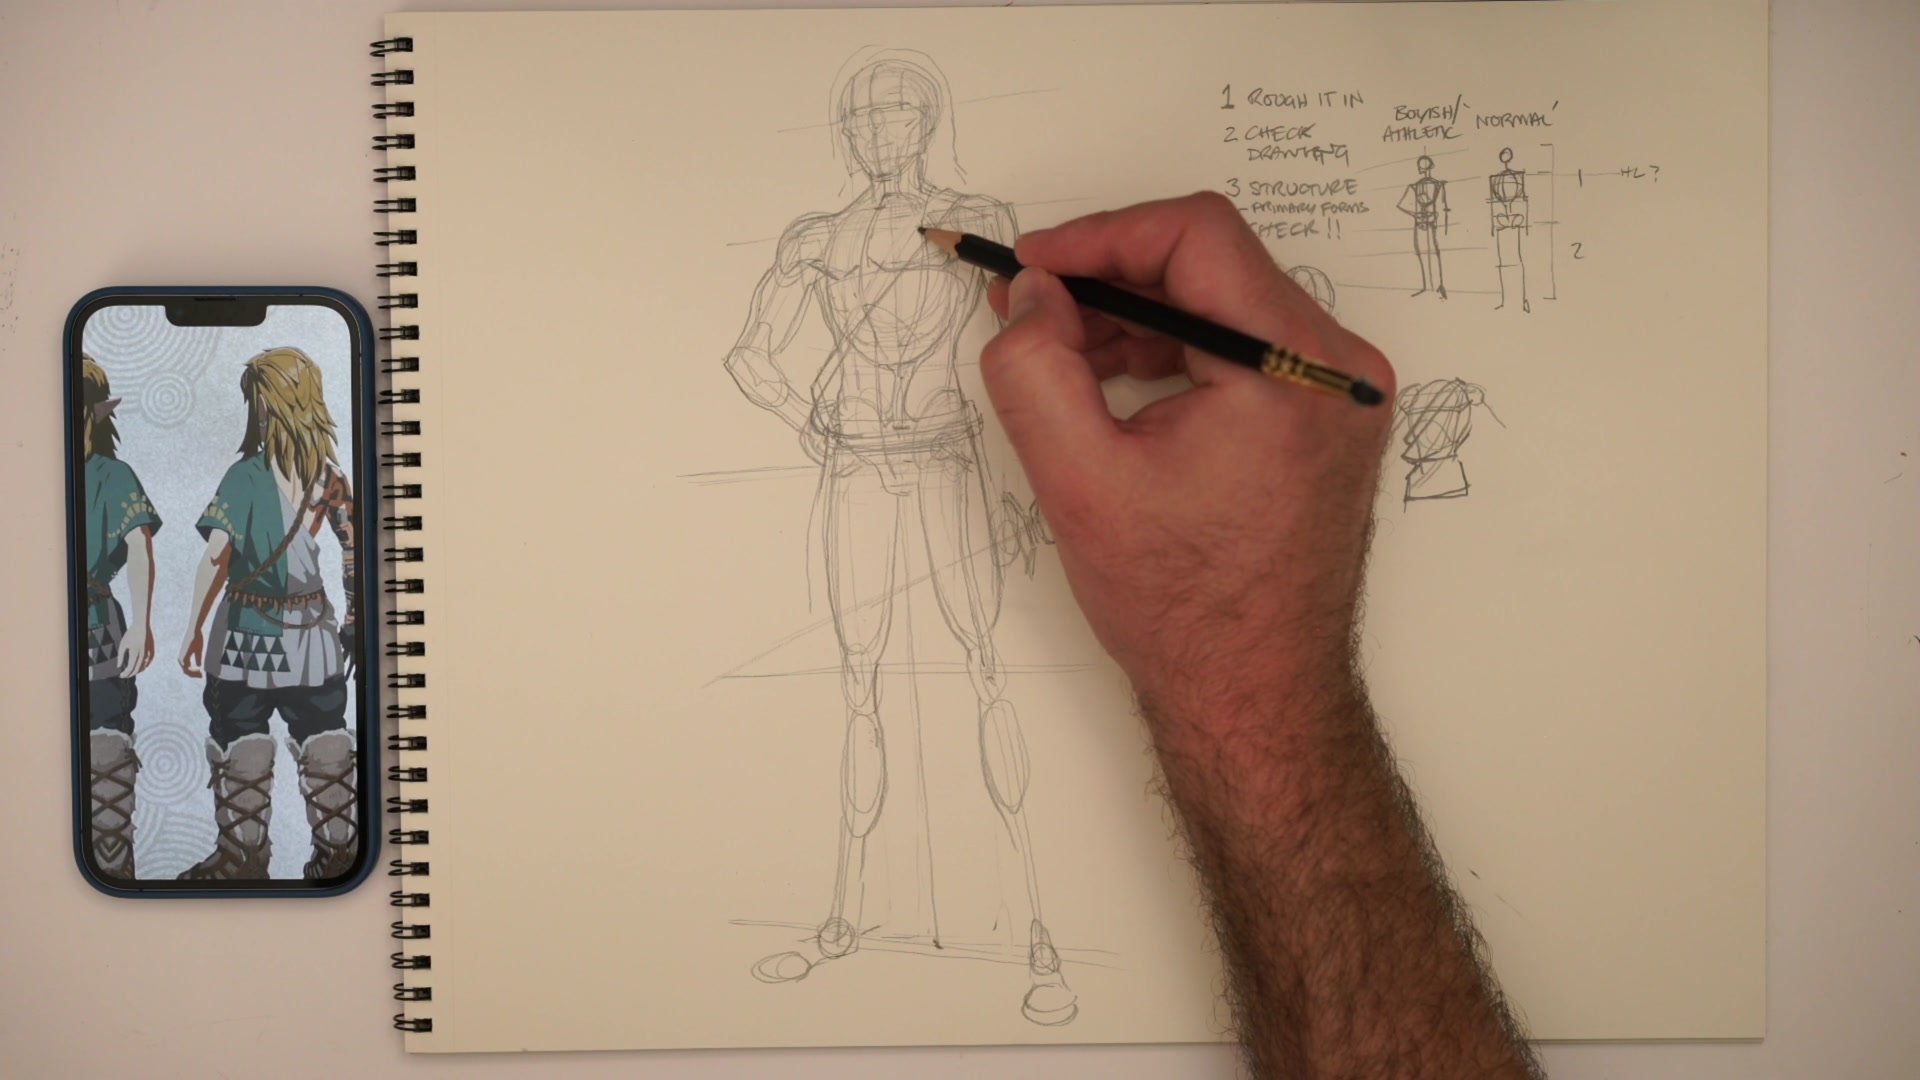
Standard anatomical proportions provide a starting point, but stylized characters require intentional variation. Link's design uses a compact frame with slightly broader shoulders, elongated legs, a larger head, and bigger hands to create that athletic but youthful quality. These proportional choices define the character's feel before any detail work begins.
The process starts by roughing in placement rather than jumping to perfect structure. Where does the character sit in space? How much room do the legs need? A center line dropped from head to feet checks that everything balances around a central axis. The horizon line placed around pelvis height creates the slight upward perspective that gives the figure dimension.
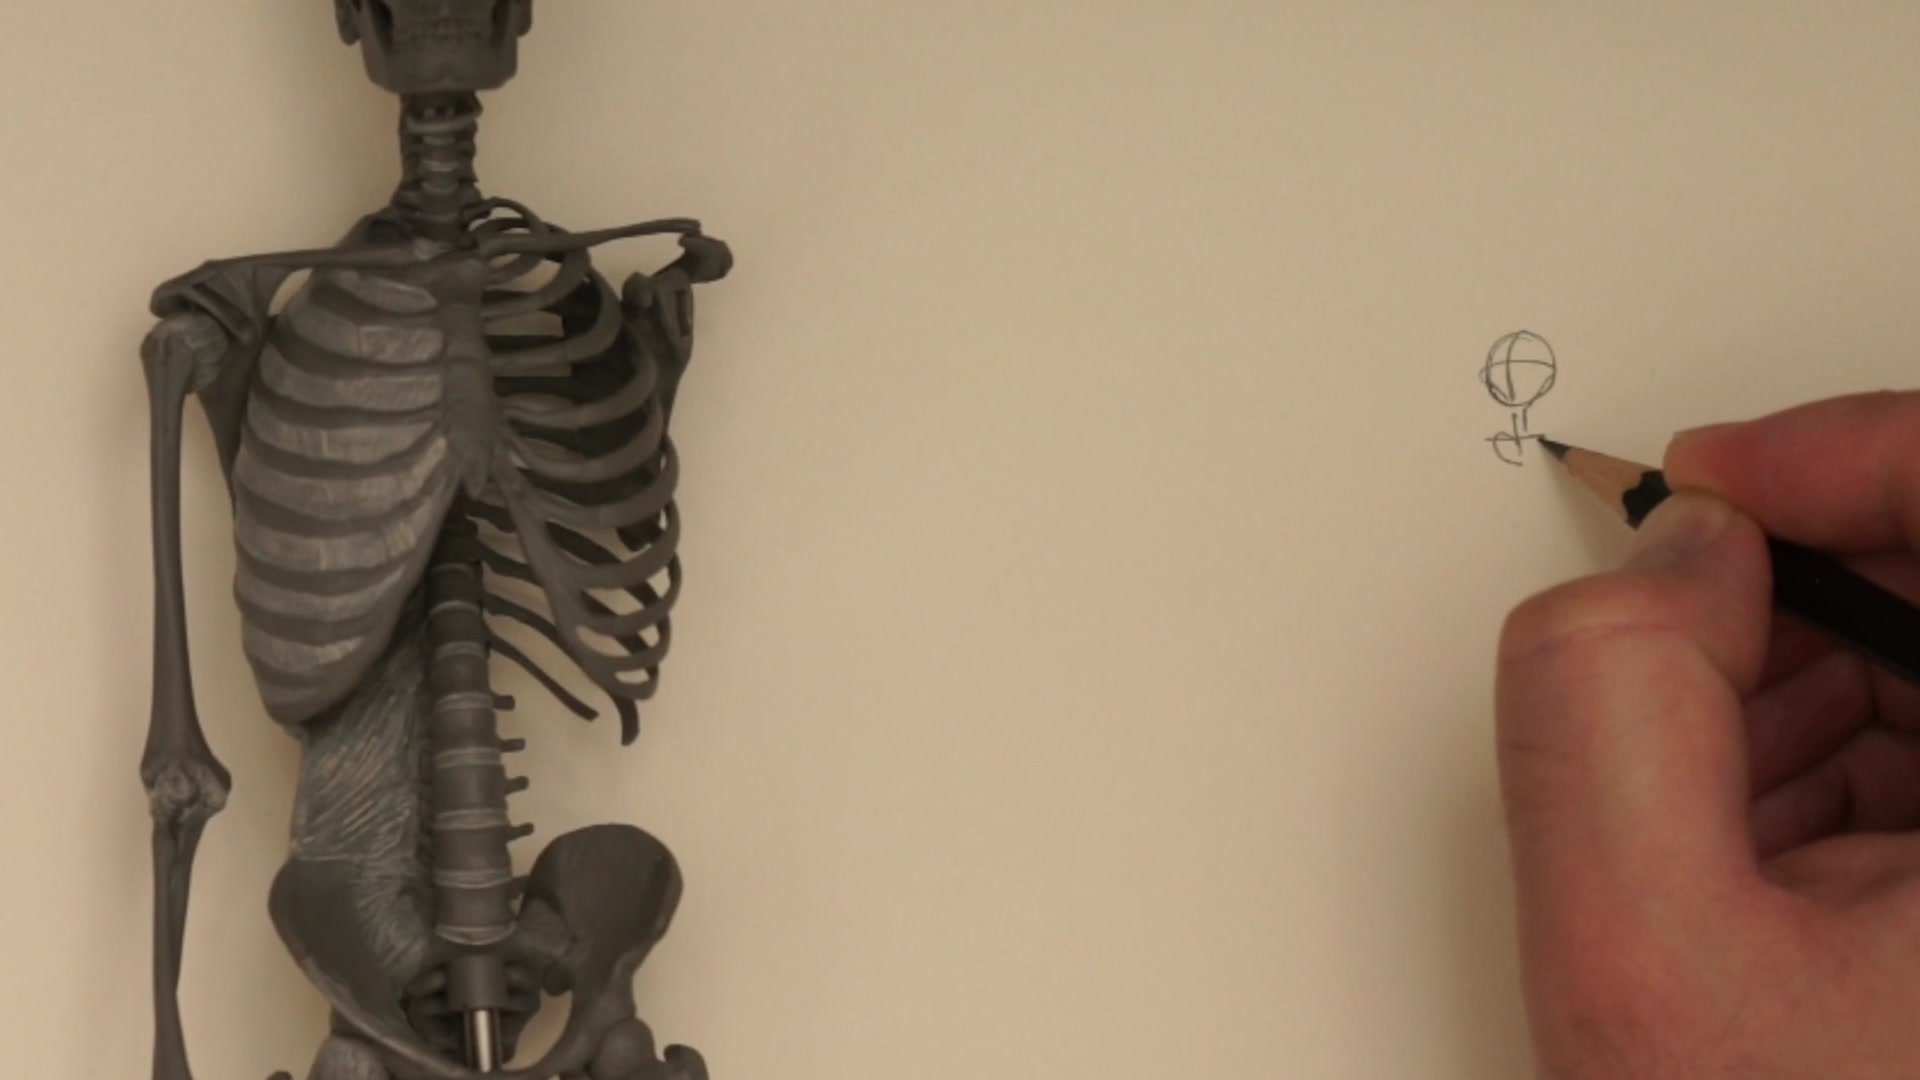
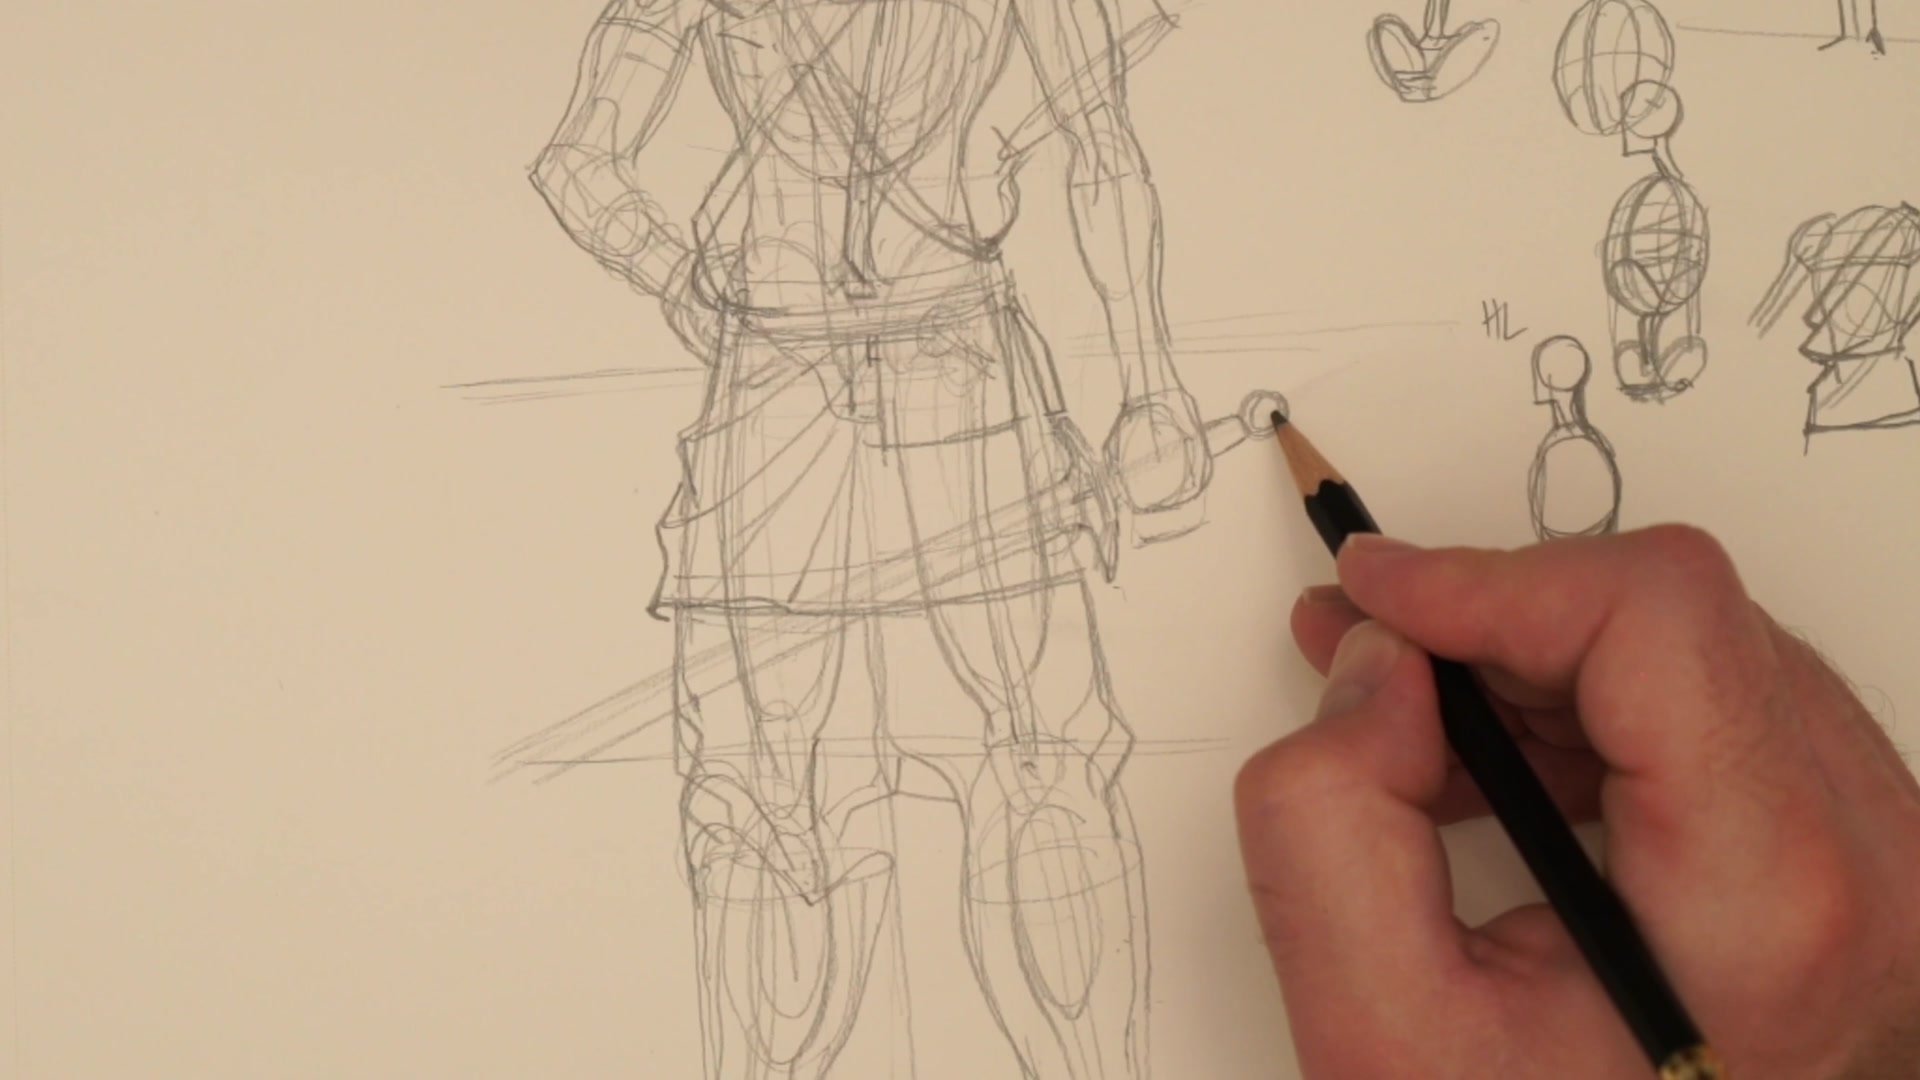
Drawing through forms rather than just edges creates three-dimensional solidity. The torso is not a flat shape but a form with a spine curving through its center. The pelvis simplifies to two plates facing each other, like dinner plates at an angle. Tracking where the spine wraps around the torso mass and how the pelvis plates relate to the rib cage bottom creates the structural foundation that makes figures feel grounded.
Structural Construction

Primary Forms Before Costume
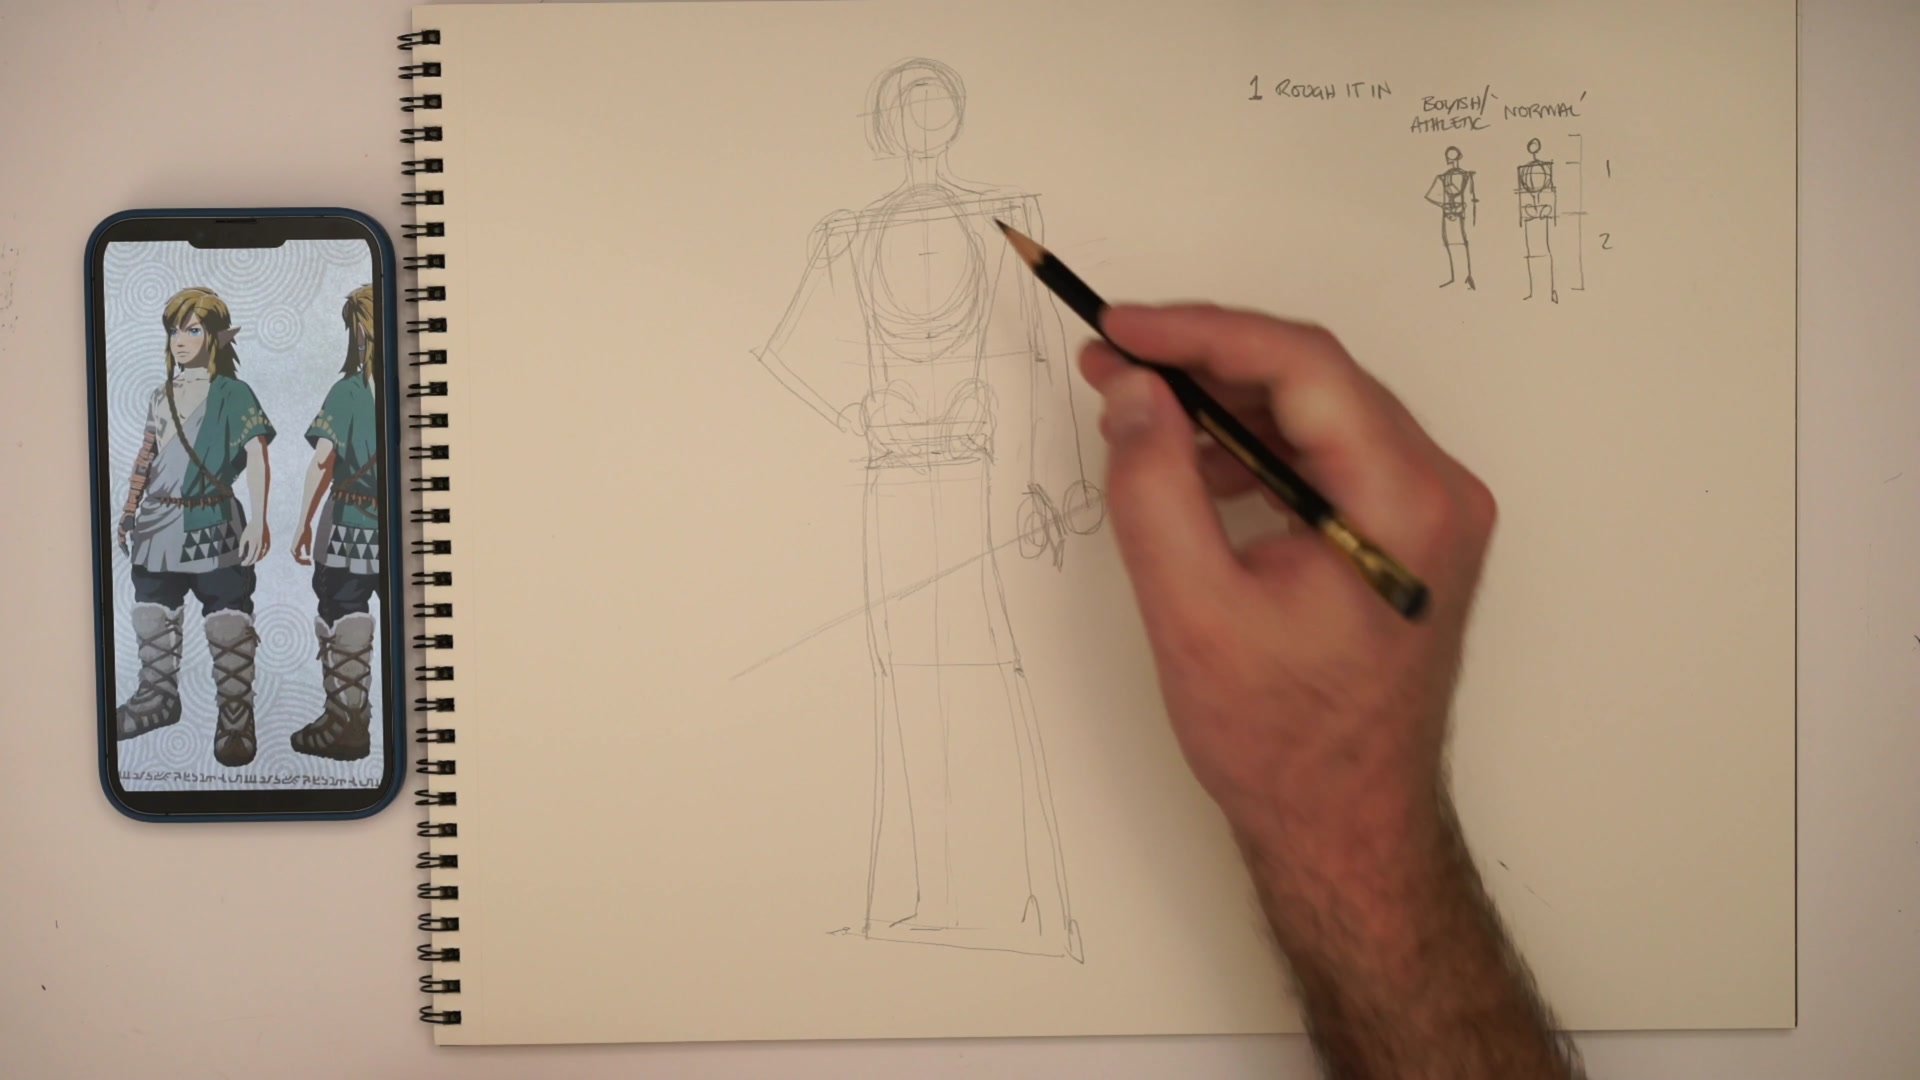
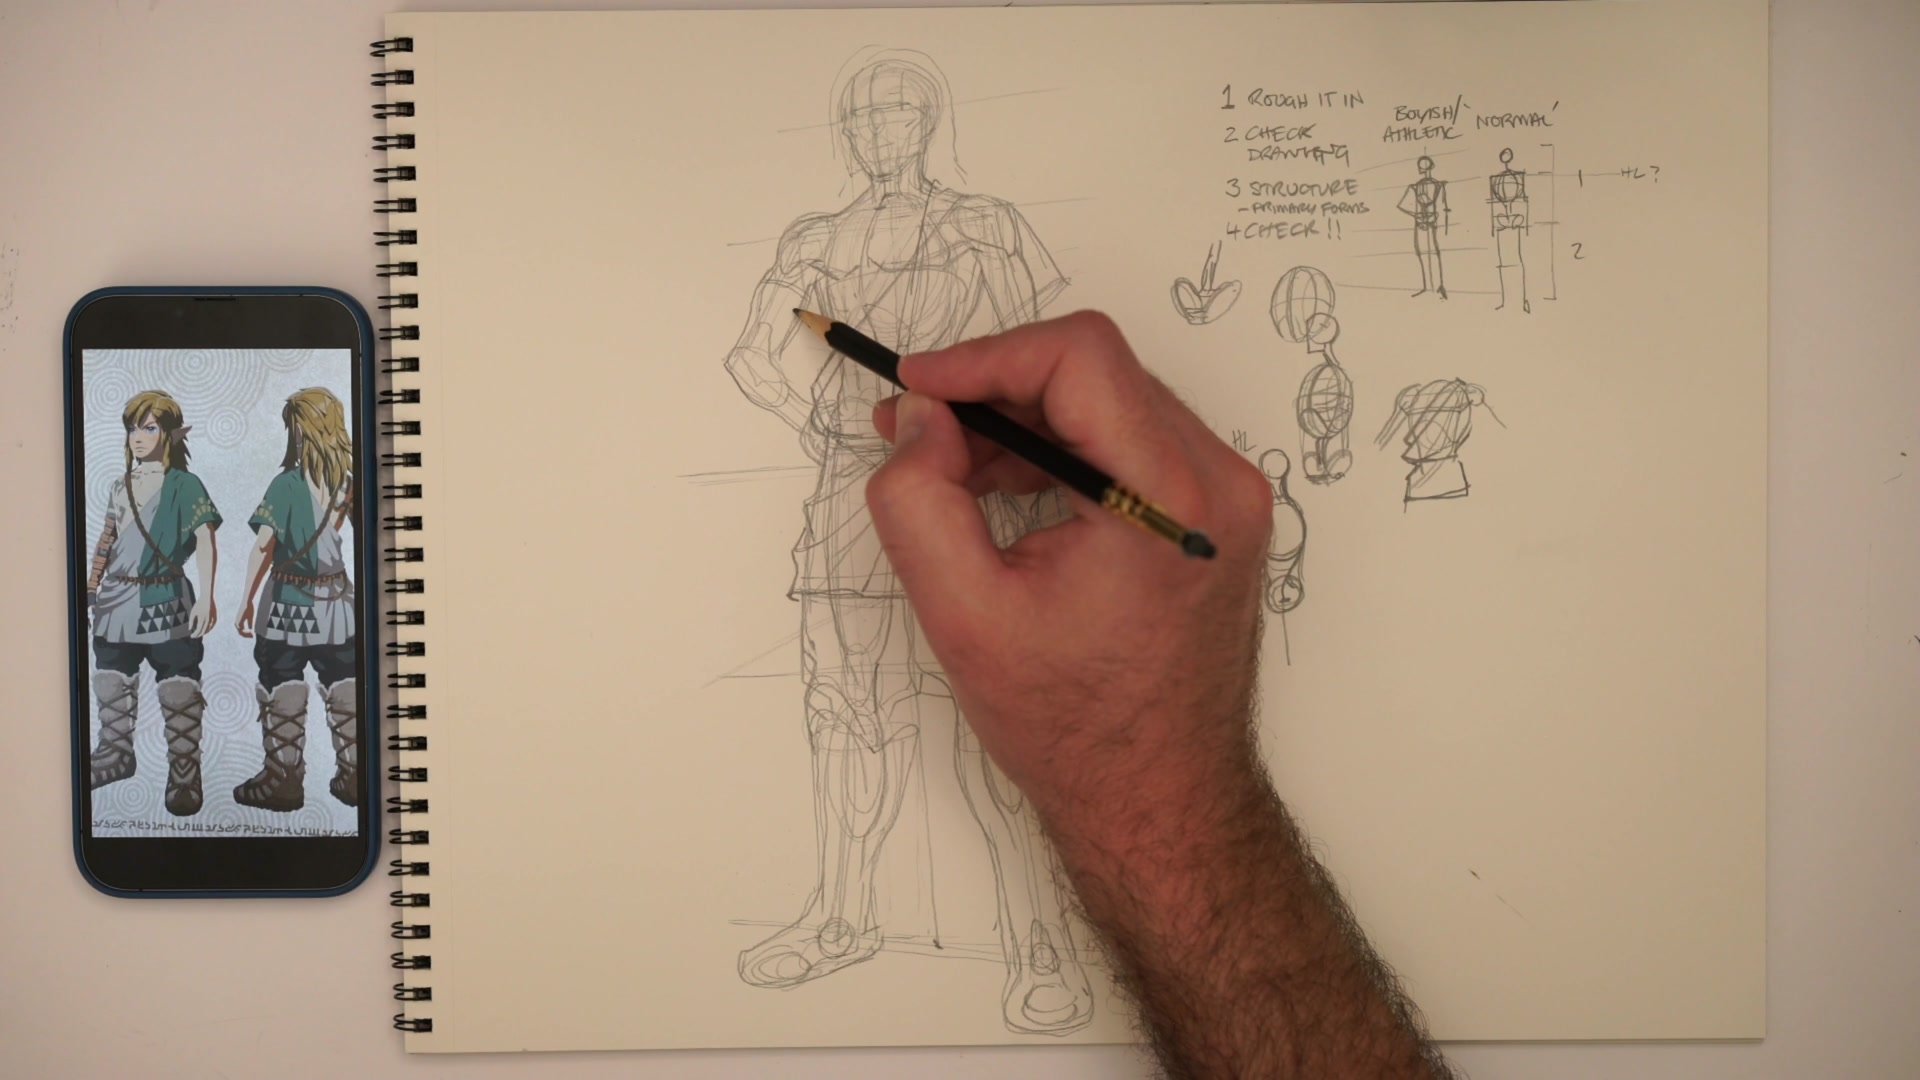
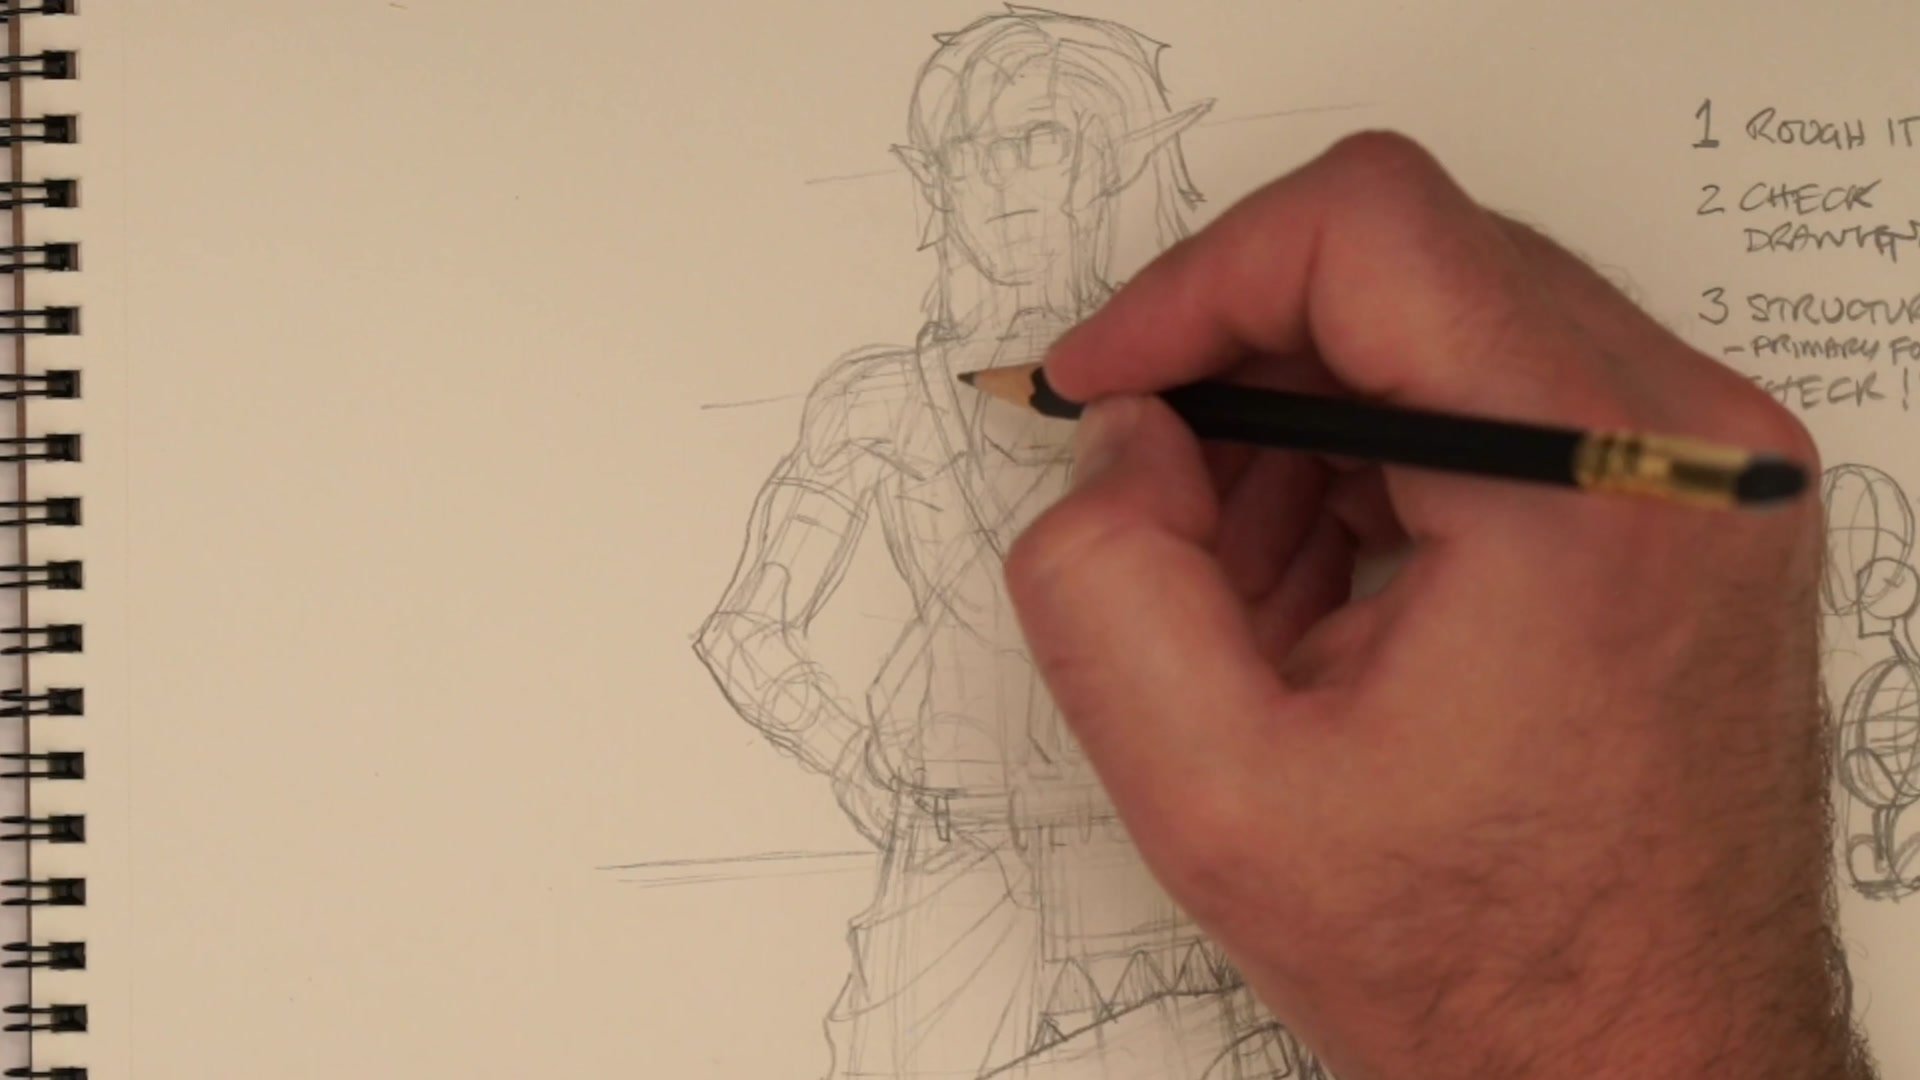
Massing in primary forms gives structure before anatomy or costume detail gets added. Shoulders as spheres, the torso as a larger sphere, the pelvis as those two plate forms, legs as cylinders. Building this mannequin-style figure first keeps the construction honest because the costume sits on something dimensionally sound.
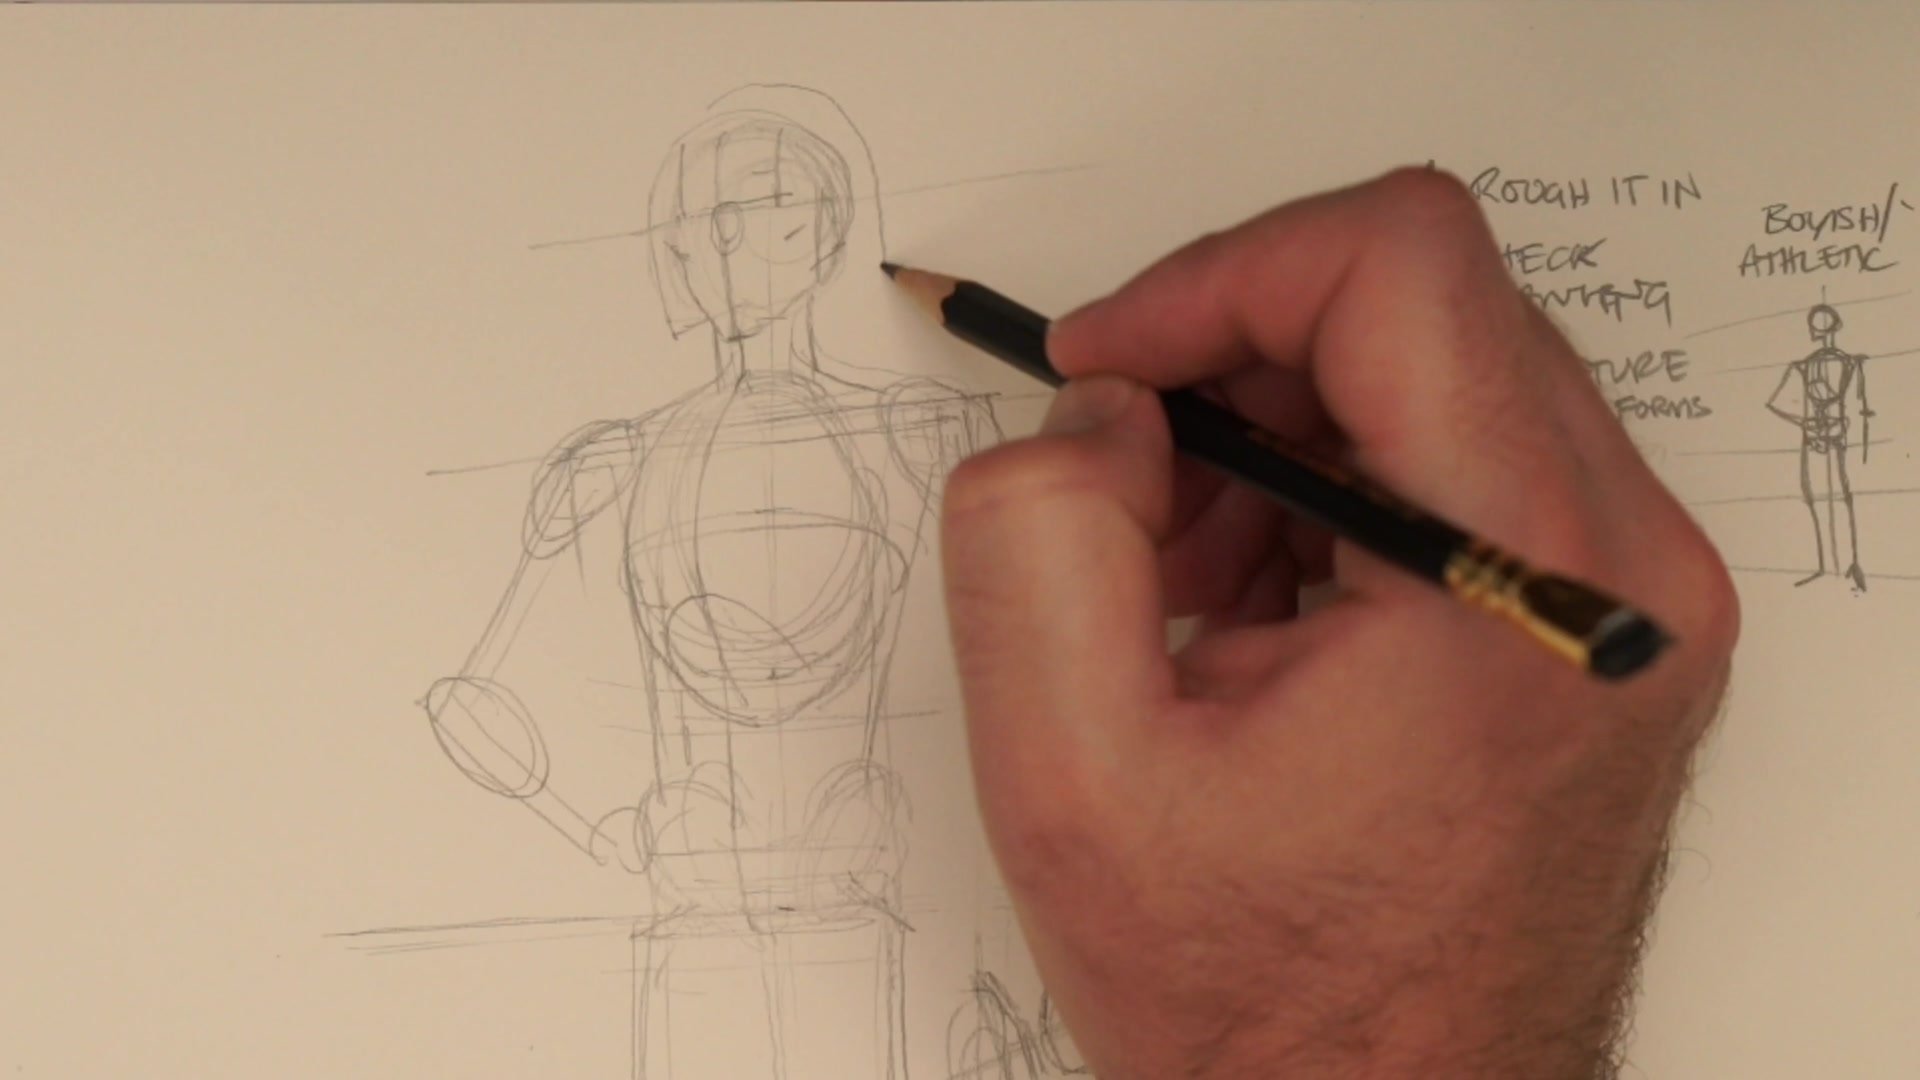
Checking the drawing at this stage catches problems before they get locked in. Rotating the paper to look straight on reveals whether center lines track correctly. Finding where the horizon line sits ensures forms above it curve upward and forms below curve downward. This verification step is where most structural problems surface and where fixing them takes minutes instead of hours.
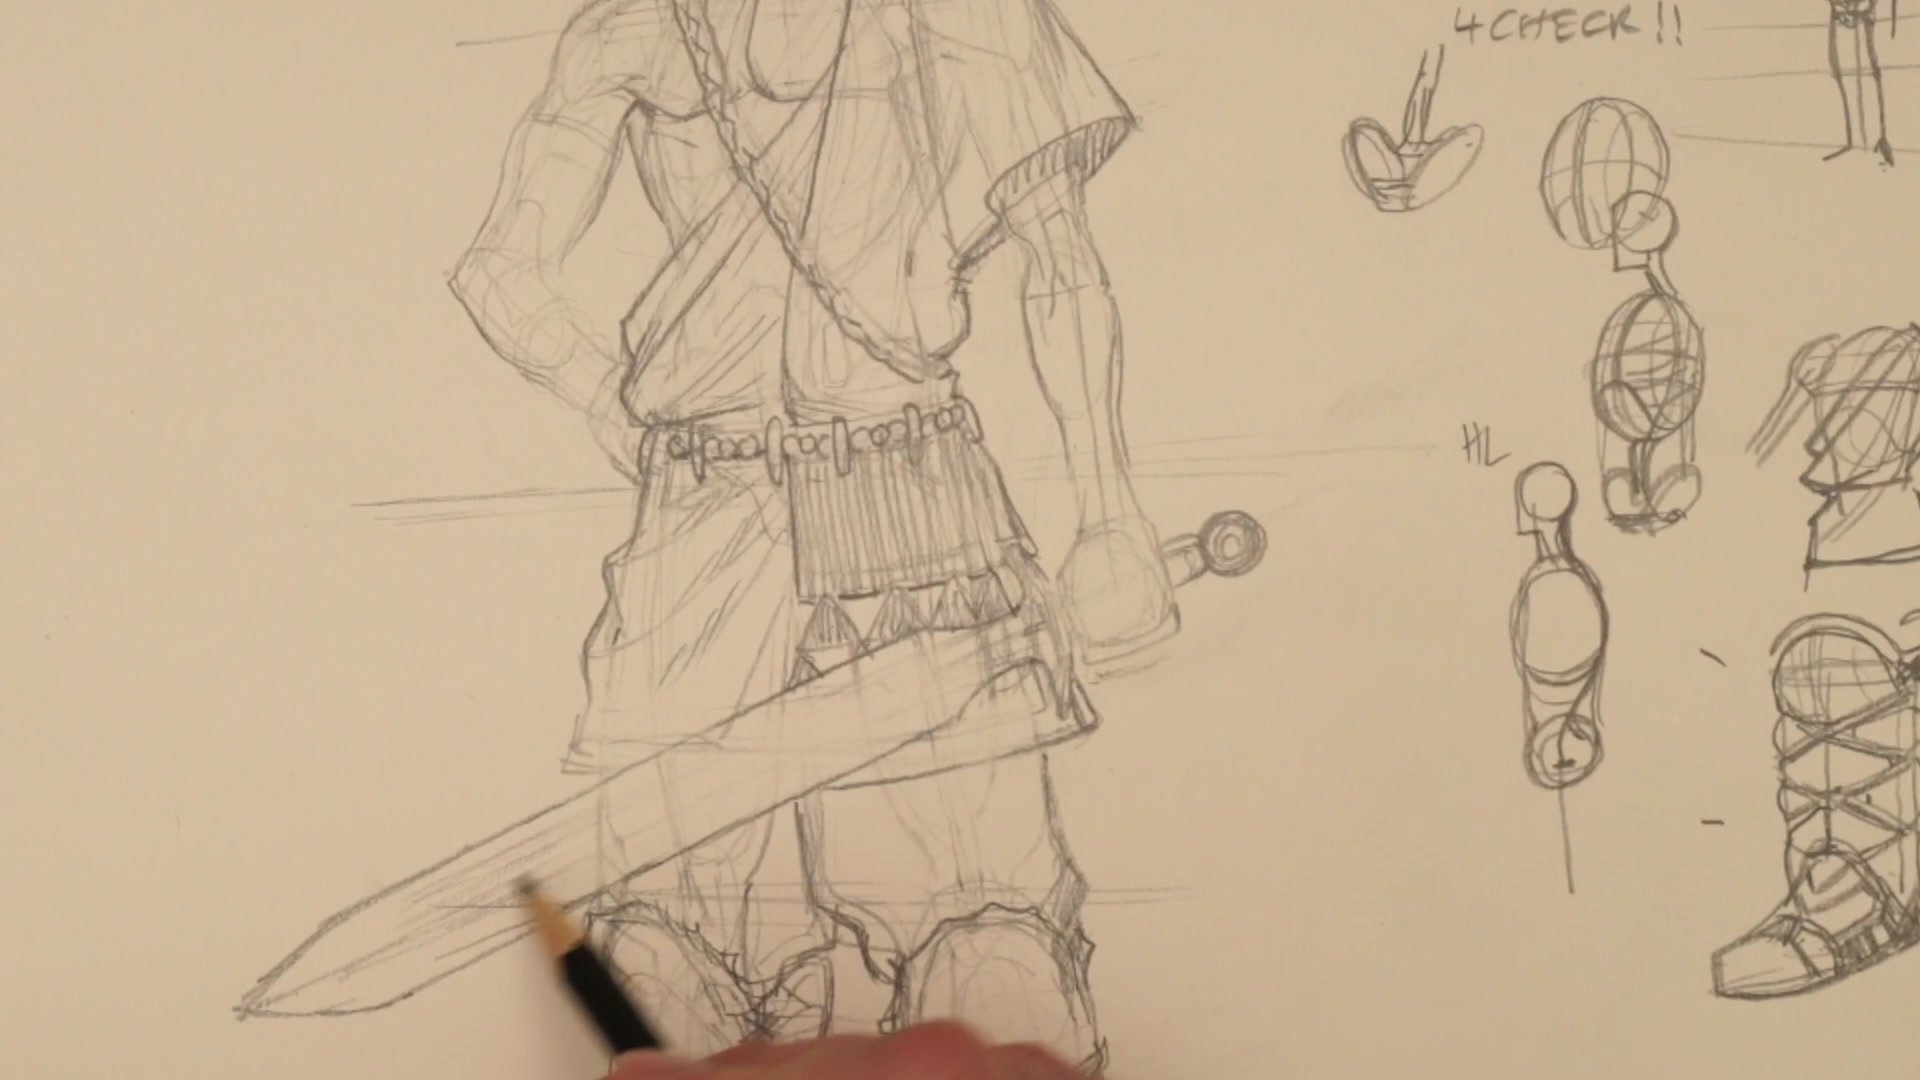
The approach then shifts to roughing in costume elements by identifying their primary forms. The belt wraps around the pelvis, which reads larger than the actual hip bones because pants add thickness. The tunic hangs from the shoulders, creating fold patterns based on how fabric drapes over the pectoral masses and down to the belt. Getting these primary shapes placed before adding any detail prevents the kind of repositioning that destroys previous work.
Costume Detail Construction

Crossing Points Solve Complexity
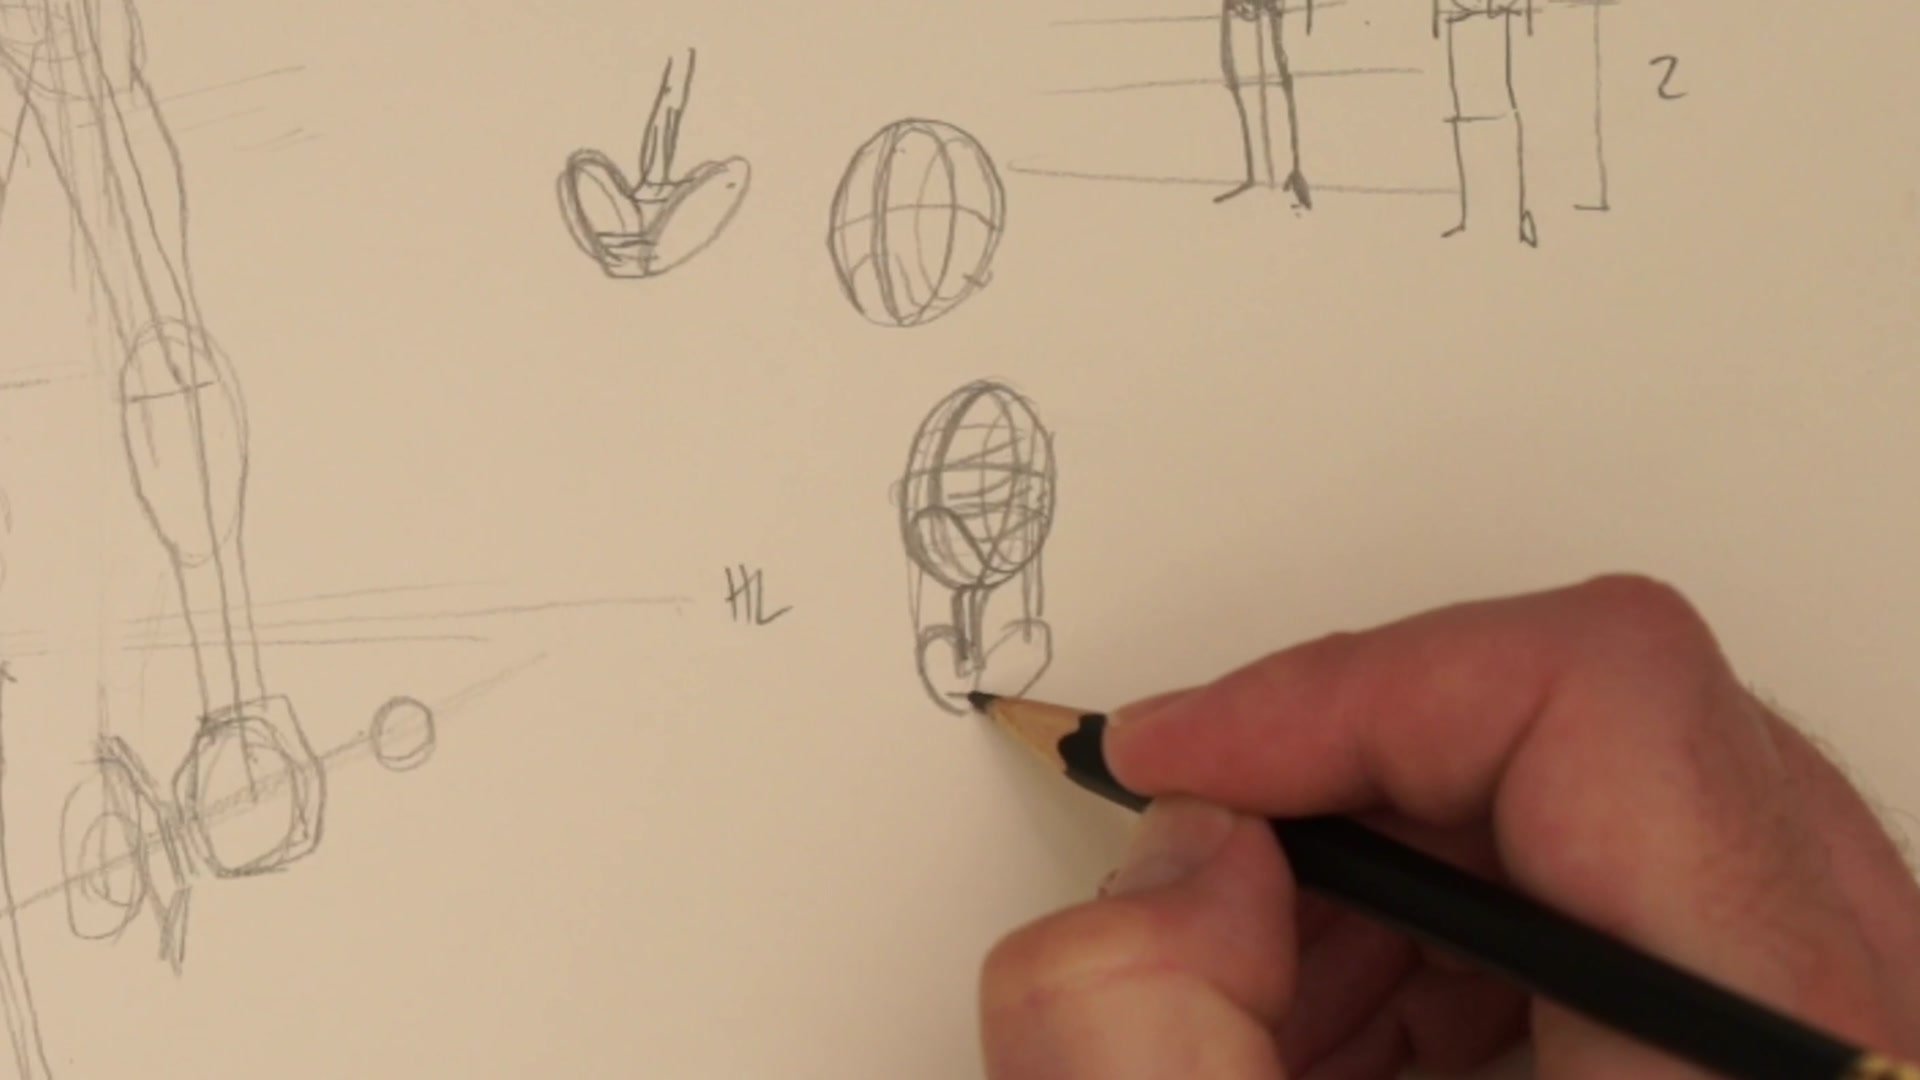
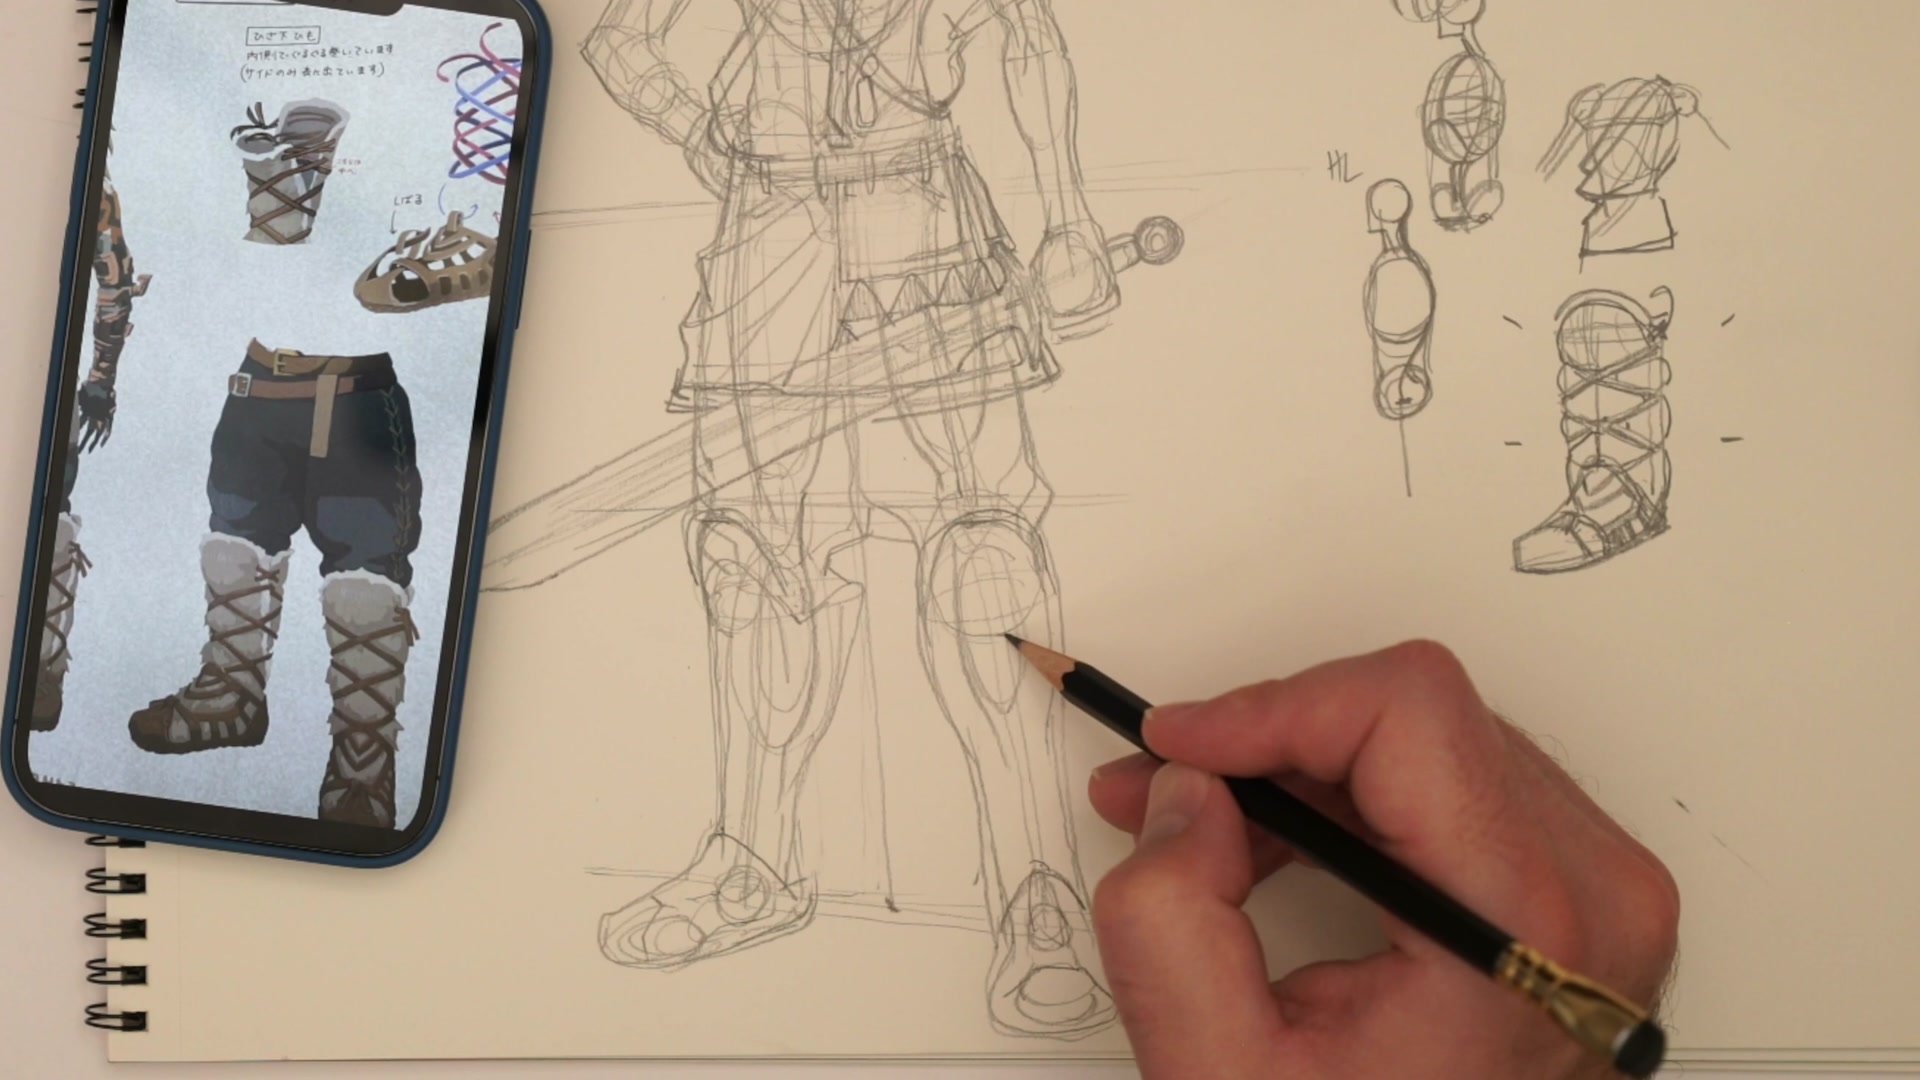
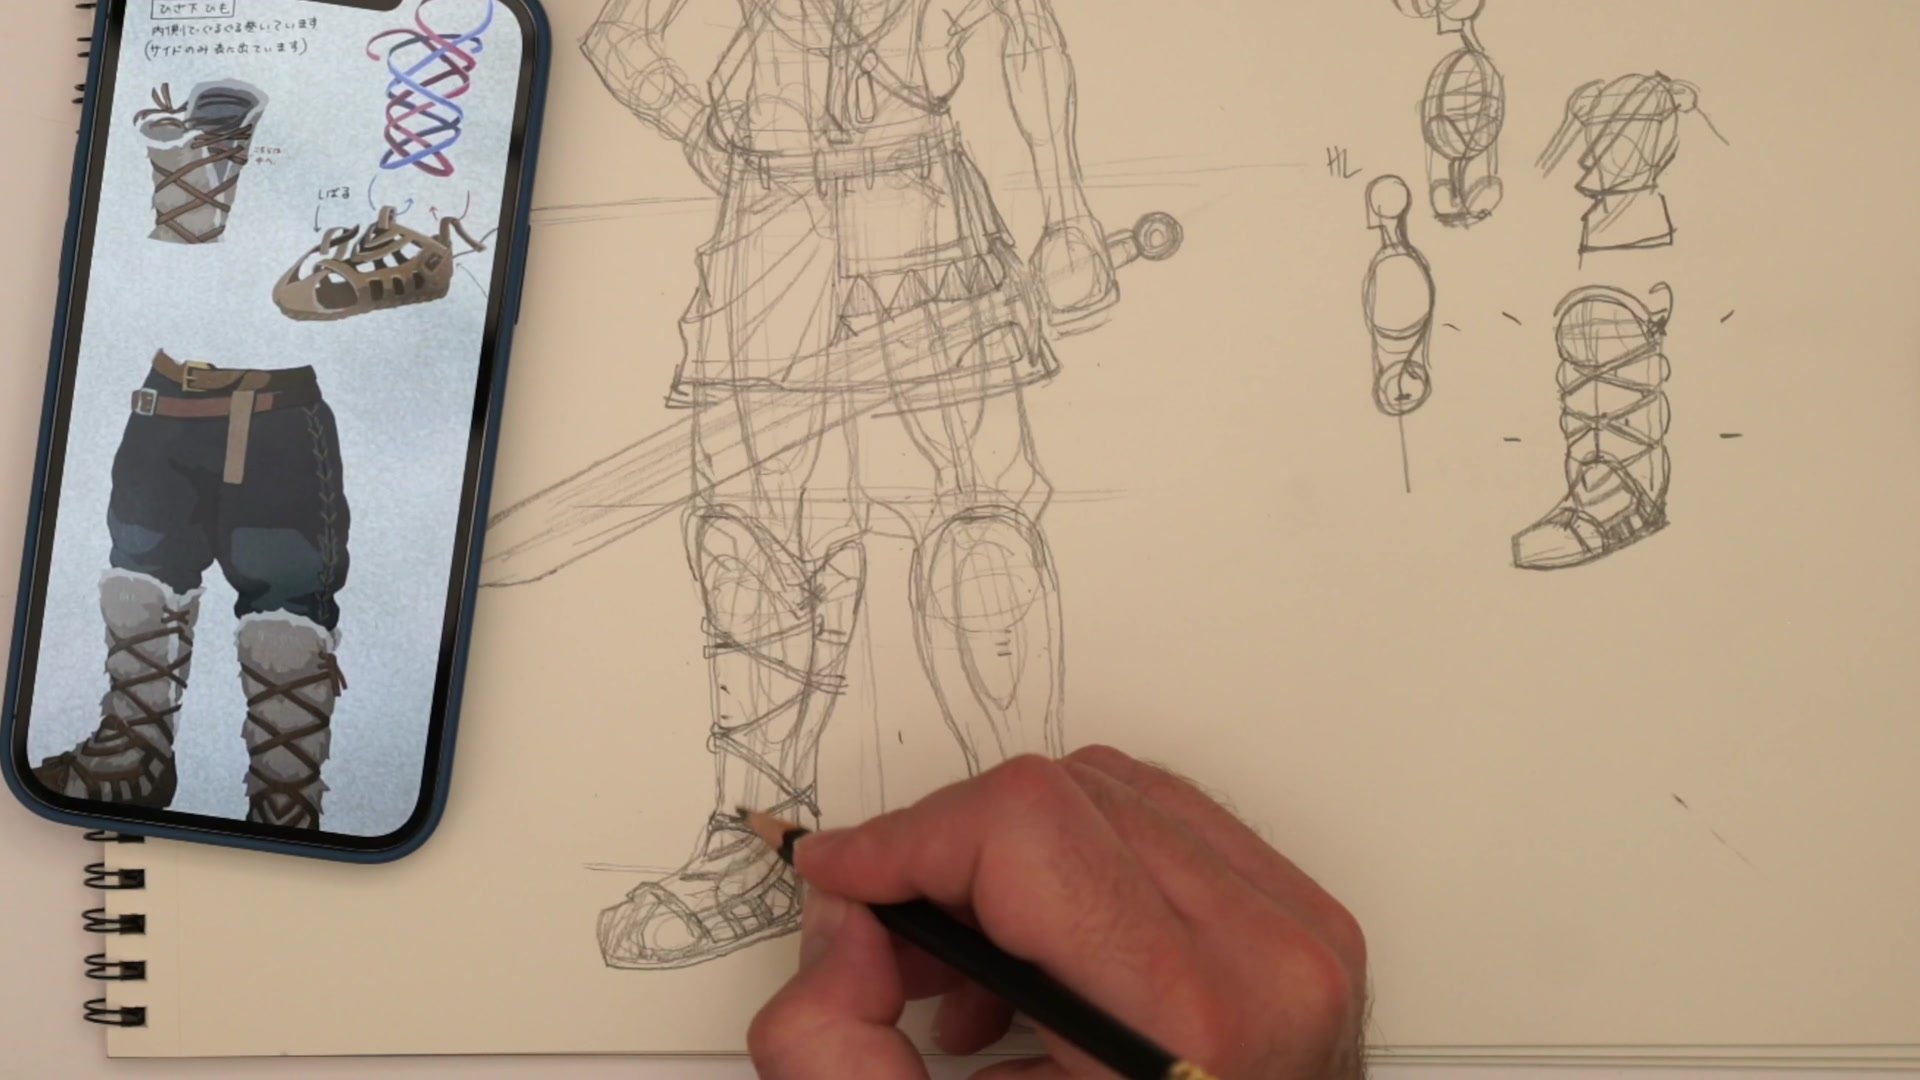
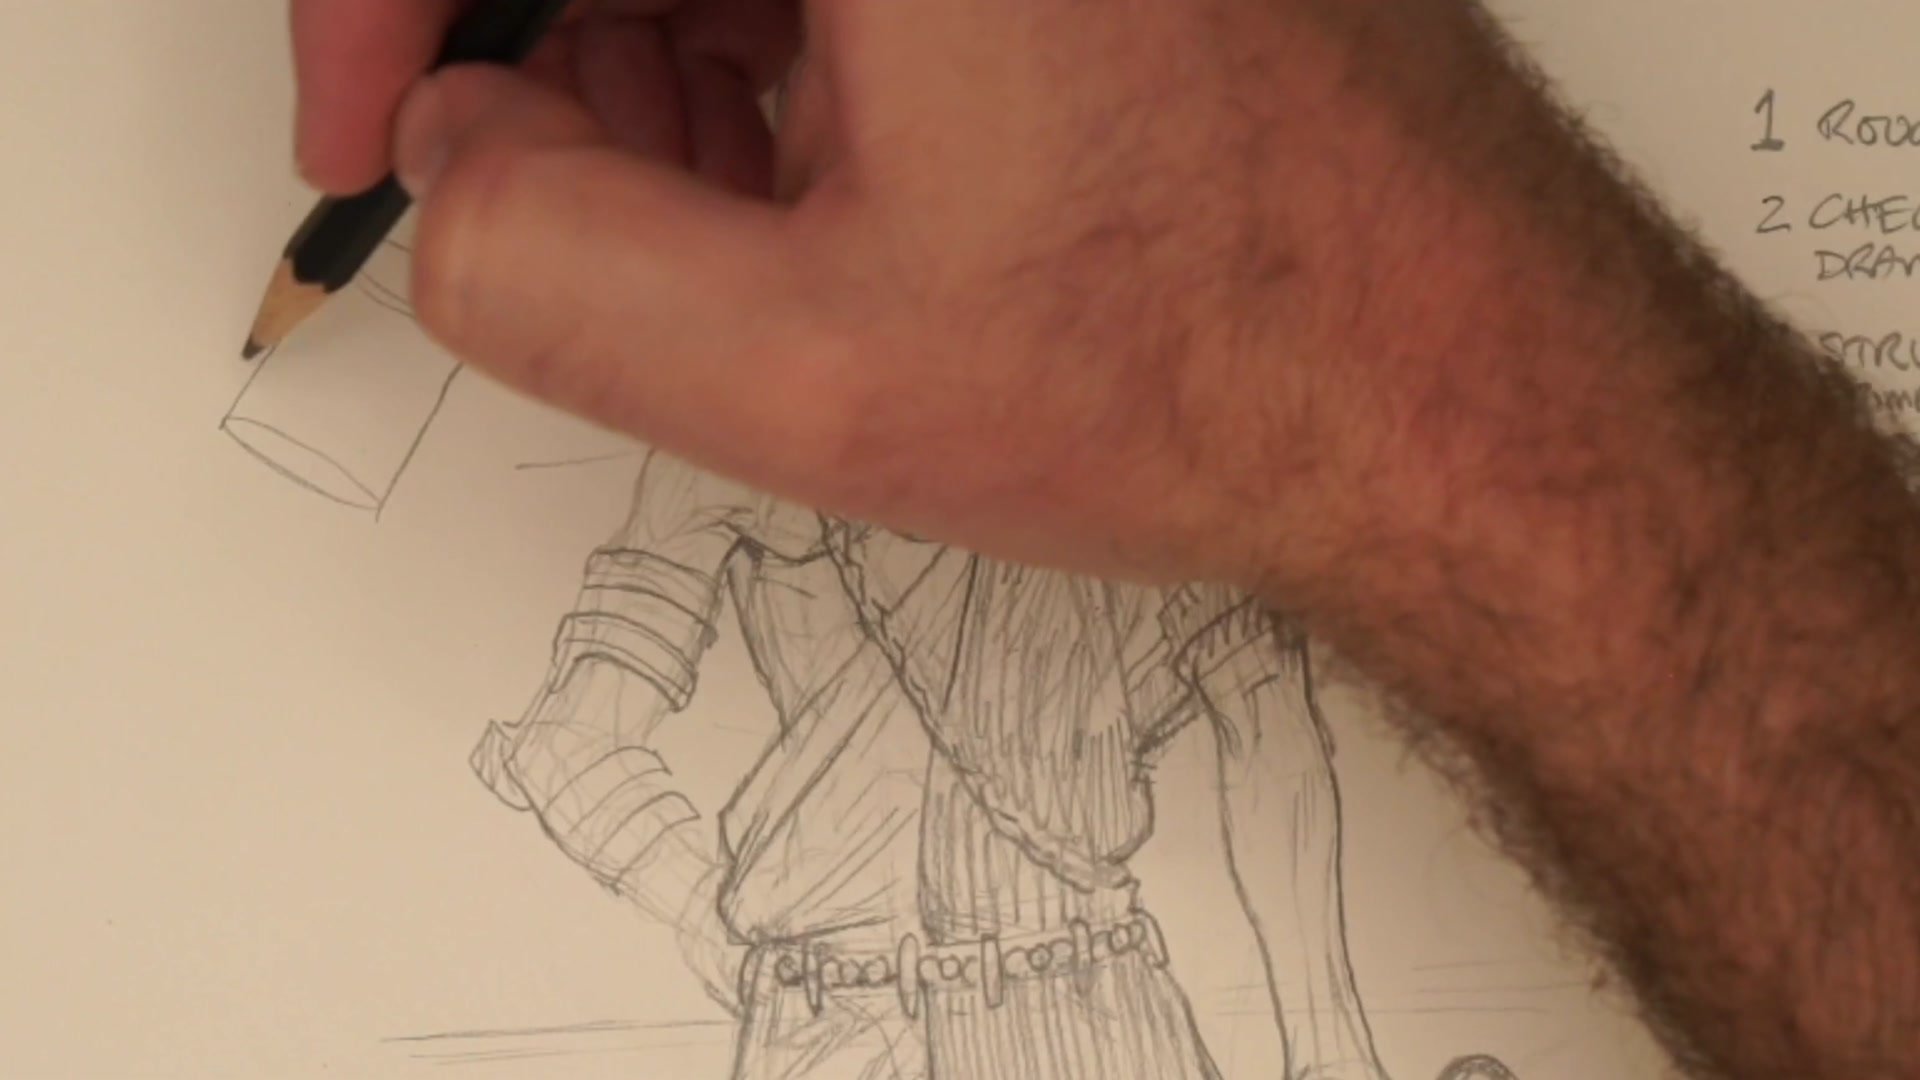
Costume details feel overwhelming until broken down into geometric problems. Link's boots demonstrate this clearly. Complex straps crossing at specific points, patterns wrapping around cylindrical forms, details that need to sit correctly in perspective. The approach is always the same: identify the primary form, which is a cylinder for the boot. Find the center line of that cylinder. Then map where crossing points occur.
The question becomes specific: where does this strap cross the center line? Then where does it cross the side edge? Tracking these individual crossing points rather than trying to draw the entire strap at once turns a complicated costume element into a series of placement decisions. One crossing point here. Another there. Space these systematically using the structural framework already established.
Getting construction right at the structural stage means detail work becomes placement rather than problem-solving. The belt pattern of triangles, the boot strap geometry, the tunic folds are all placed on predetermined structural locations. This method works for any complex costume element: boots, belts, armor pieces, draped fabric. The hard thinking happens while building structure. Detail becomes systematic placement on that framework.
Detail and Refinement
Key Principles
Primary Forms First: Mass in the major shapes of both anatomy and costume before adding any detail. Shoulders as spheres, torso as sphere, pelvis as two plates, limbs as cylinders. Costume elements get their own primary forms built on top.
Center Lines Track Everything: Drop center lines through every form, from the figure's main axis to individual boot cylinders. These lines create the structural grid that all detail gets placed on.
Crossing Points as Geometry: Complex costume elements become manageable by identifying where straps, patterns, and folds cross the center line and side edges. Place these specific points rather than drawing entire elements at once.
Check Before Committing: Rotate the drawing, look at it straight on, verify center lines track correctly and the horizon line creates proper form curvature. This checking stage catches problems before detail work makes them permanent.
Practice This
Pick a Character: Choose a character with costume details that interest you. Having a subject that matters makes the structural practice engaging rather than abstract.
Draw the Mannequin First: Build just the anatomical structure underneath with proper proportions, center lines, and primary forms. No costume, no detail. Verify the structure reads as three-dimensional.
Construct Costume on Top: Add costume elements starting with primary forms, then find center lines for each element, mark crossing points, and place details systematically. Complete the drawing to where it feels done, even if imperfect.


