Master Your Elliptical Anatomy
Summary
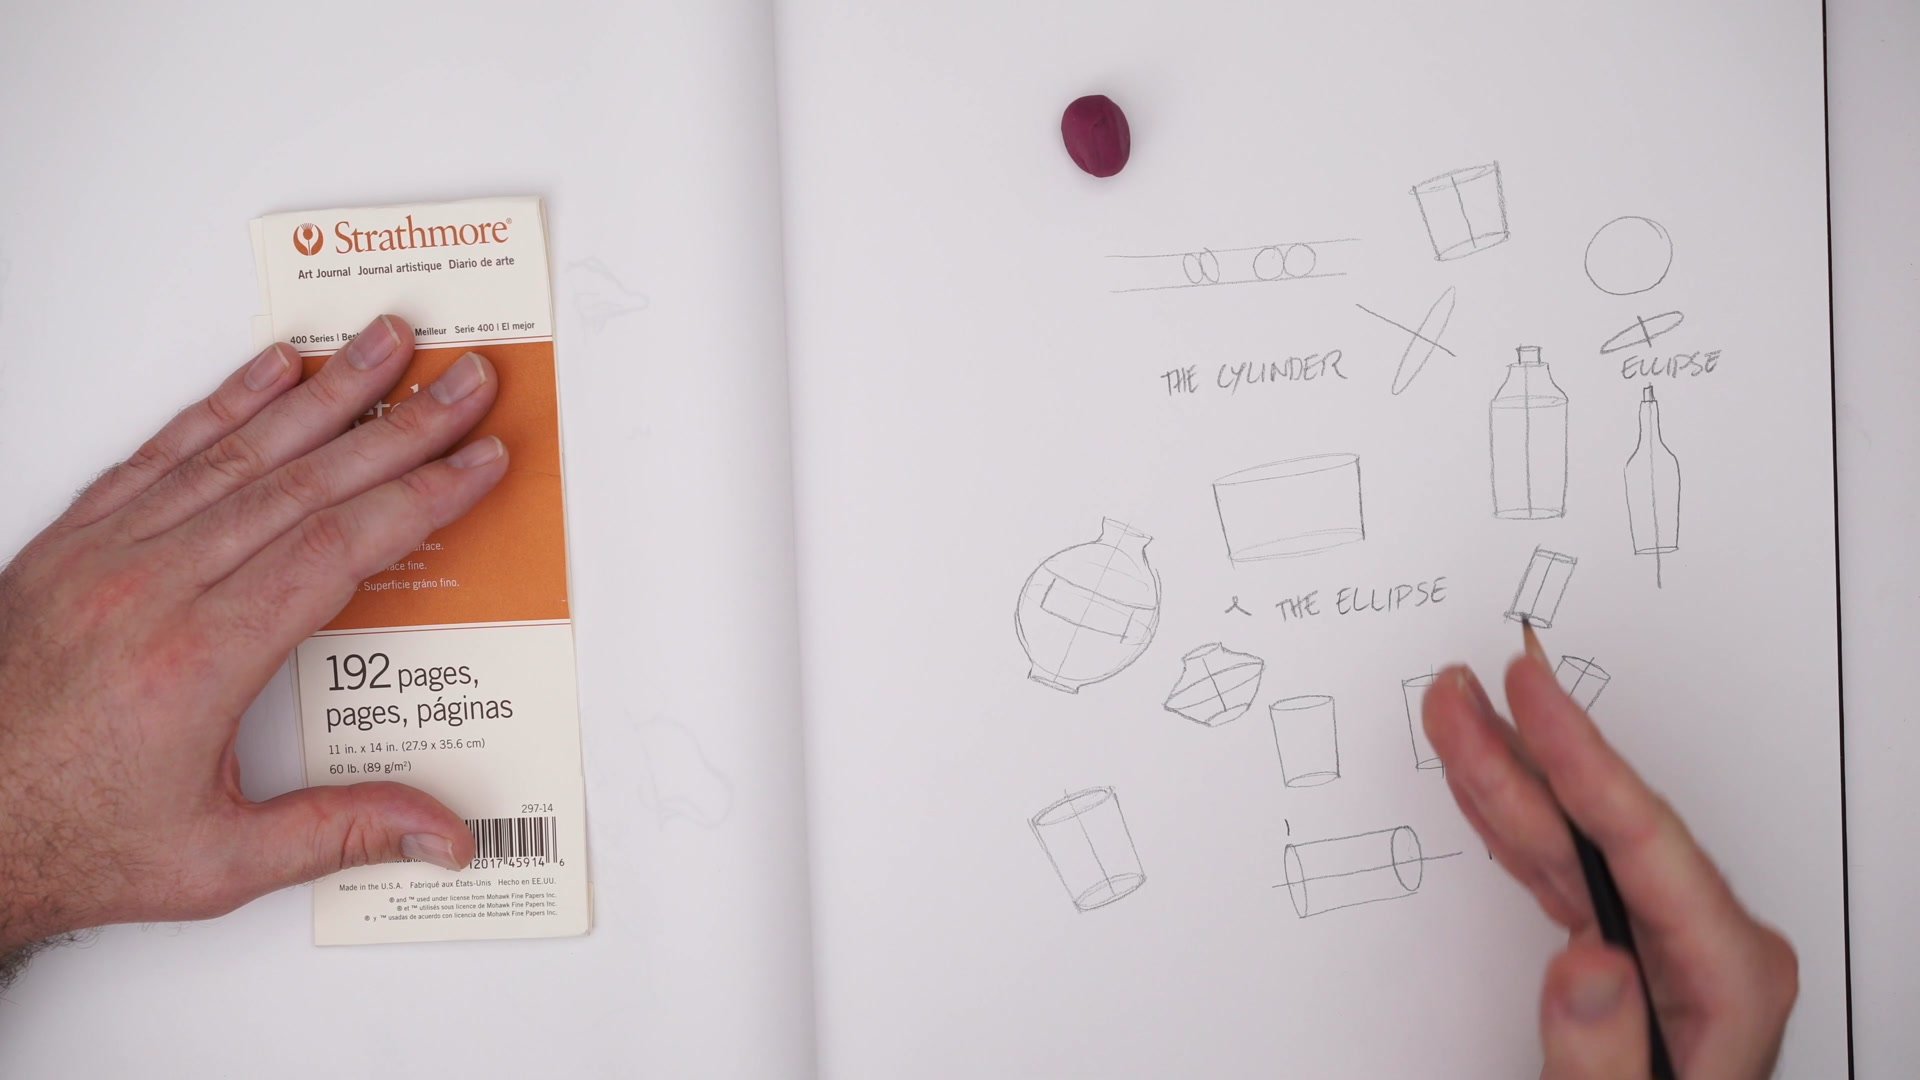
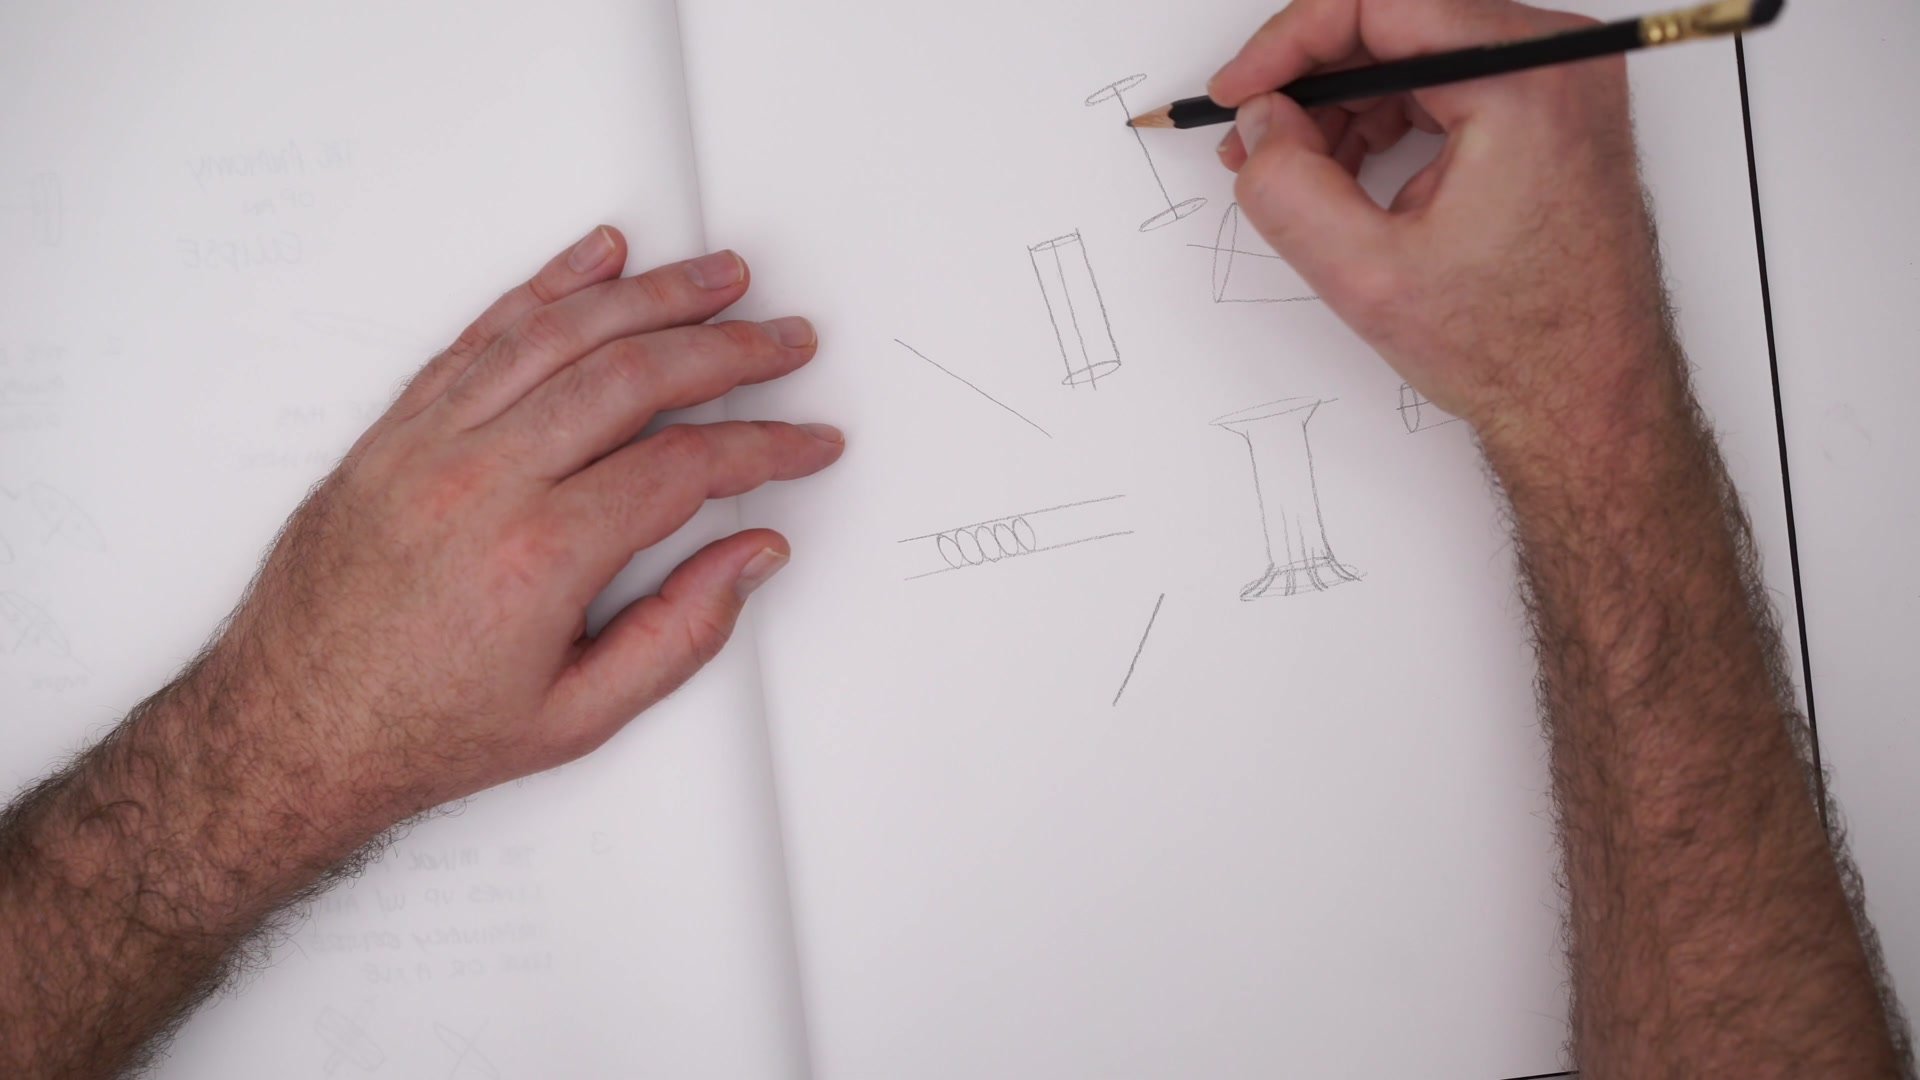
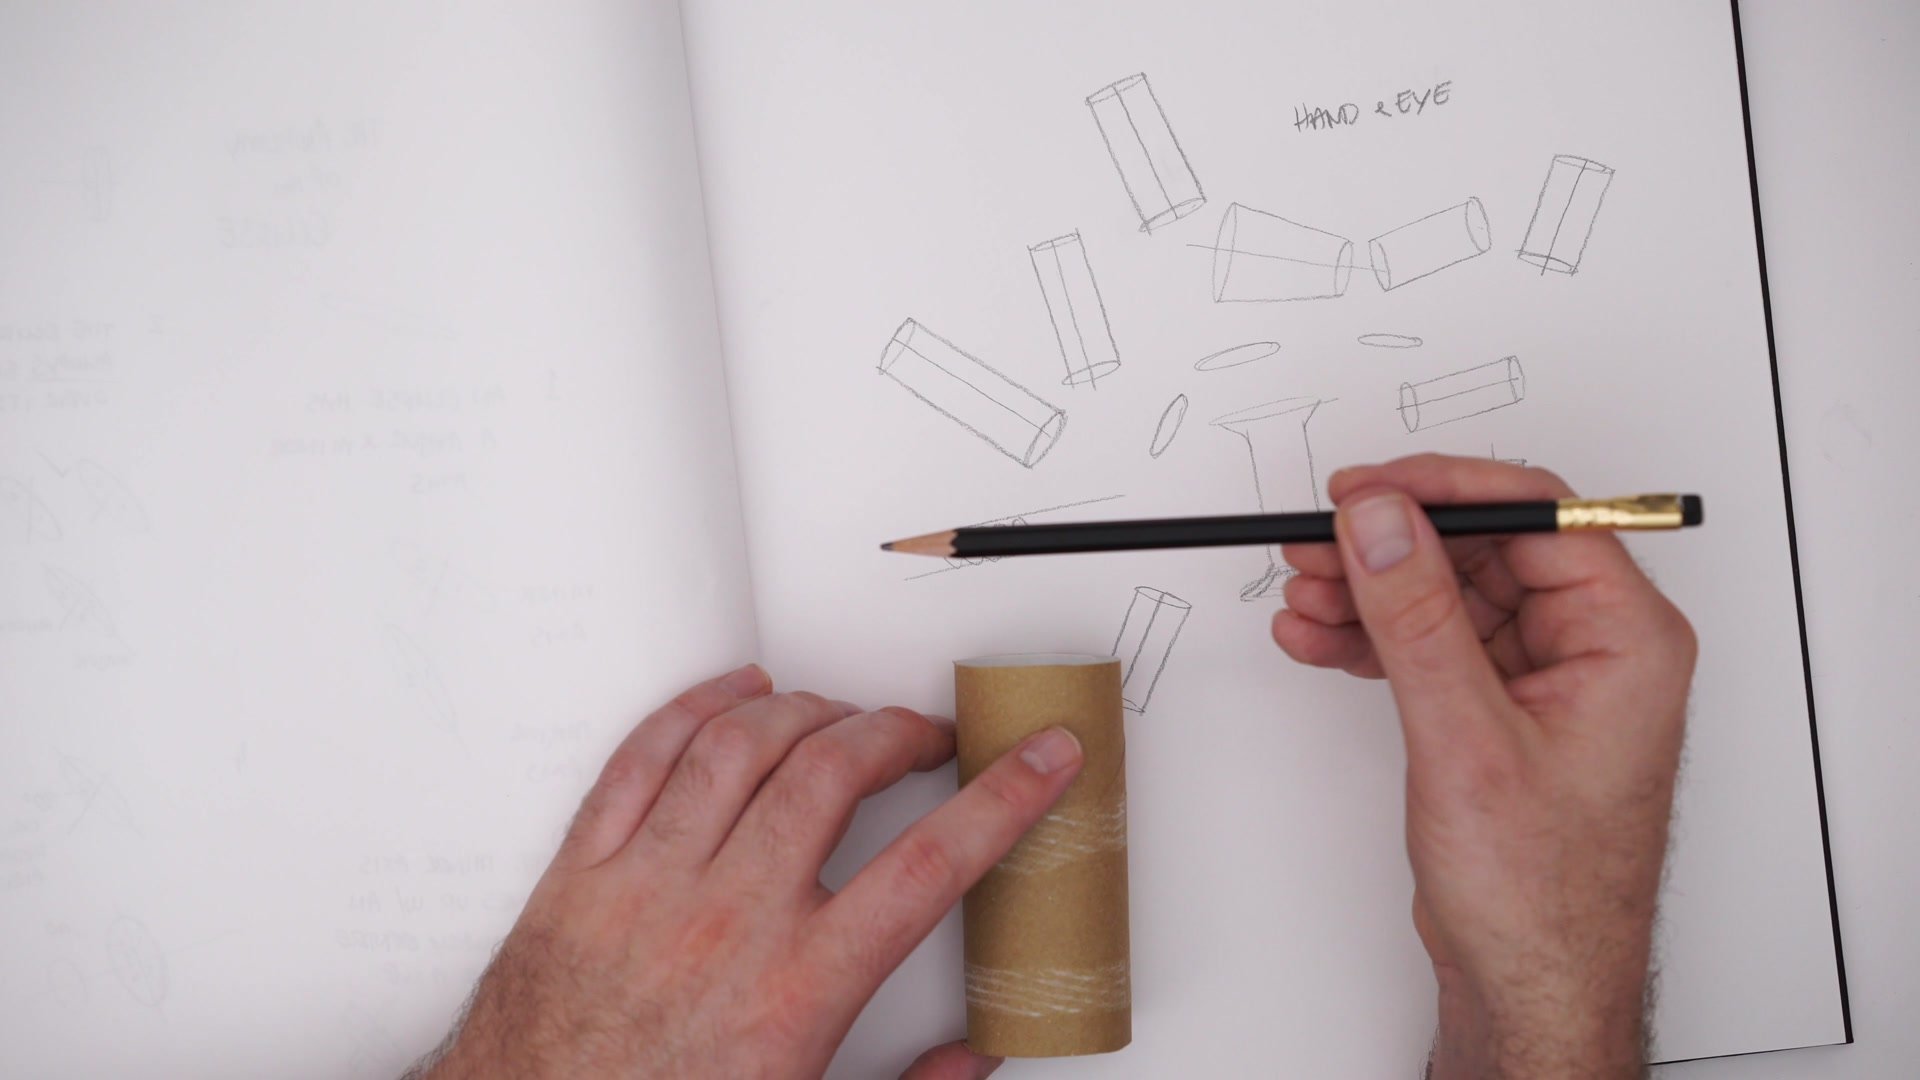
The Cylinder Exercise
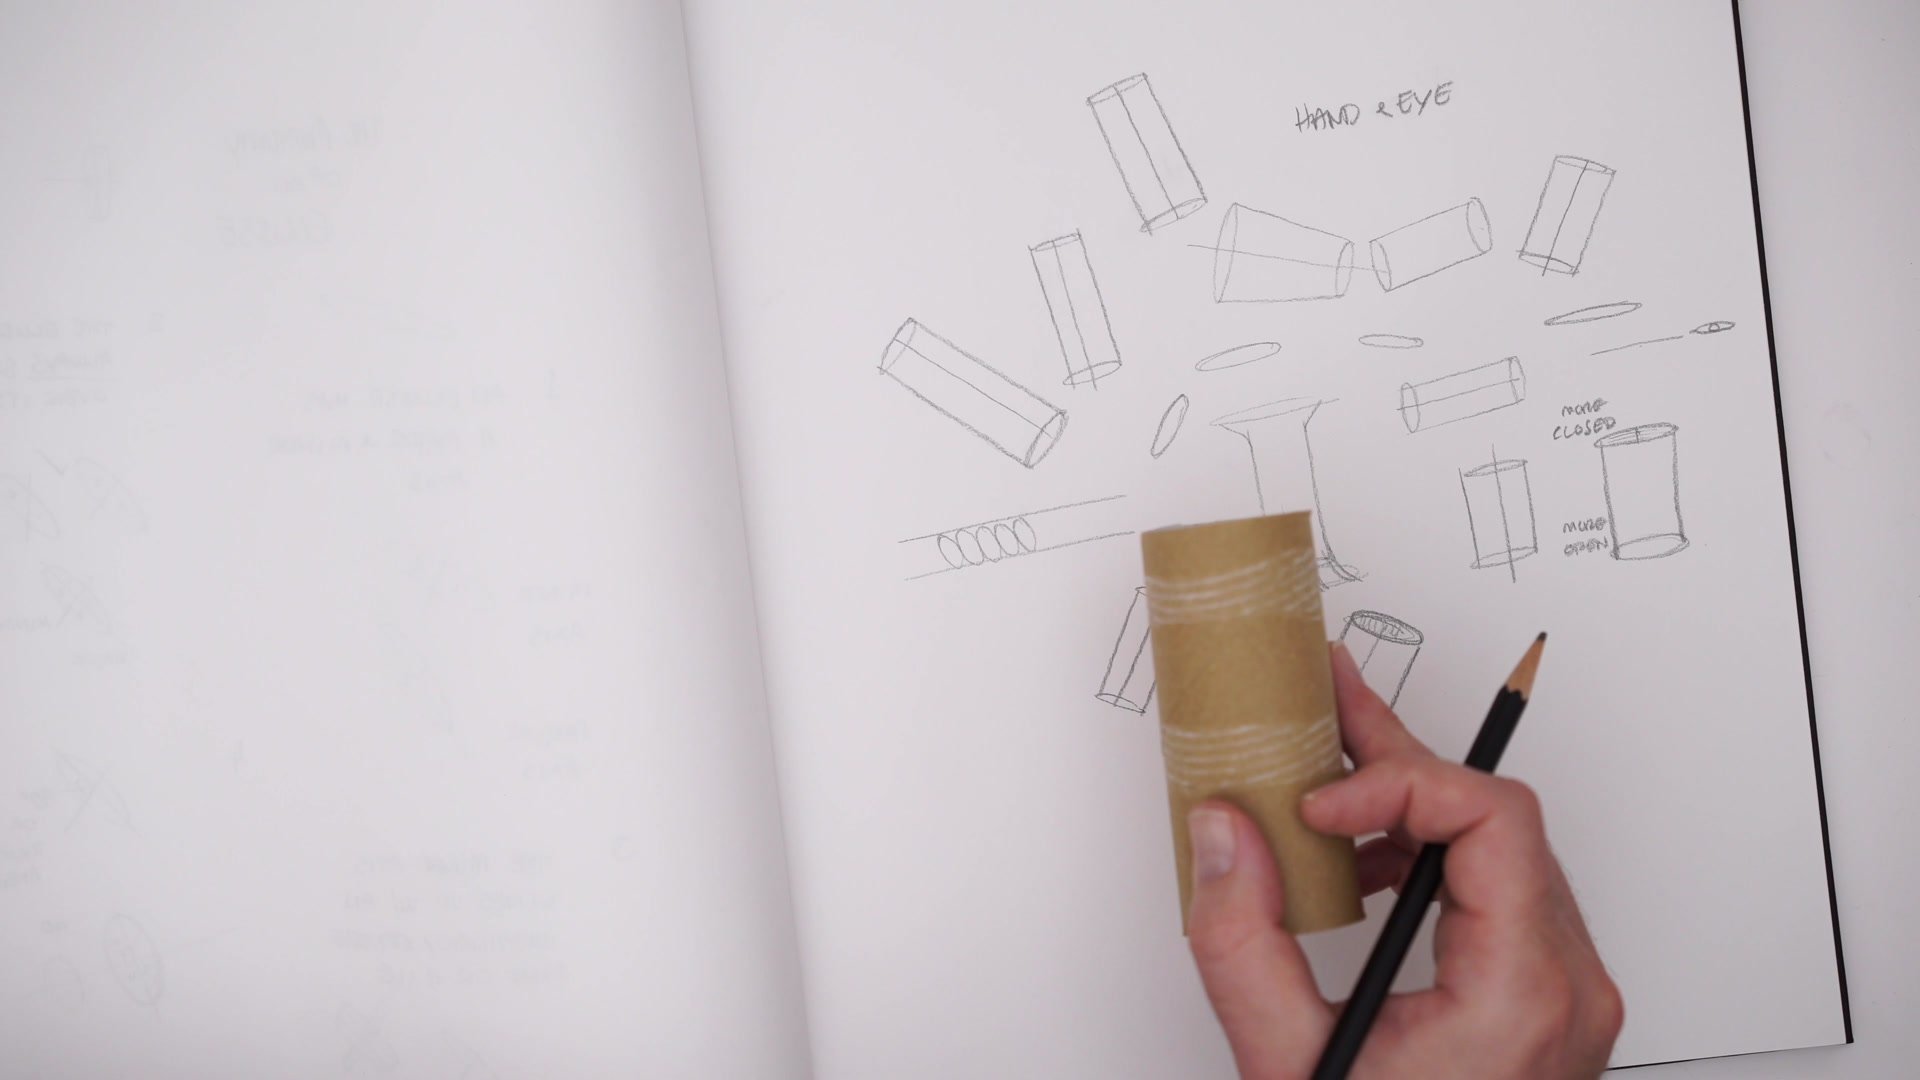
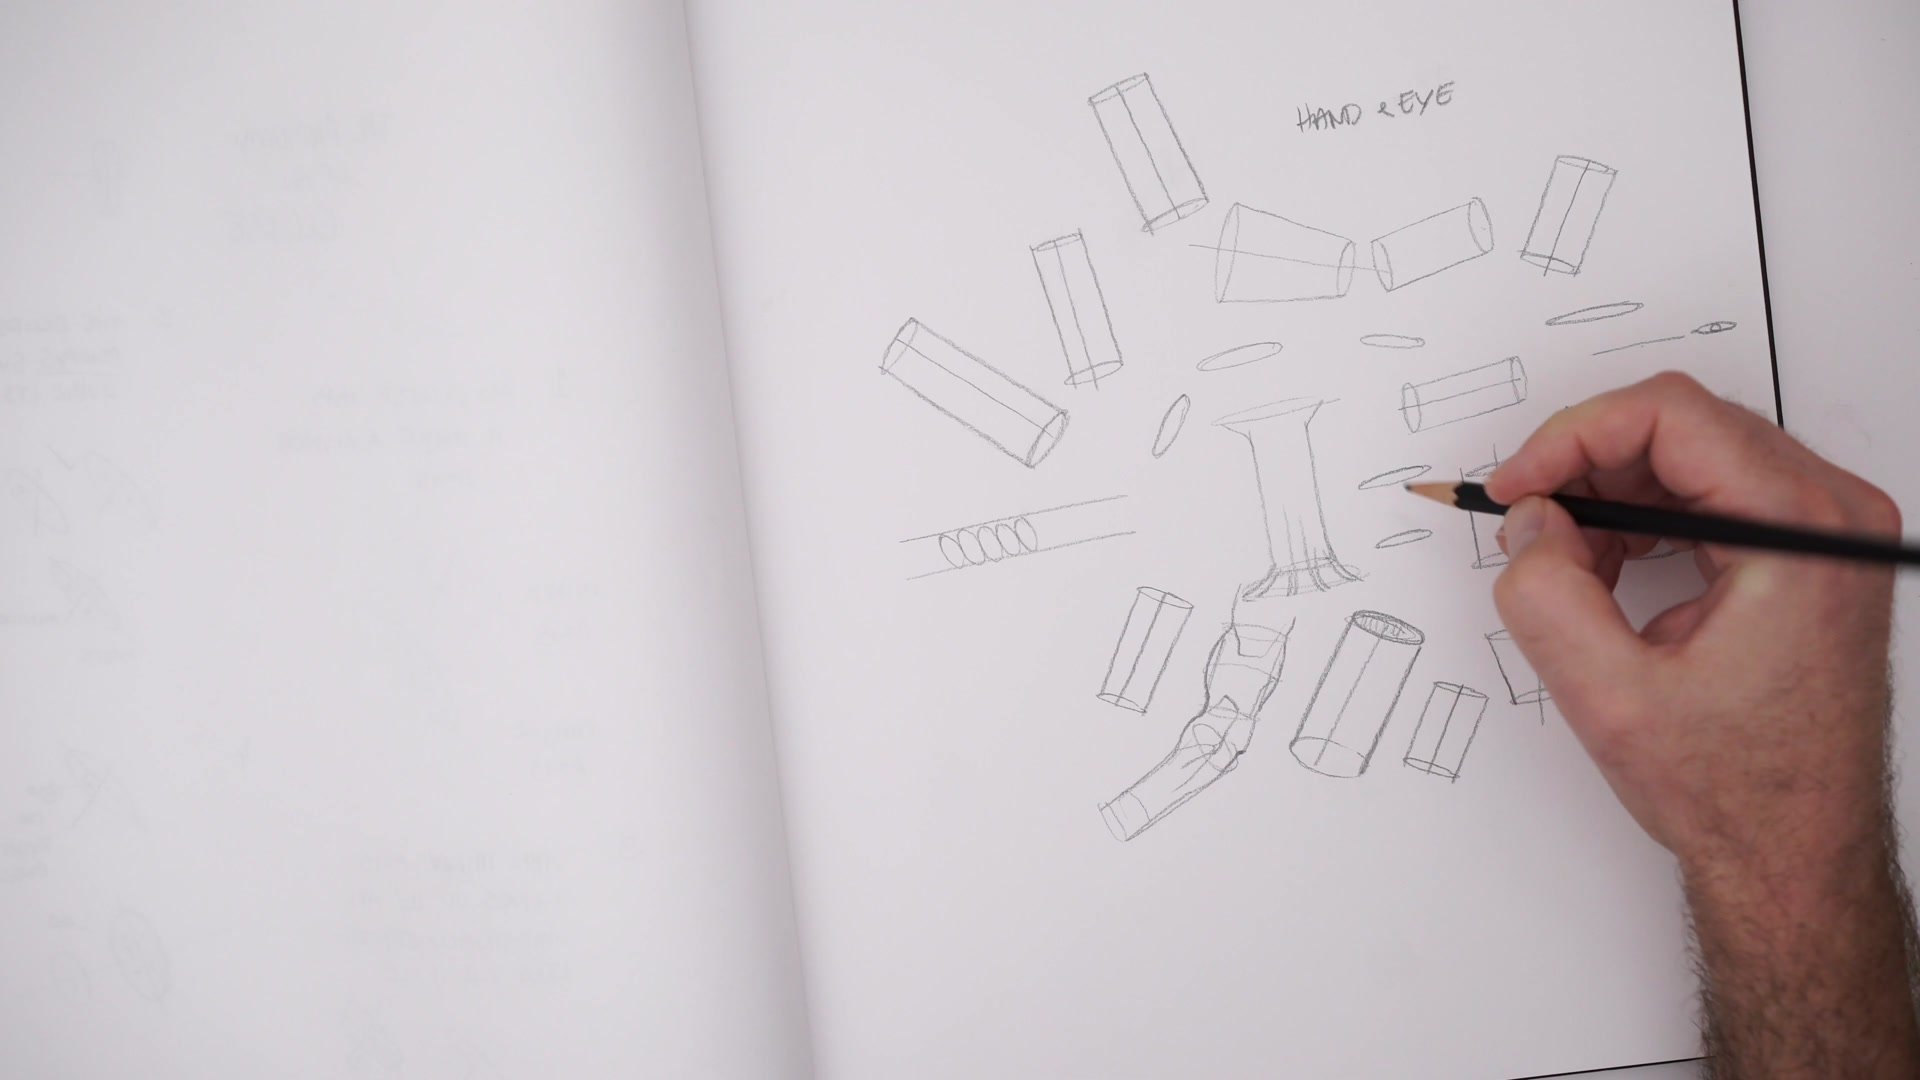
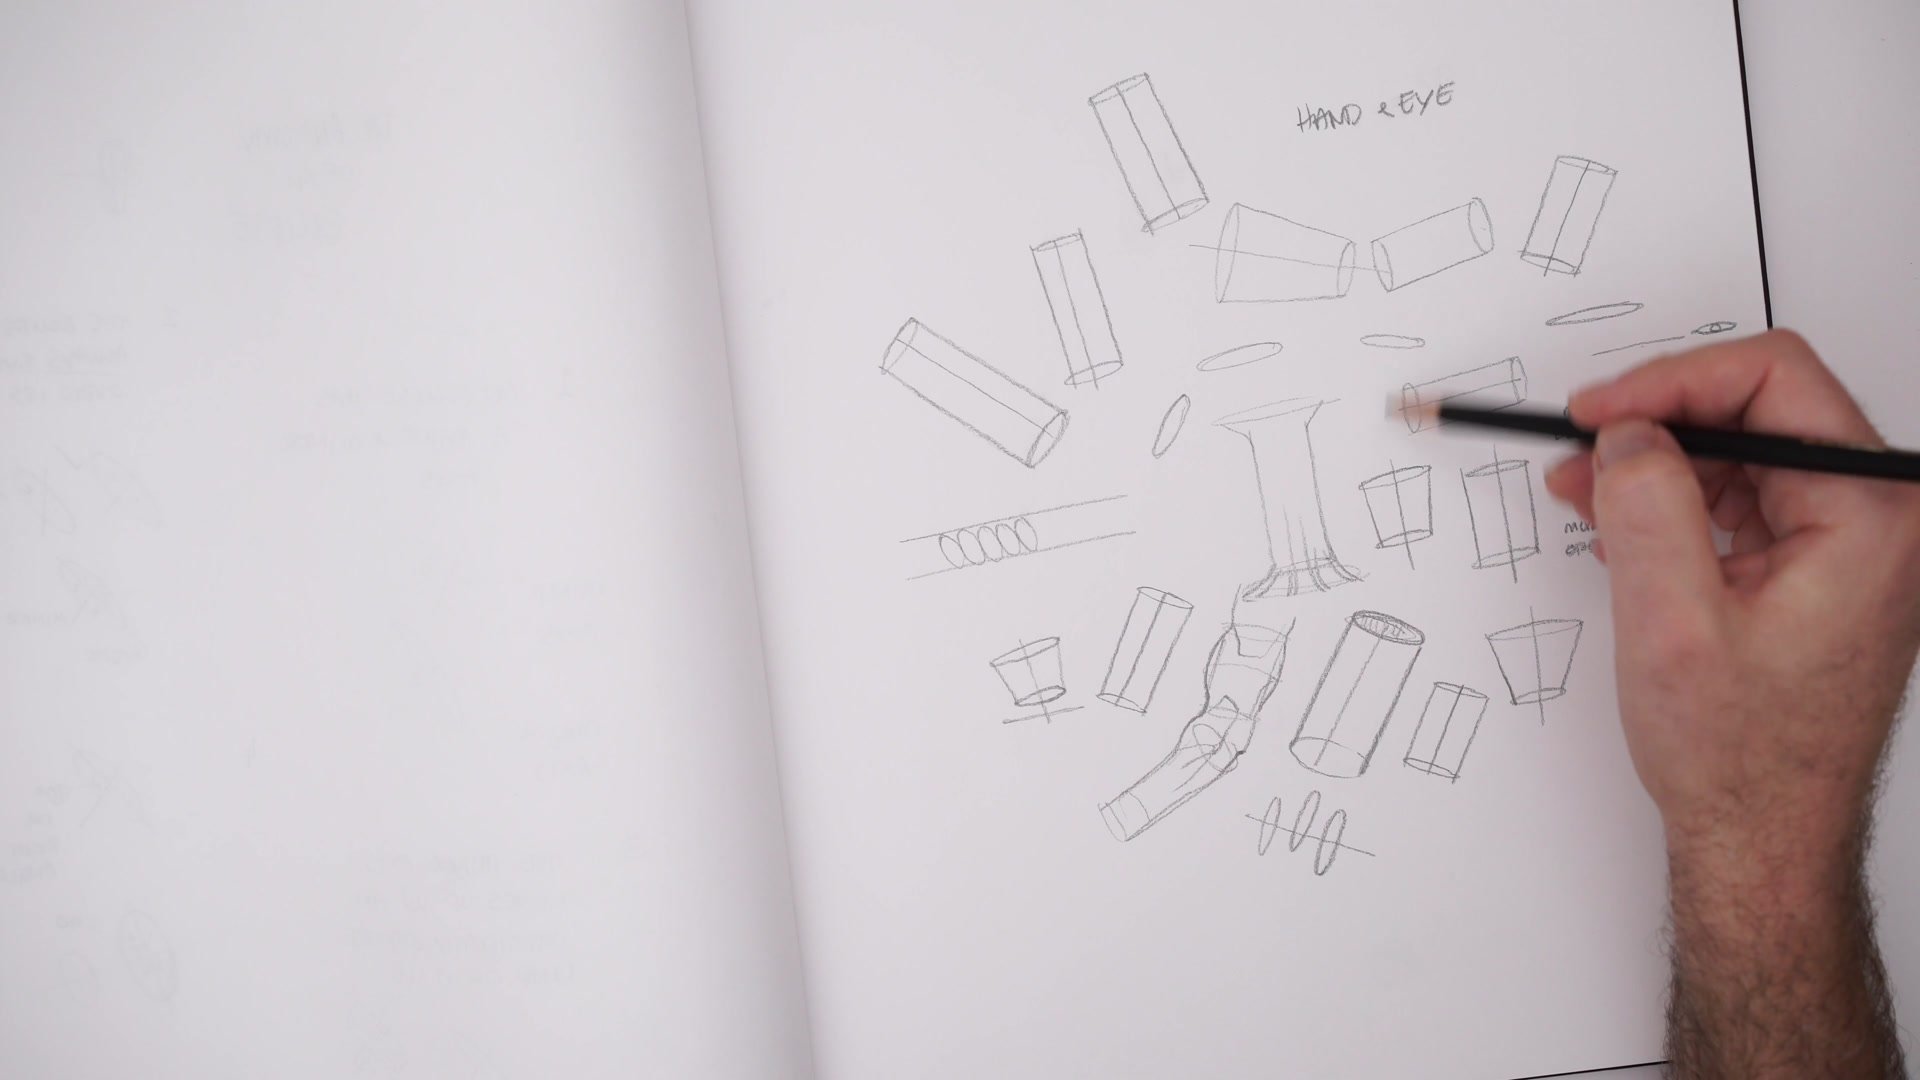
Ellipses and cylinders appear everywhere in drawing, from tree trunks and bottles to arms and fingers. Yet most ellipse practice involves drawing disembodied circles between parallel lines, which misses the actual skill being trained. The real challenge is drawing two ellipses that relate to each other along a shared minor axis, and that requires understanding the hidden geometry that underlies every cylindrical form.
This lesson covers the anatomy of the ellipse and applies it through a simple but effective exercise: drawing coffee cups and toilet rolls. Rather than abstract repetition, this applied approach builds the hand-eye coordination needed to construct accurate cylinders at any angle, which is the foundation for drawing nearly every structural form in illustration and anatomy.
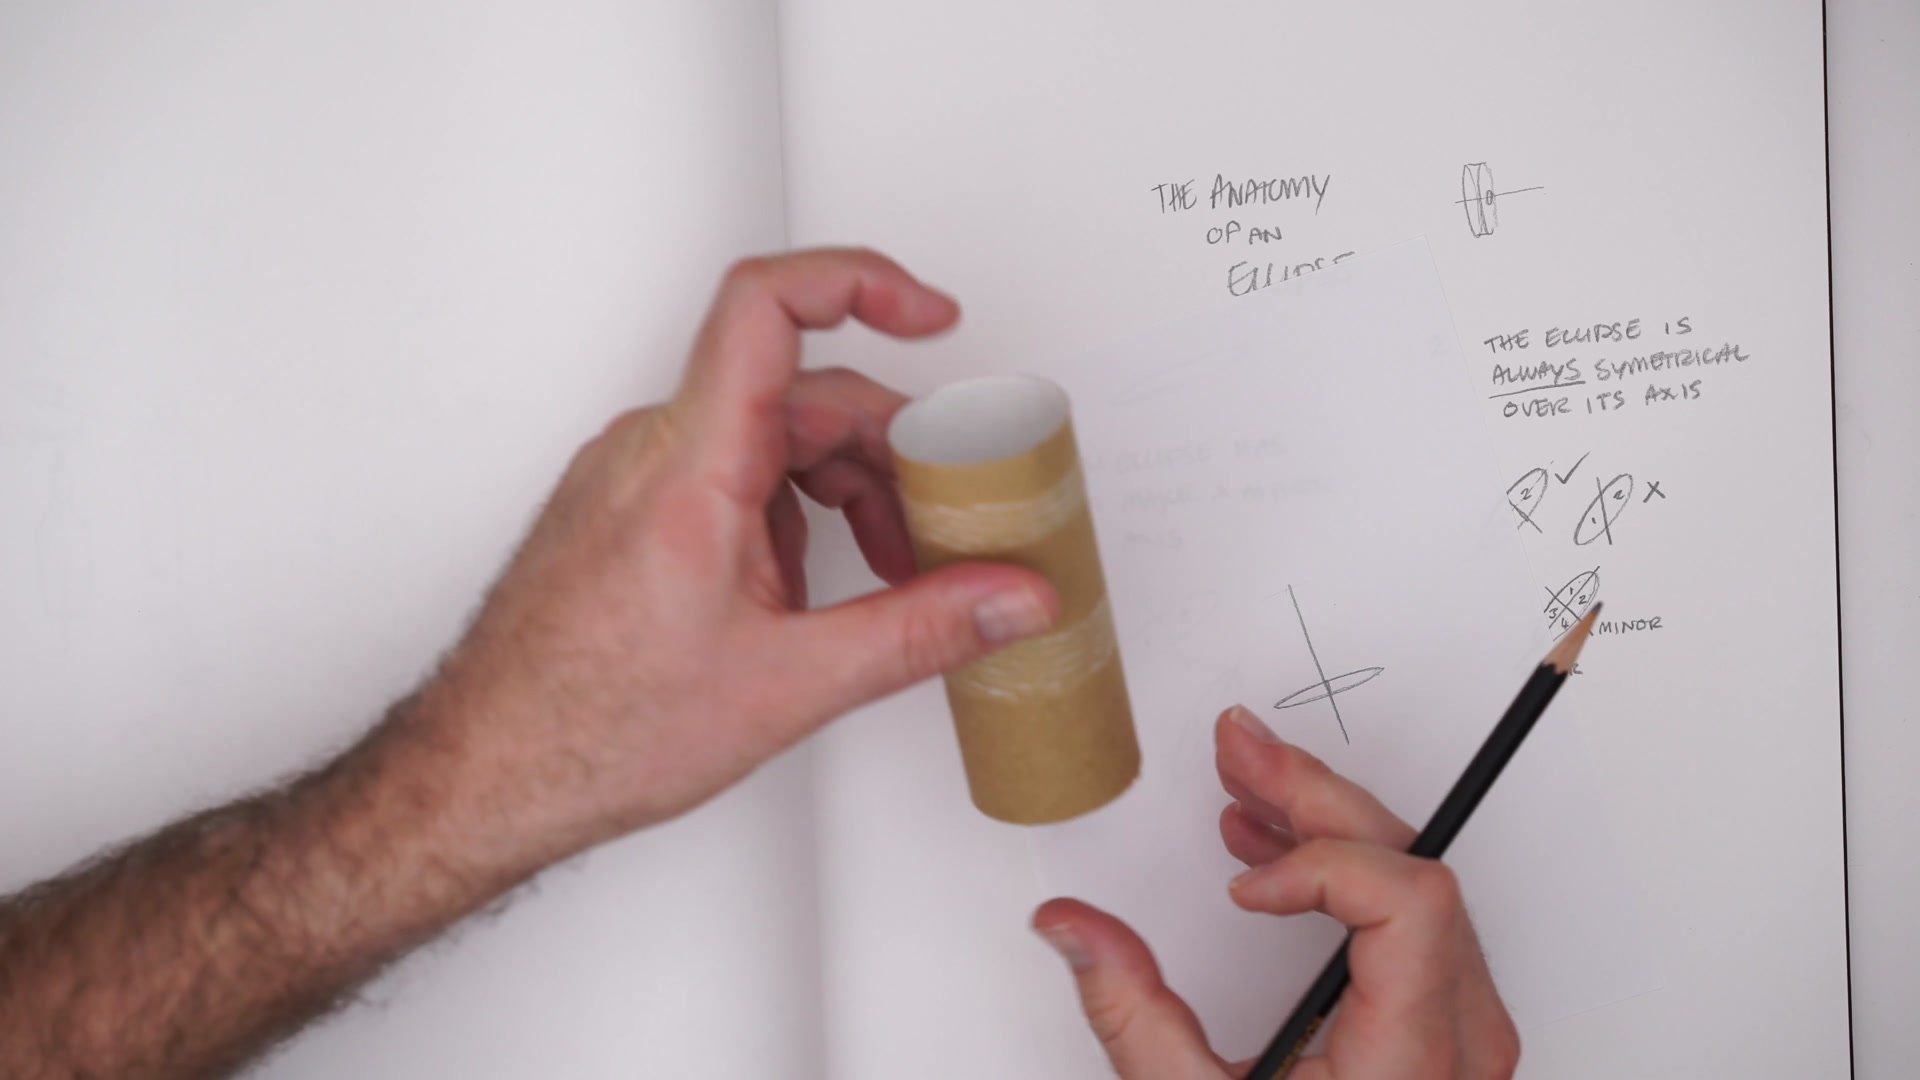
Ellipse Anatomy
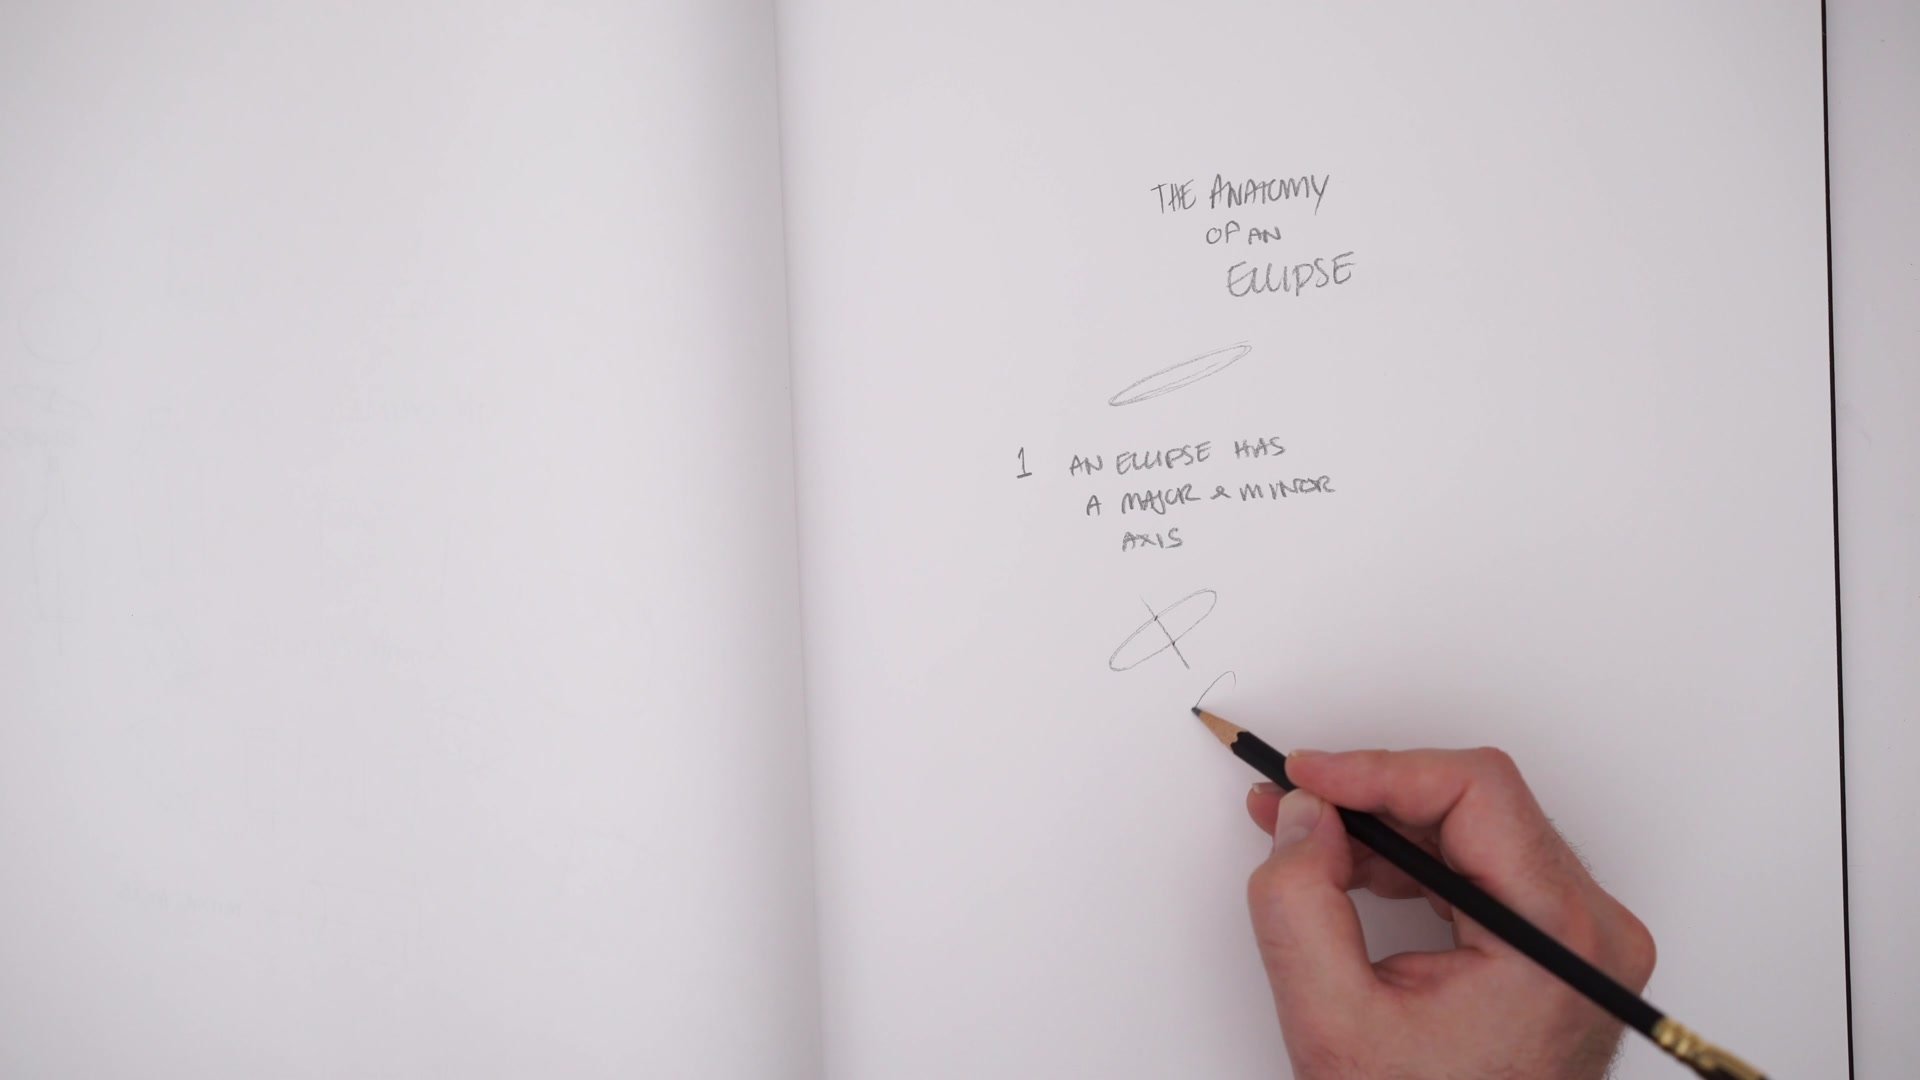
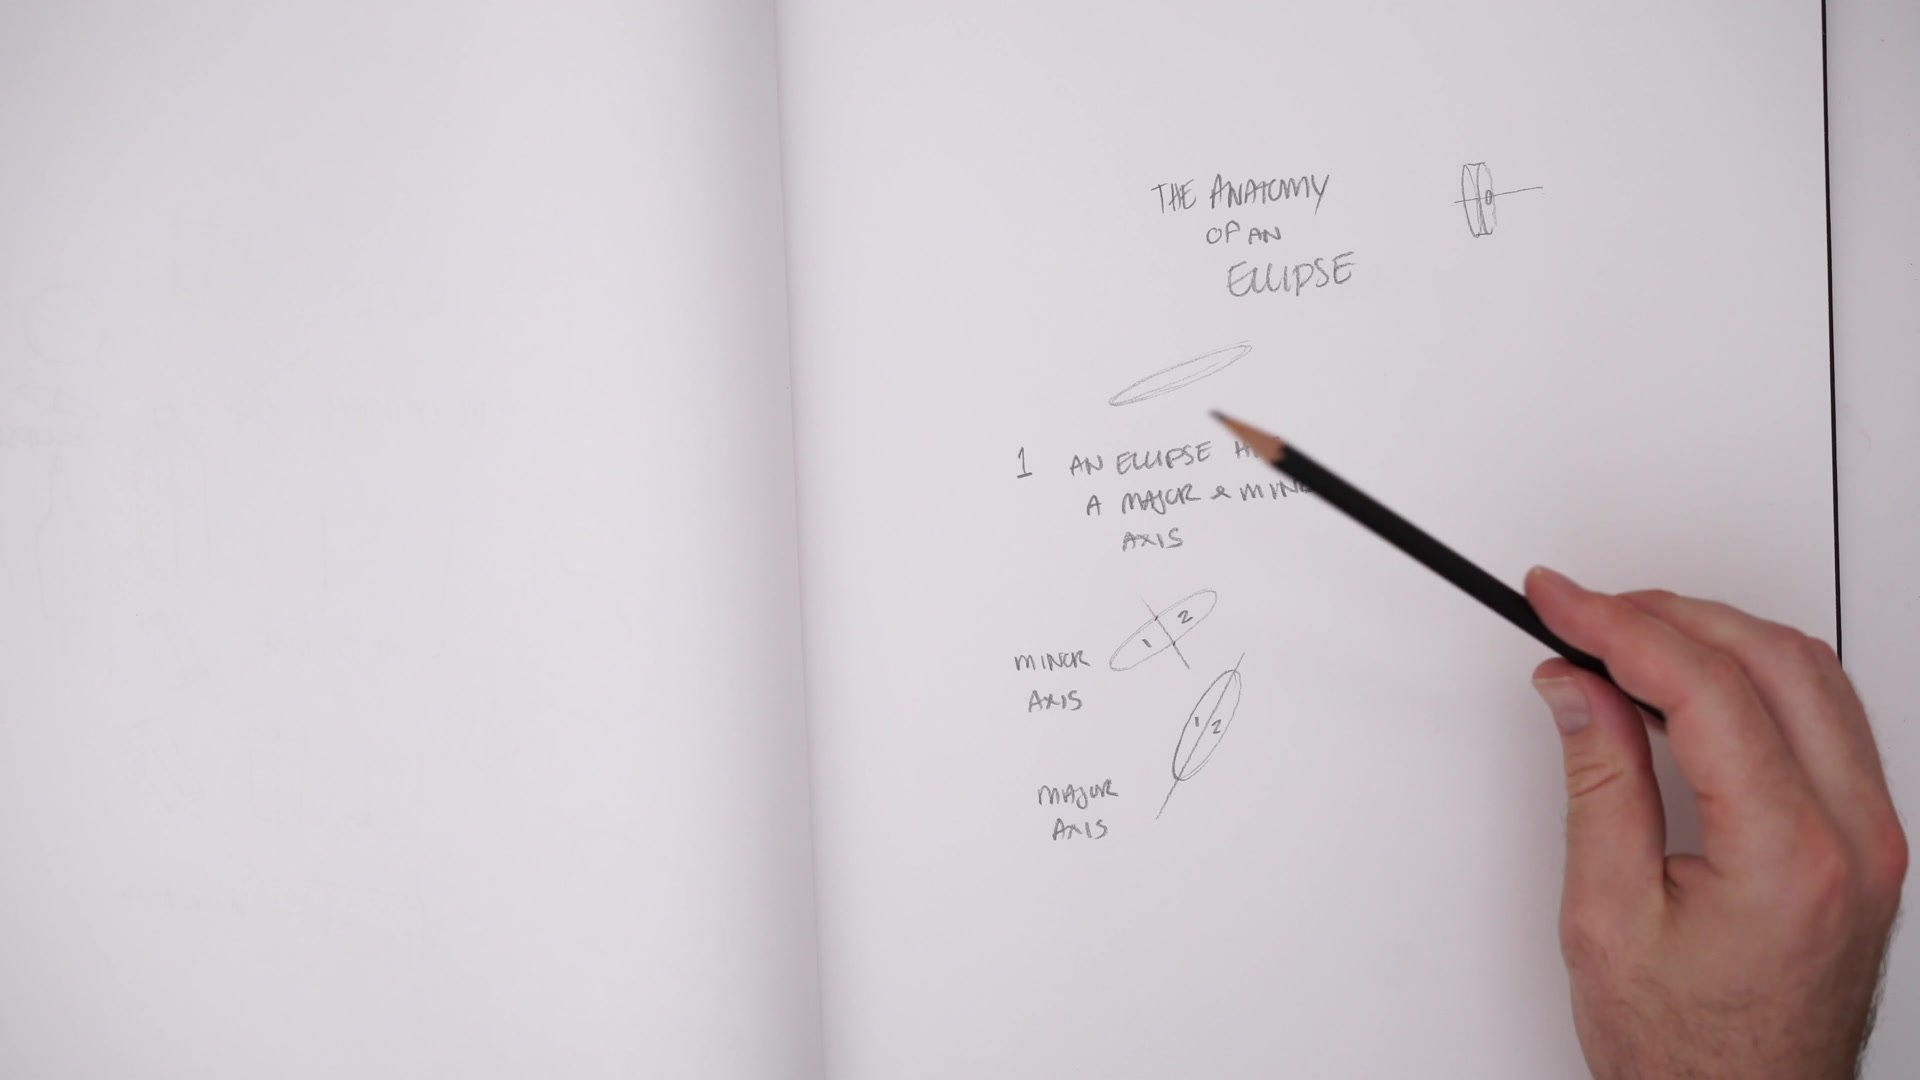
Major and Minor Axis
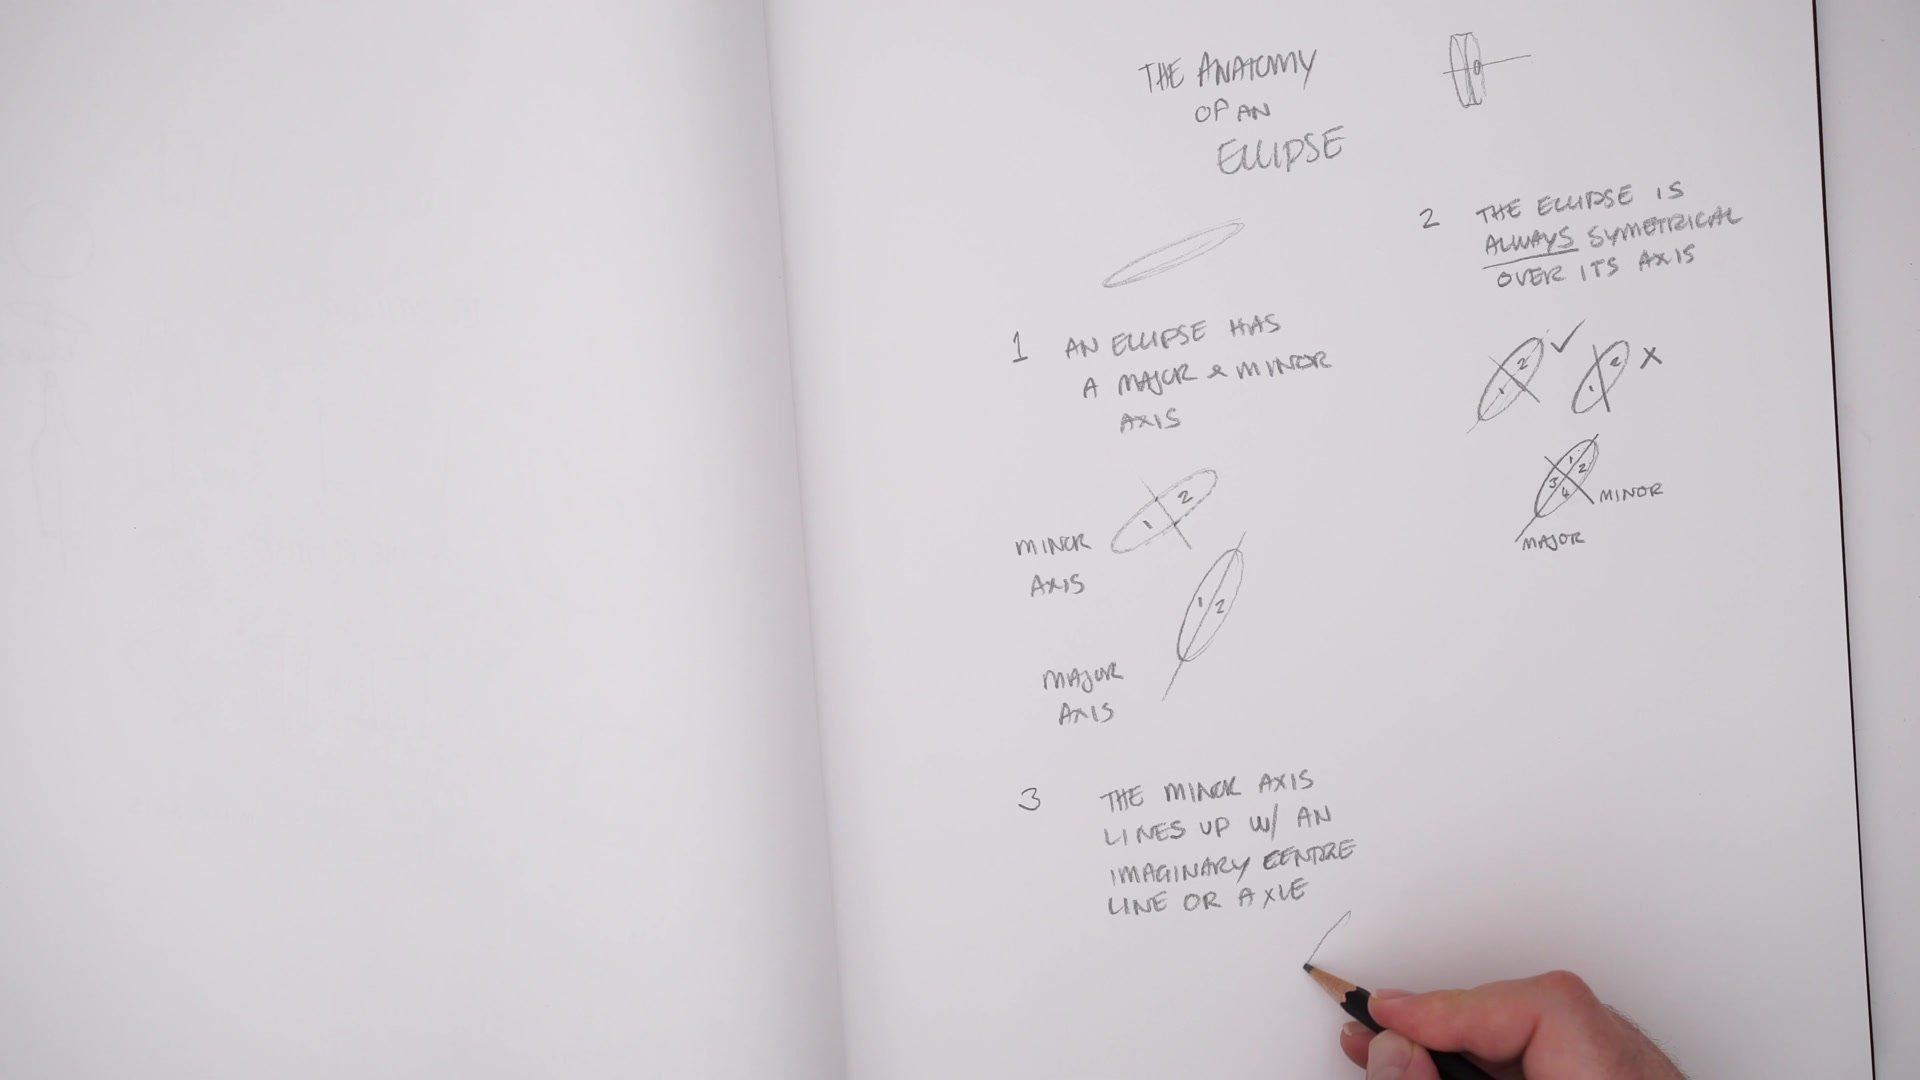
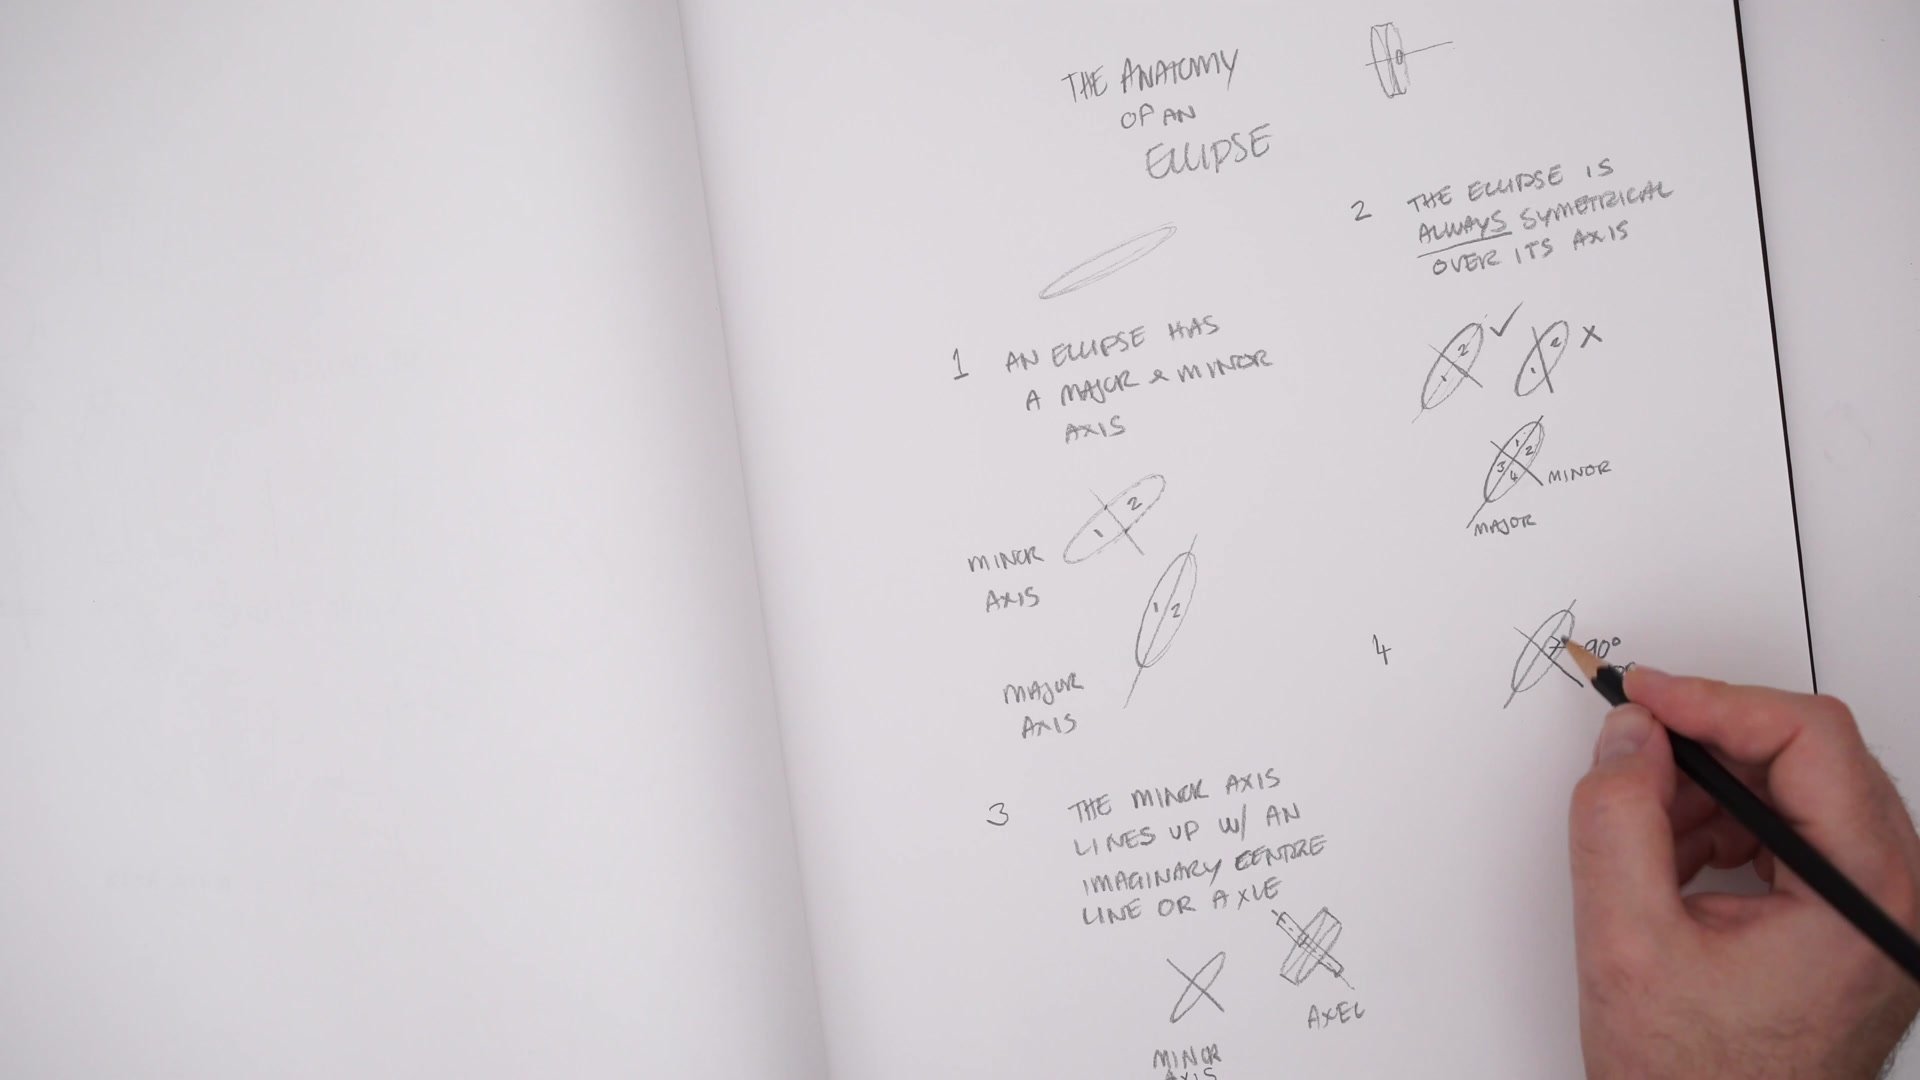
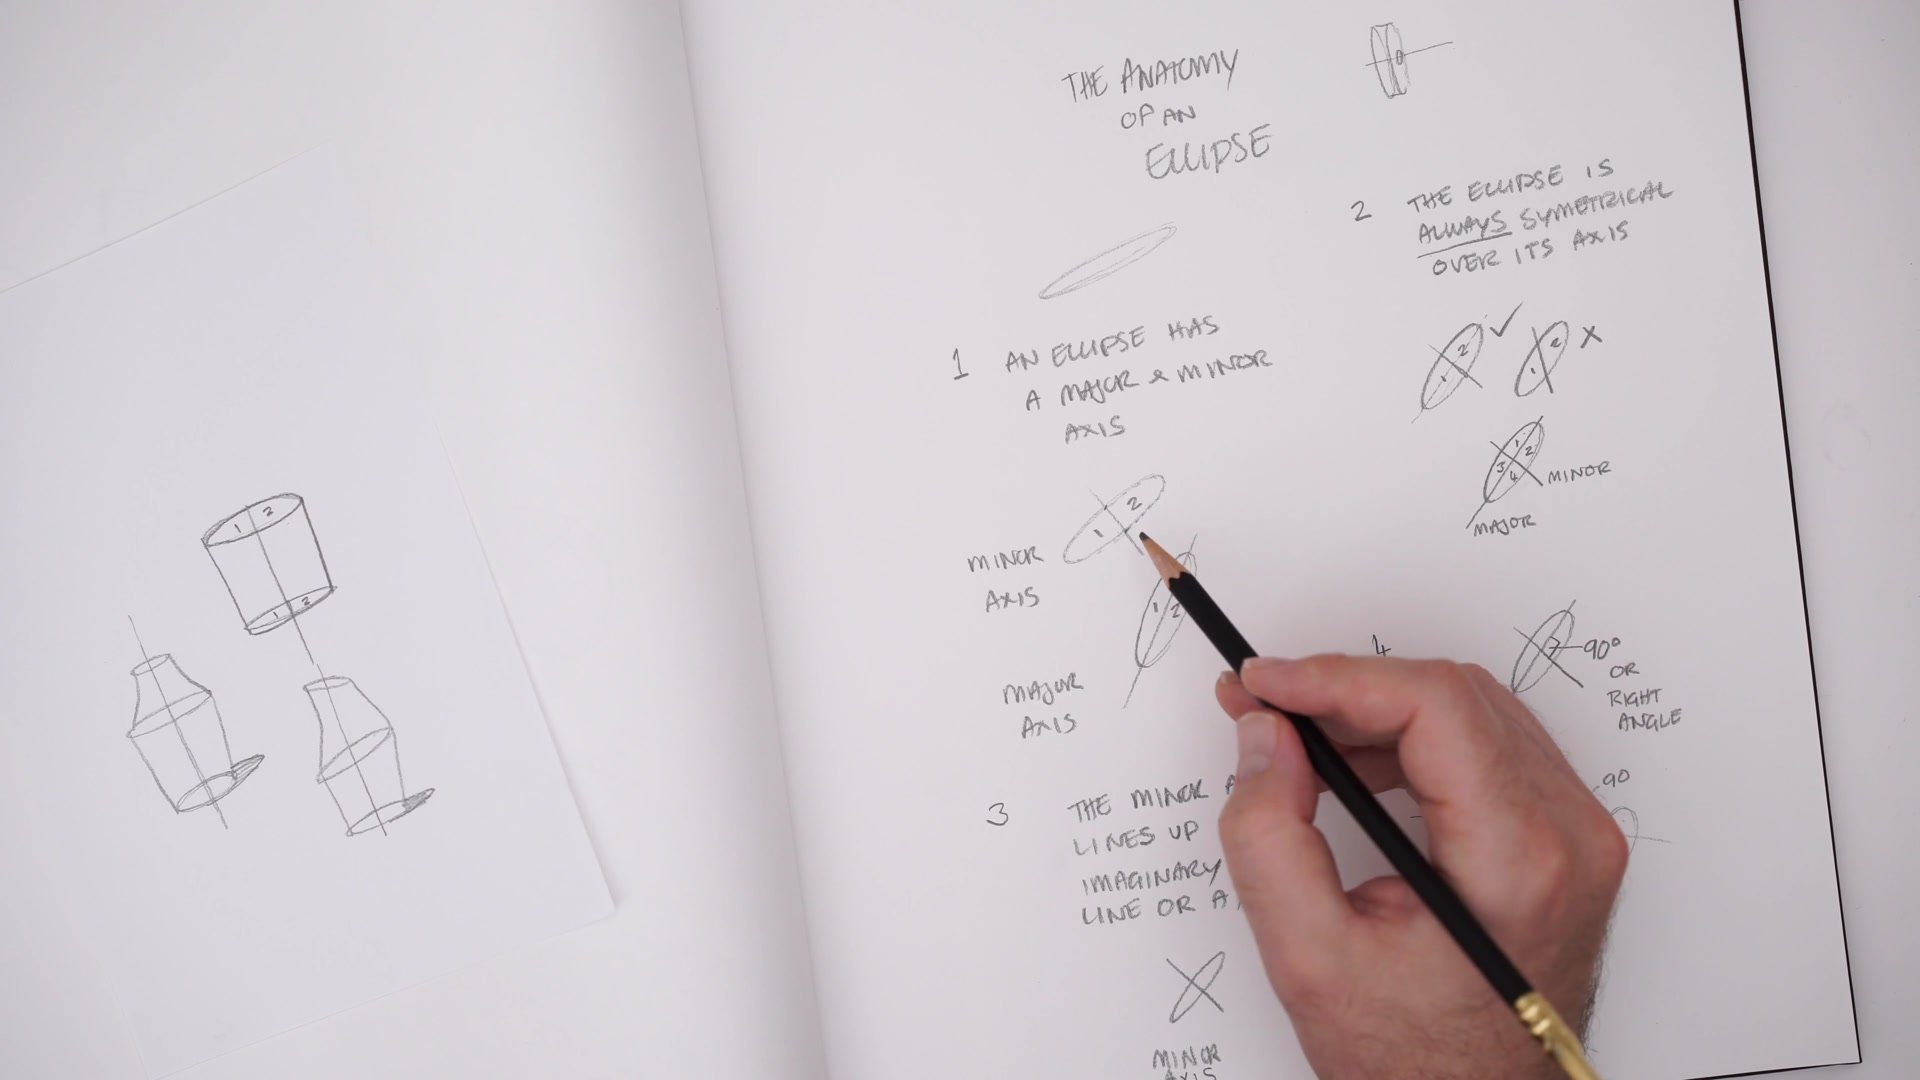
Every correctly drawn ellipse contains hidden geometry: a major axis and a minor axis. The minor axis divides the ellipse at its shortest dimension, while the major axis divides it at its longest dimension. These invisible lines are not something that exists in the real world, but they are the underlying structure that makes accurate drawing possible.
The minor axis is the critical one for cylinder construction. It functions like the axle of a wheel, running through the center of any cylindrical object. When drawing a toilet roll or a coffee cup, that imaginary axle is the minor axis, and every ellipse on that object needs to align with it. Understanding this relationship turns guesswork into a systematic approach for placing ellipses that actually line up.
Symmetry and Alignment

Symmetry Over the Axes
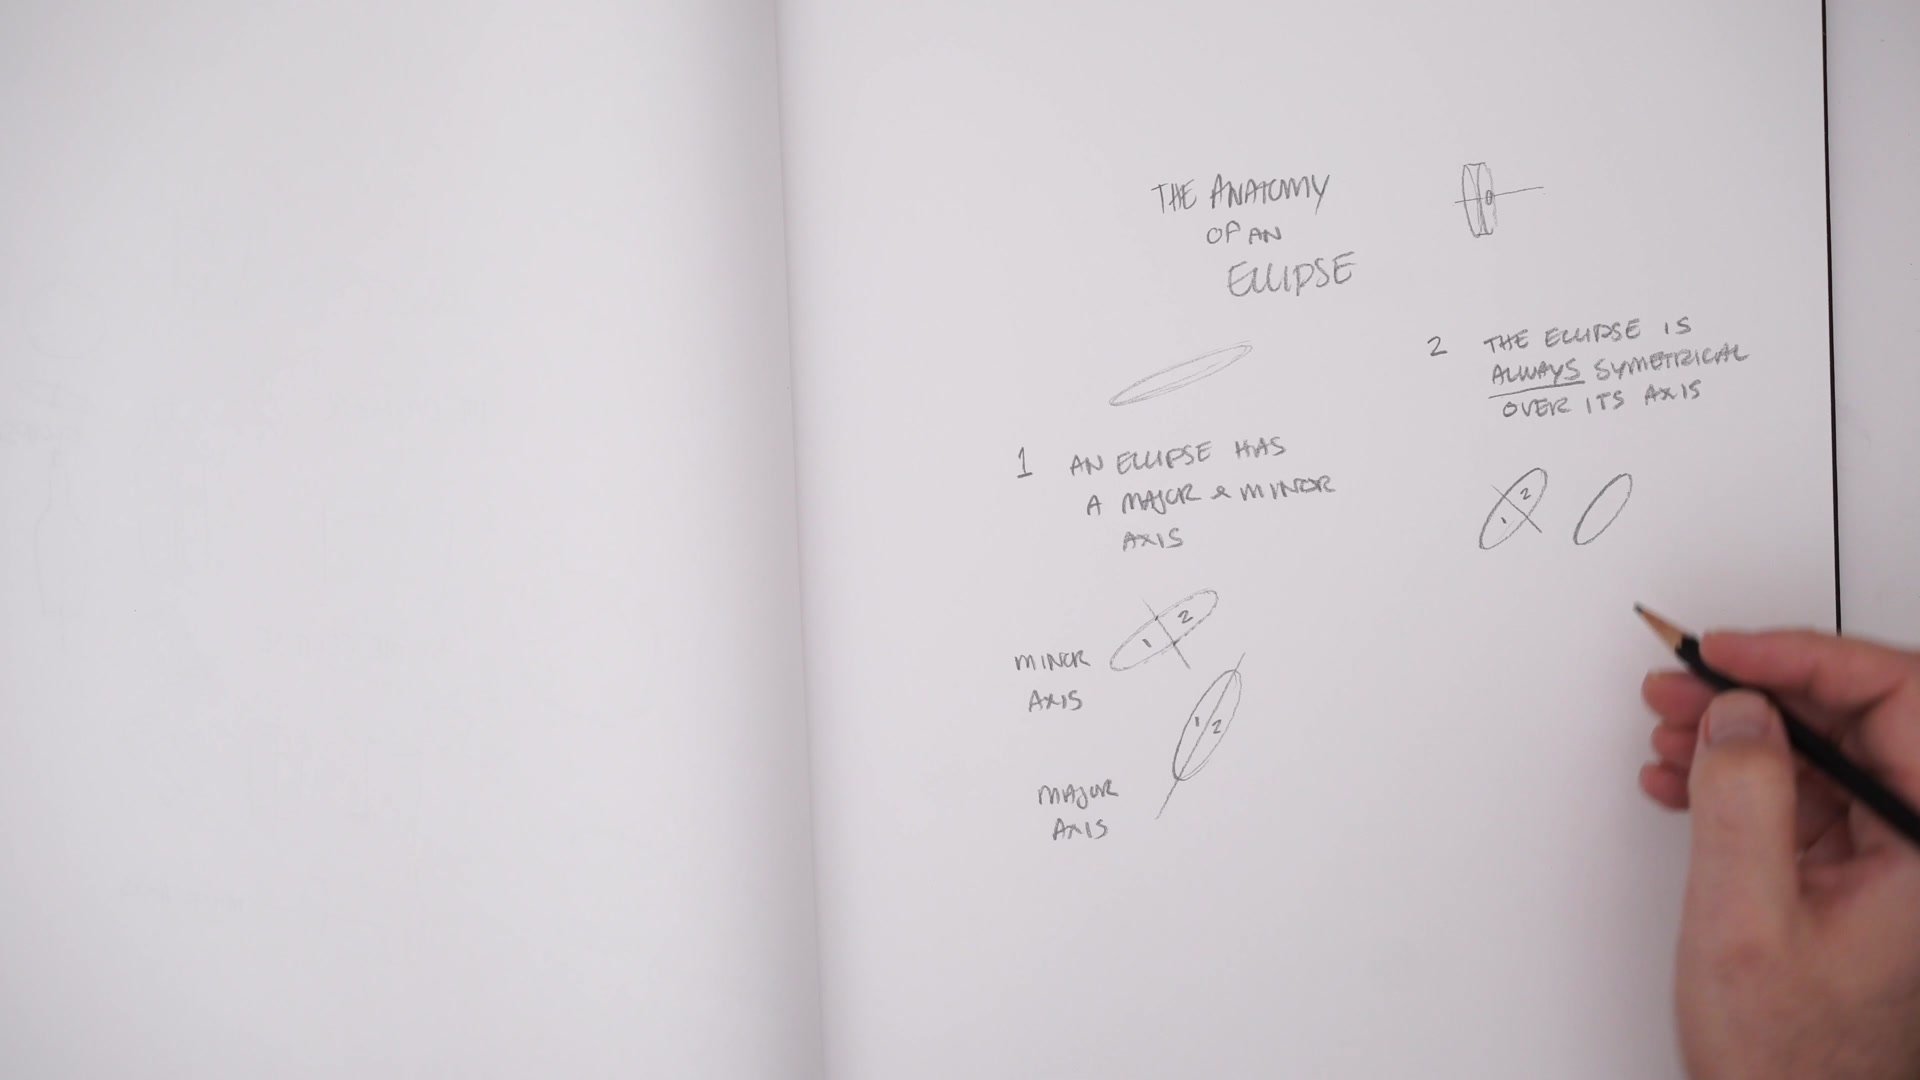
A true ellipse is always symmetrical over both its axes. The minor axis creates two identical halves, and the major axis does the same in the other direction, producing four symmetrical quarters. This is the key troubleshooting tool: if one side of an ellipse looks bigger than the other, or if it bulges in one direction, the axis placement is wrong.
The major and minor axes always meet at 90 degrees on the page. This means that once the minor axis is established, drawing a perpendicular line gives the major axis, which then makes it much easier to construct an ellipse with four even quarters. This hidden geometry is what separates a wobbly oval from a convincing ellipse that sits correctly in perspective.
Applied Practice
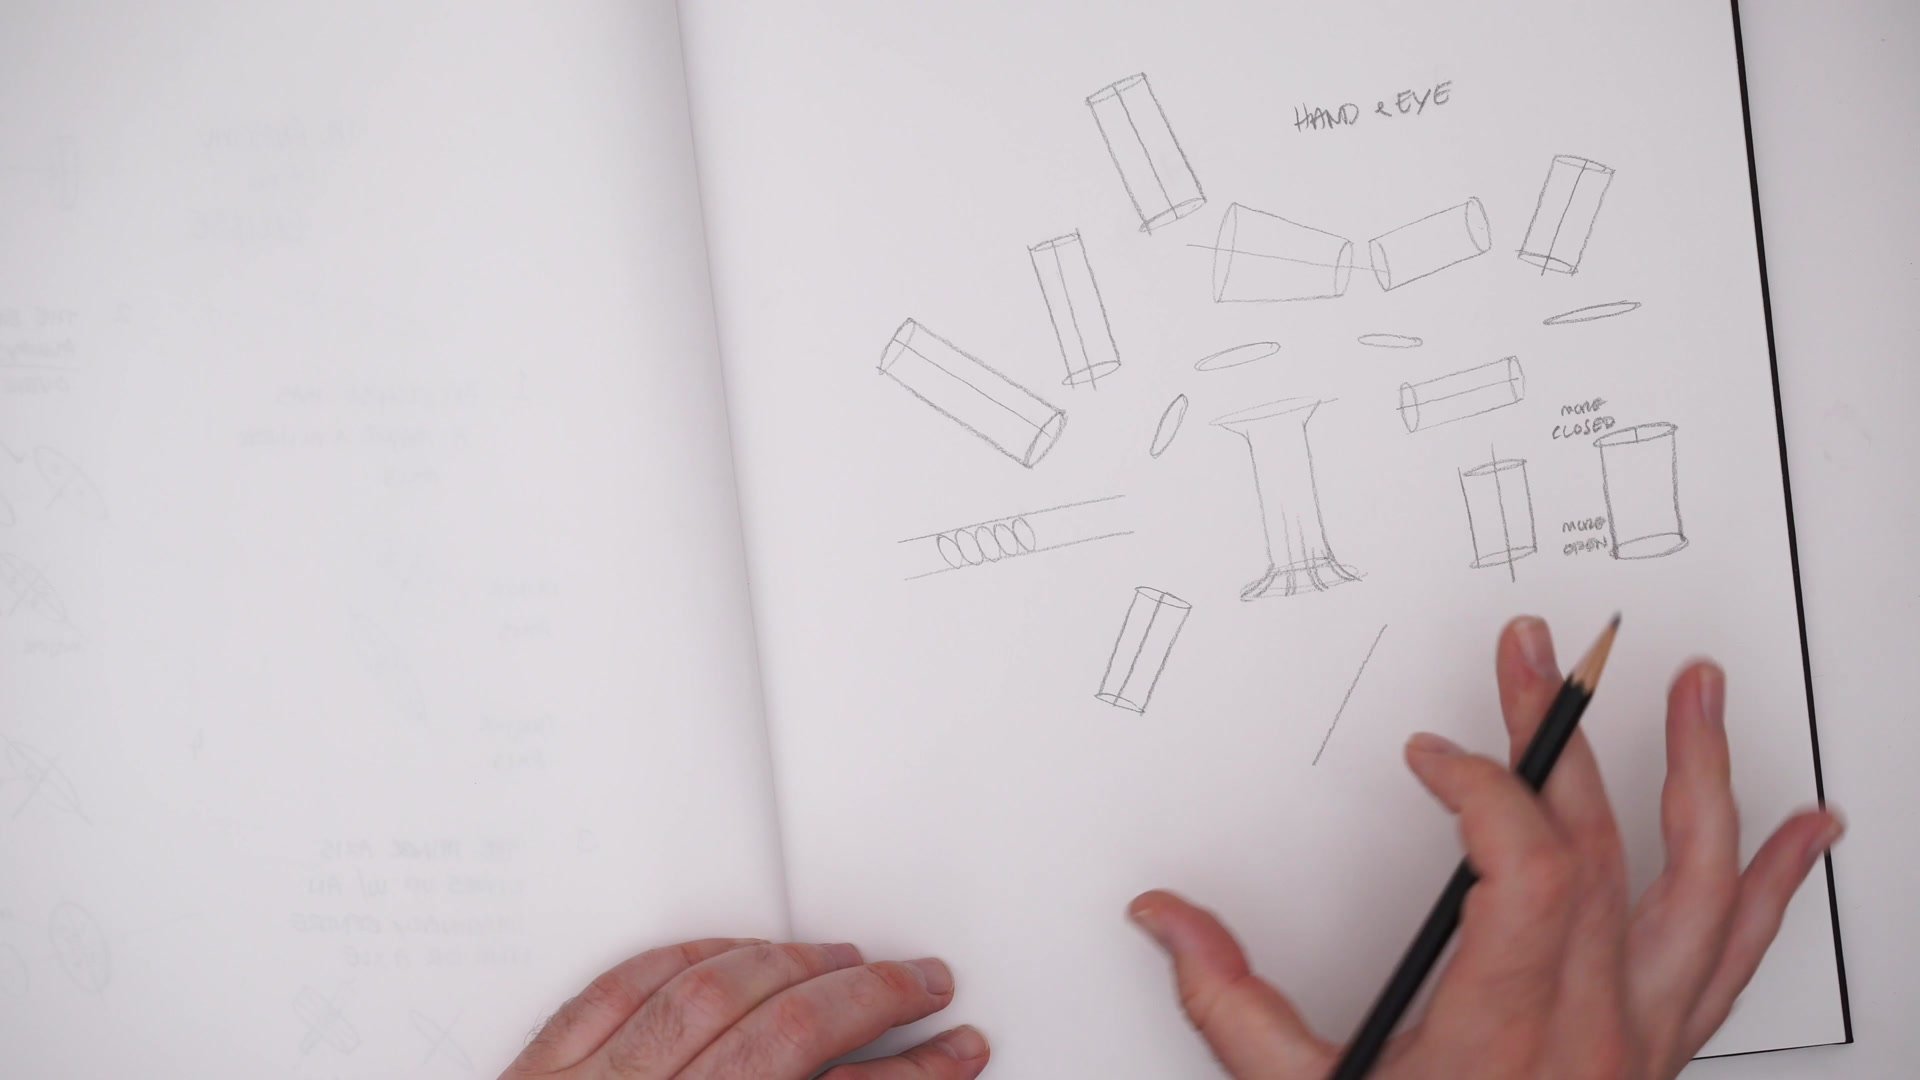
Ellipses in Perspective
When drawing cylinders, the relationship between ellipses changes based on viewing angle. An ellipse closer to the horizon line appears more closed, while one further below it appears more open. This is observable with any physical cylinder: holding a toilet roll at eye level shows a nearly flat ellipse at the top, while looking down reveals an increasingly open one.
The practical takeaway is that when constructing a cylinder, the bottom ellipse should be more open than the top one when viewed from above. This observation replaces complicated perspective calculations with a simple visual logic. Practicing cylinders at different angles, rather than drawing them statically, trains the hand-eye coordination needed for real drawing situations where cylindrical forms appear at unpredictable orientations throughout anatomy, objects, and environments.
Building Forms
Key Techniques
Minor Axis as Axle: The minor axis functions like the axle of a wheel, running through the center of any cylindrical object. All ellipses on that form must align with this invisible center line.
Symmetry for Troubleshooting: A true ellipse divides into four identical quarters across its major and minor axes. Checking for symmetry reveals drawing errors that are otherwise hard to diagnose.
90-Degree Relationship: The major and minor axes always meet at right angles on the page. Drawing one perpendicular to the other provides a reliable framework for constructing accurate ellipses.
The Coffee Cup Exercise
Draw Simple Cylinders: Sketch small coffee cups or toilet rolls at various angles, focusing on lining up two ellipses along a shared minor axis. Start with a minor axis line and place ellipses along it.
Test Your Accuracy: After drawing two ellipses freehand, draw the minor axis through them to check alignment. If the axis does not bisect both ellipses symmetrically, adjust and try again.
Apply to Real Subjects: Once comfortable with basic cylinders, use these forms to block in arms, tree trunks, bottles, and other cylindrical objects. Practice a little each day rather than marathon sessions.


