How To Draw Noses - Constructive Anatomy
Summary
Constructive Nose Anatomy
Drawing noses in three dimensions trips up most artists because the typical approach starts from flat two-dimensional mapping. That method locks the nose into a single view and makes rotating it from different angles almost impossible. Constructive anatomy flips the process: start with the primary triangular form that projects out from the face, understand how it sits relative to Loomis proportions, and then build secondary and tertiary details on top of that structural foundation.
This session walks through the entire method by constructing noses on different character types, from standard human heads to dwarves and orcs. By modifying the primary form and projection angle, wildly different nose designs emerge from the same underlying technique. The focus stays on controlling the big shape first, because that is what makes a nose readable from any angle.
Proportional Placement
Placing the Nose on the Face
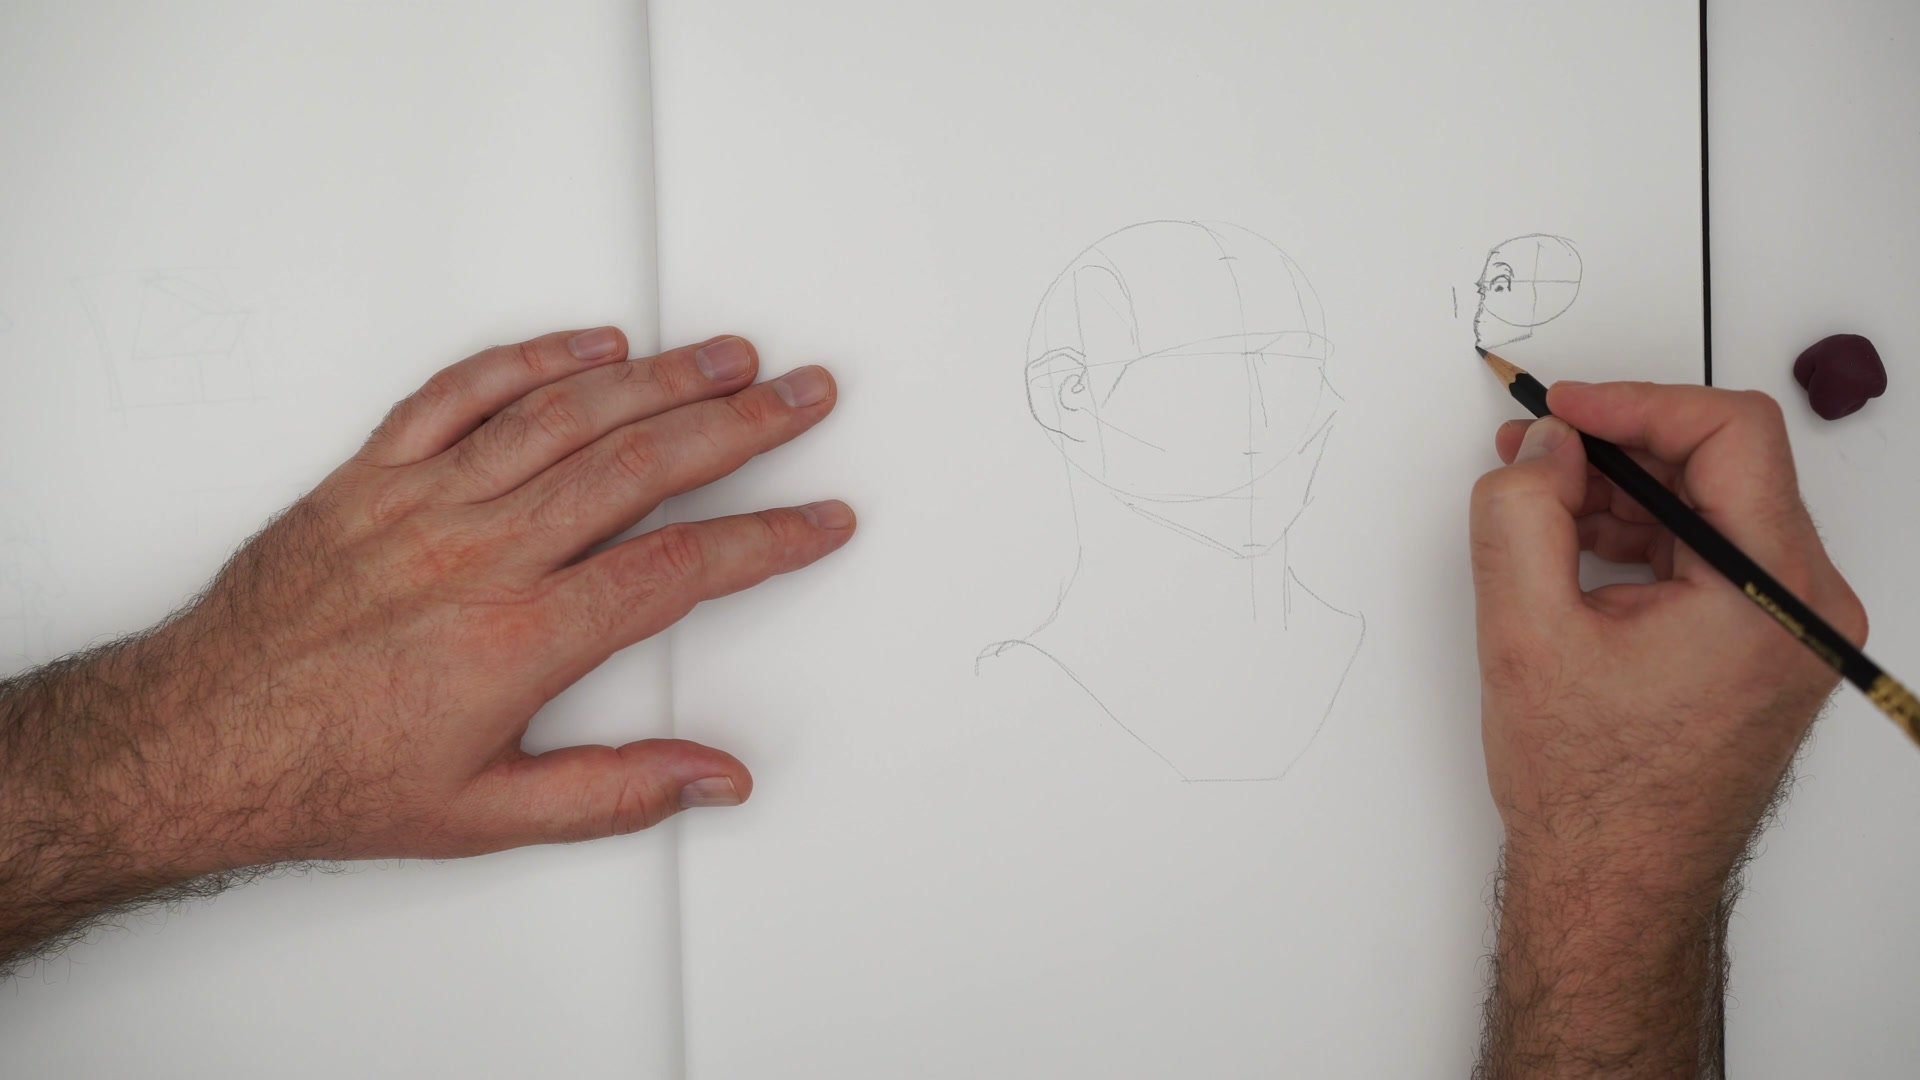
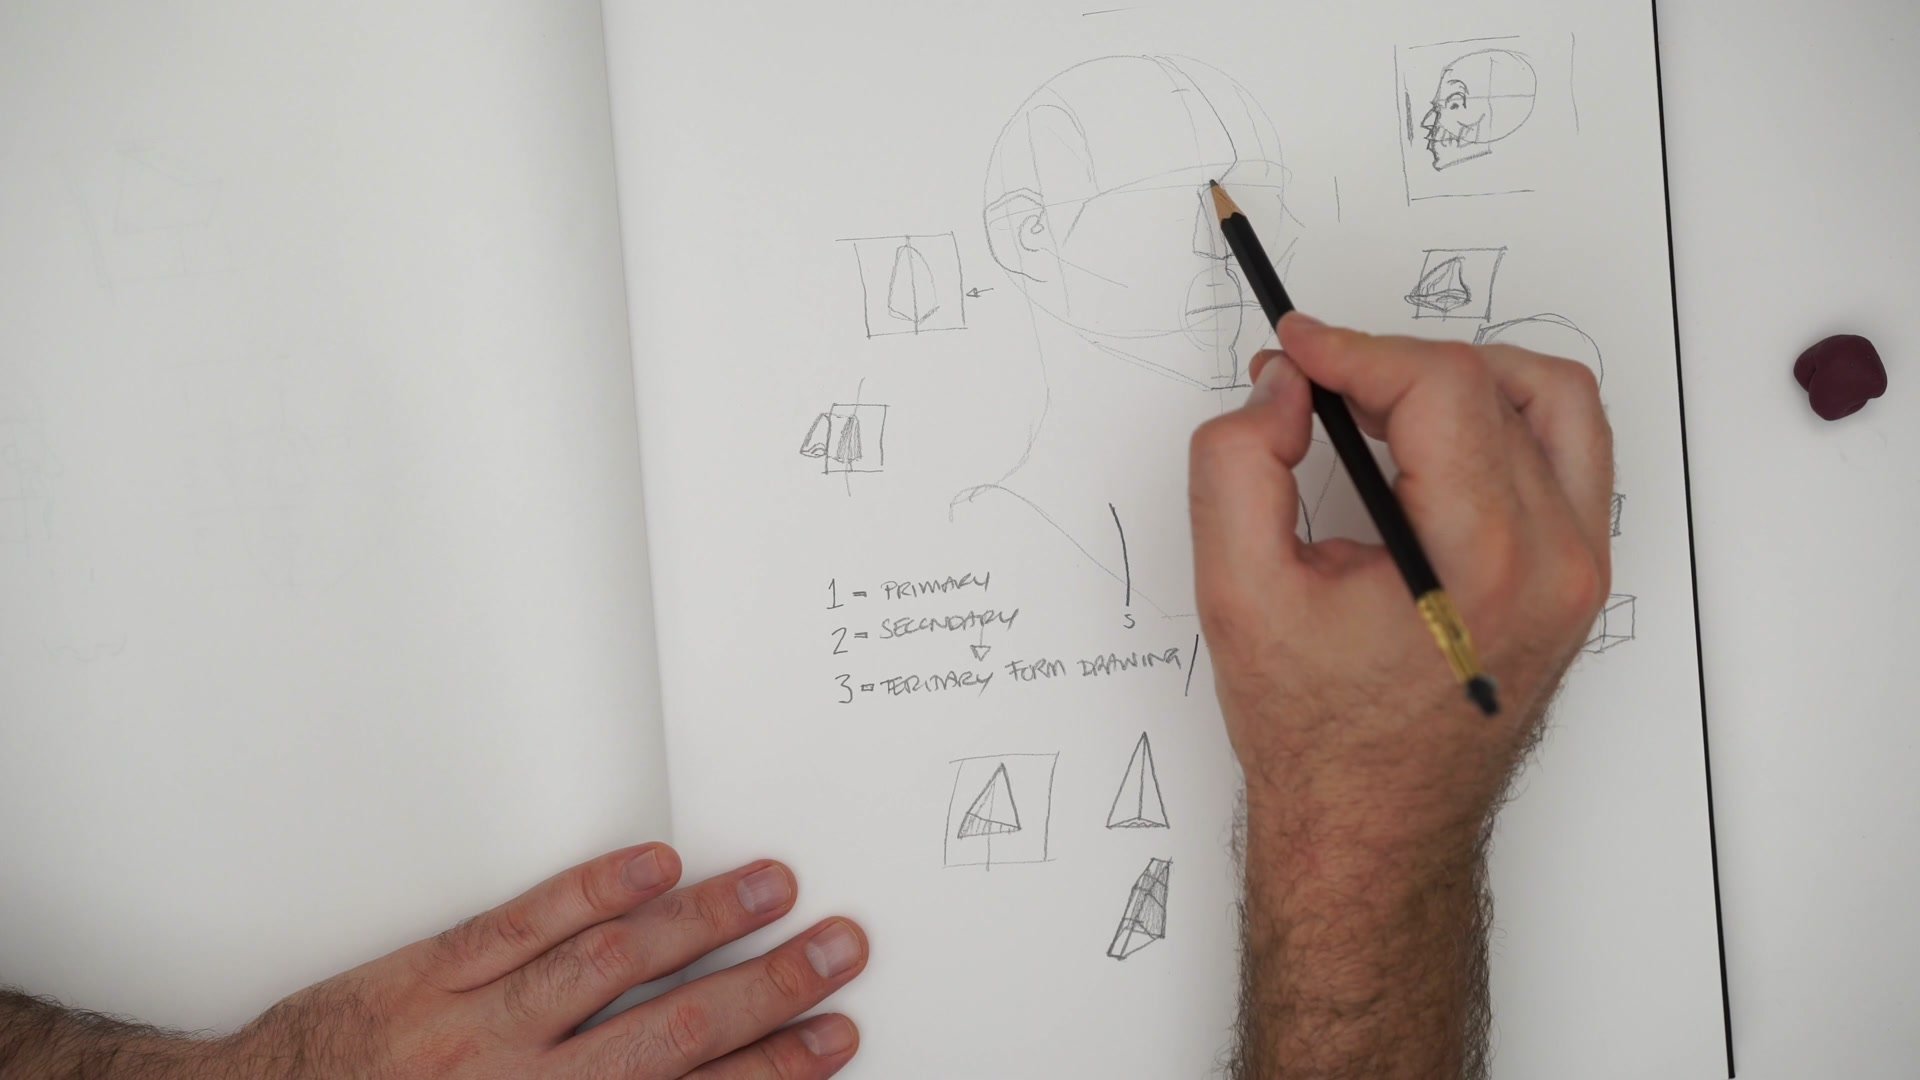
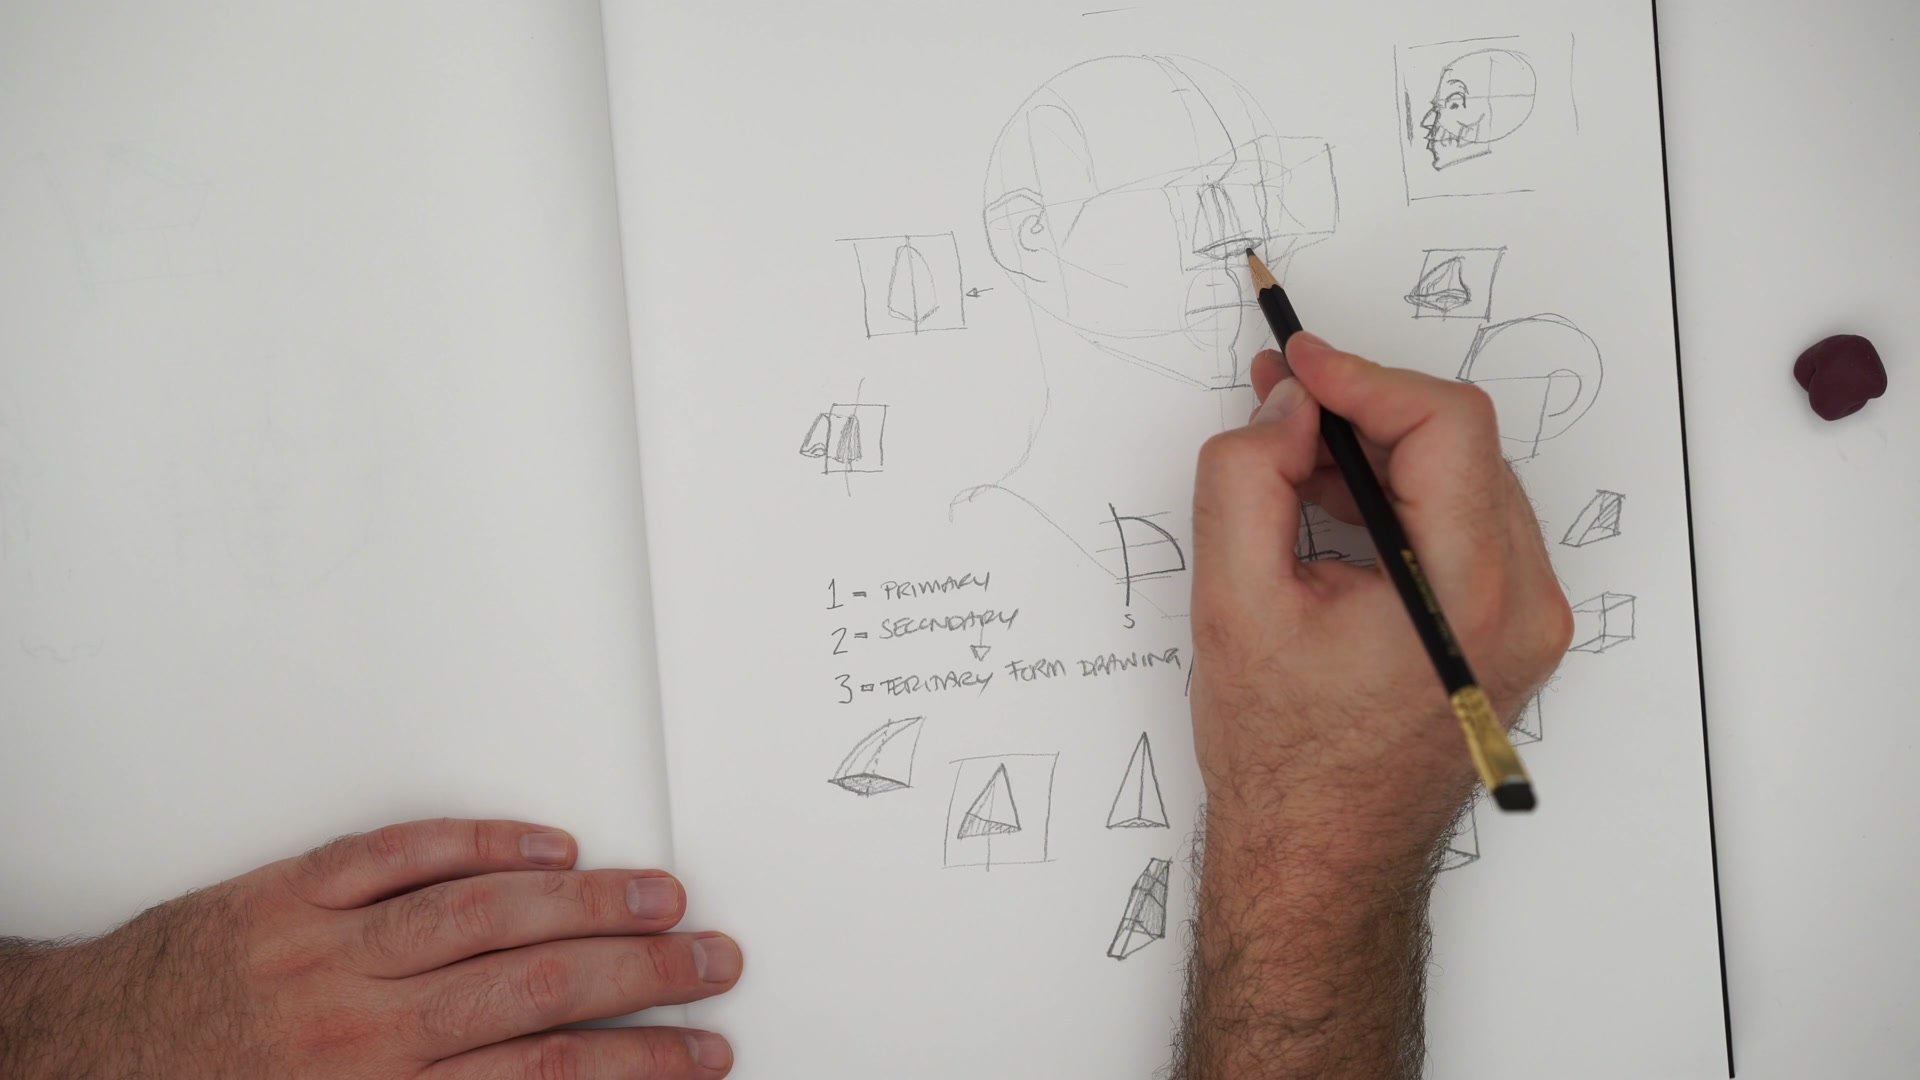
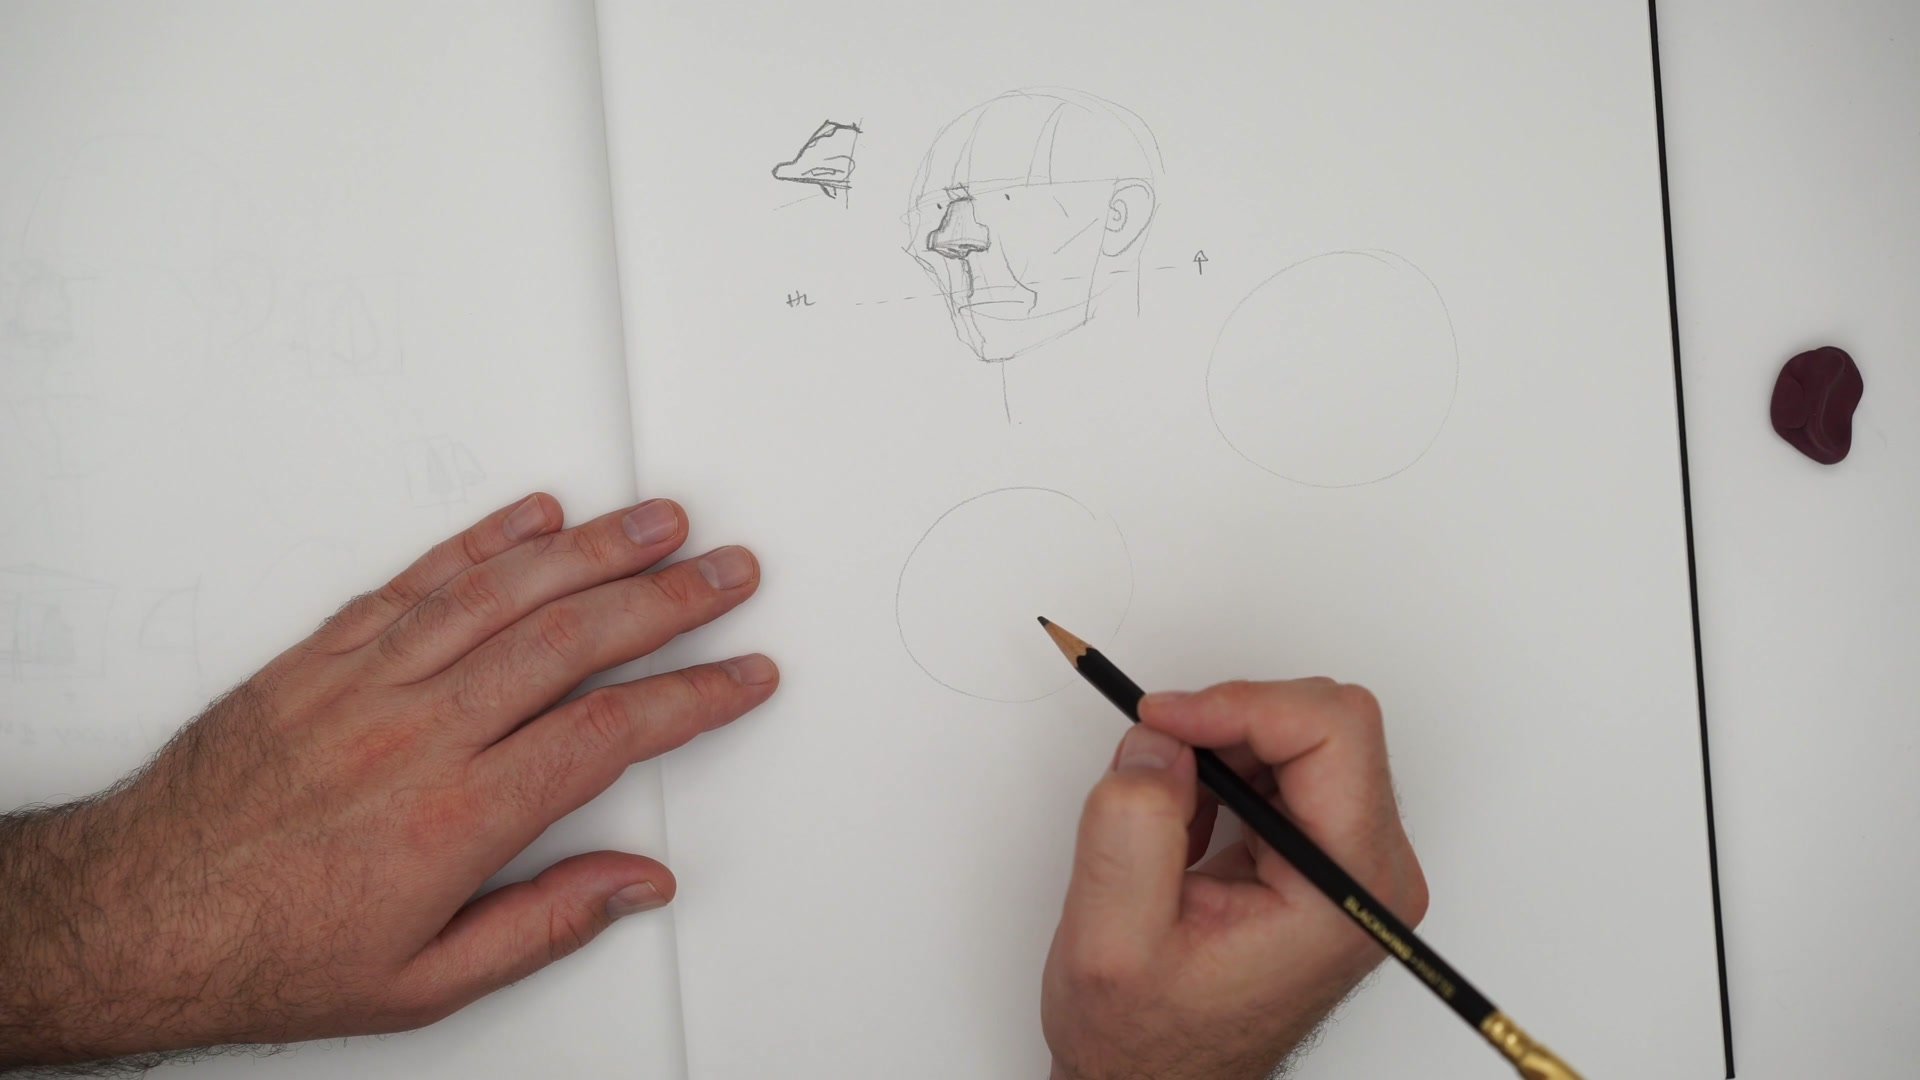
Before projecting any three-dimensional form, the nose needs a home on the face. Using Loomis proportions, the face divides into three vertical segments: hairline to brow, brow to base of nose, and base of nose to chin. The nose occupies that middle zone, and its base connects to the mound of the mouth where the lips push forward. Understanding that the surface the nose sits on is not flat but gently curved changes everything about placement.
The technique starts by imagining the face without a nose and drawing a flat silhouette shape where the nose footprint would go. This two-dimensional sticker on the face becomes the launching point. Center lines track across this shape to establish where the nose projects outward, and from there the three-dimensional construction begins. Designing the footprint first gives complete control over width, position, and overall character before any volume gets added.
Primary Form Construction
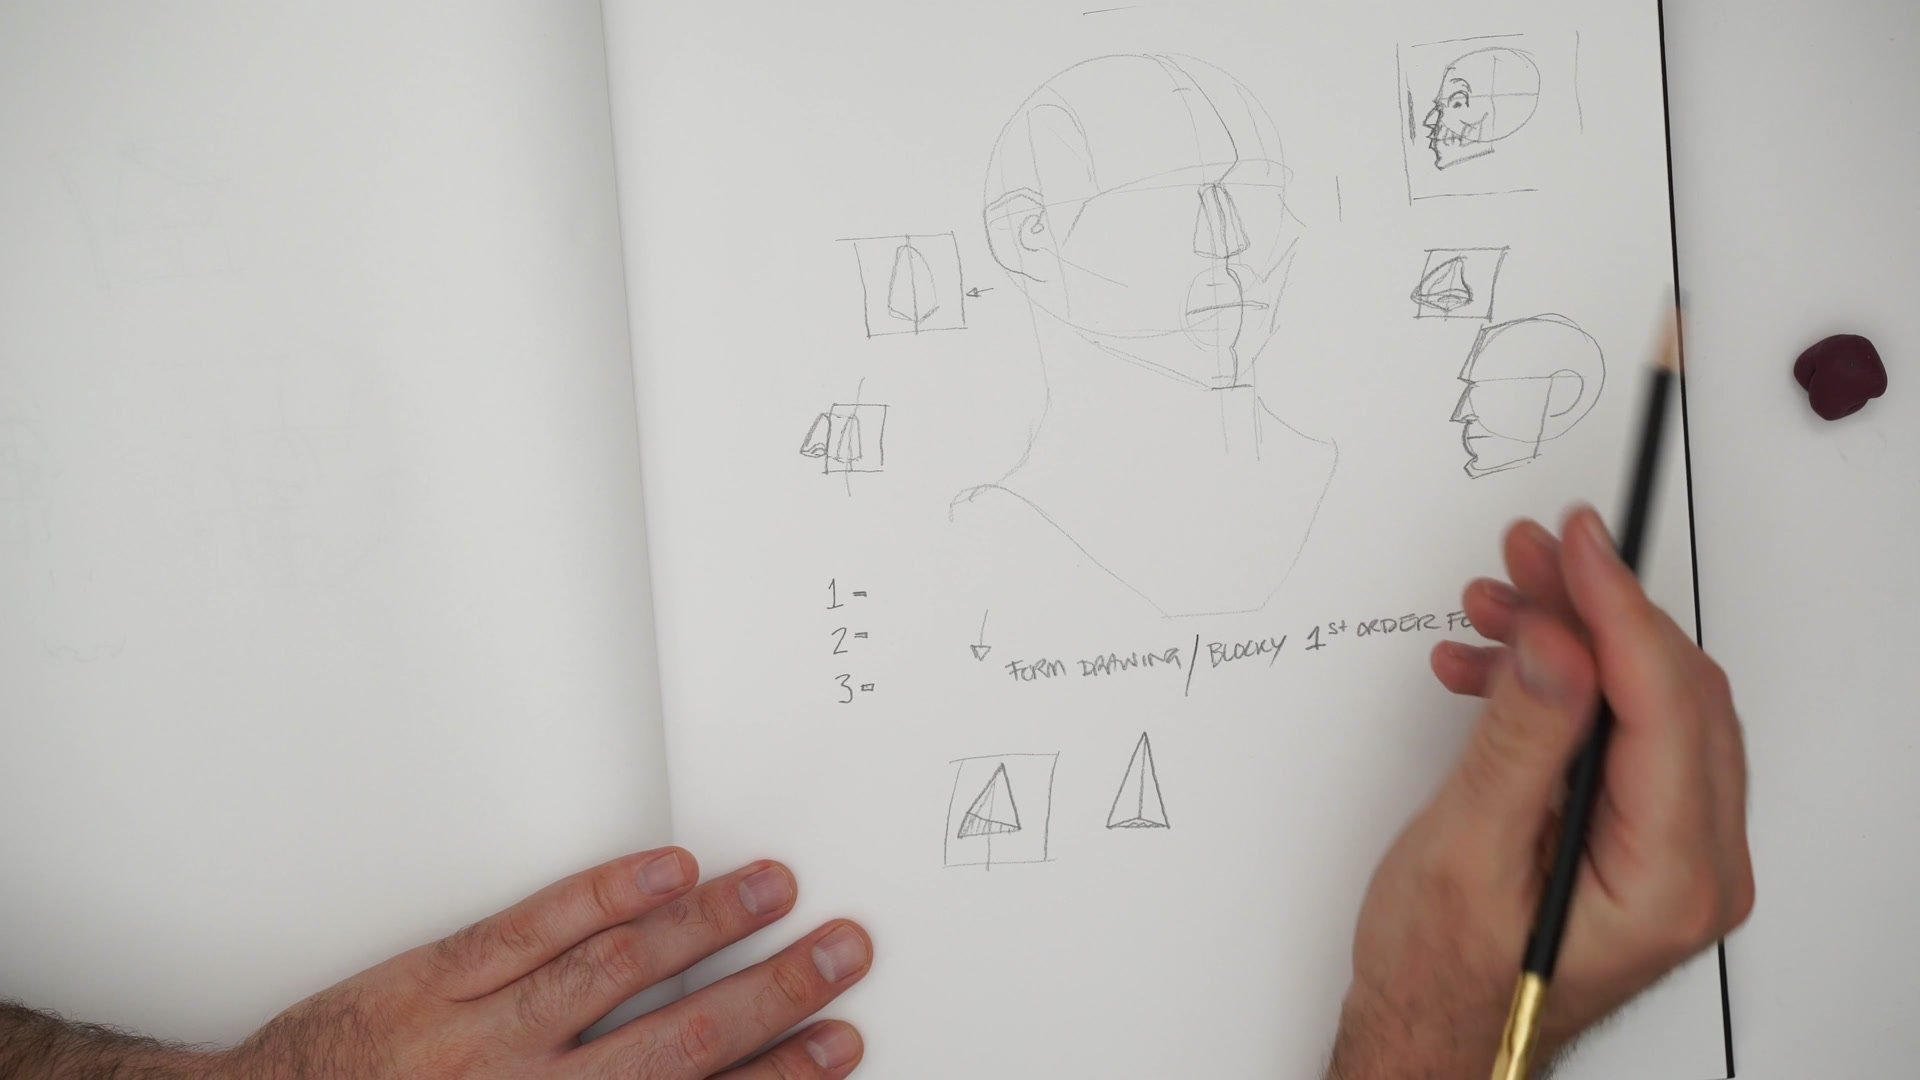
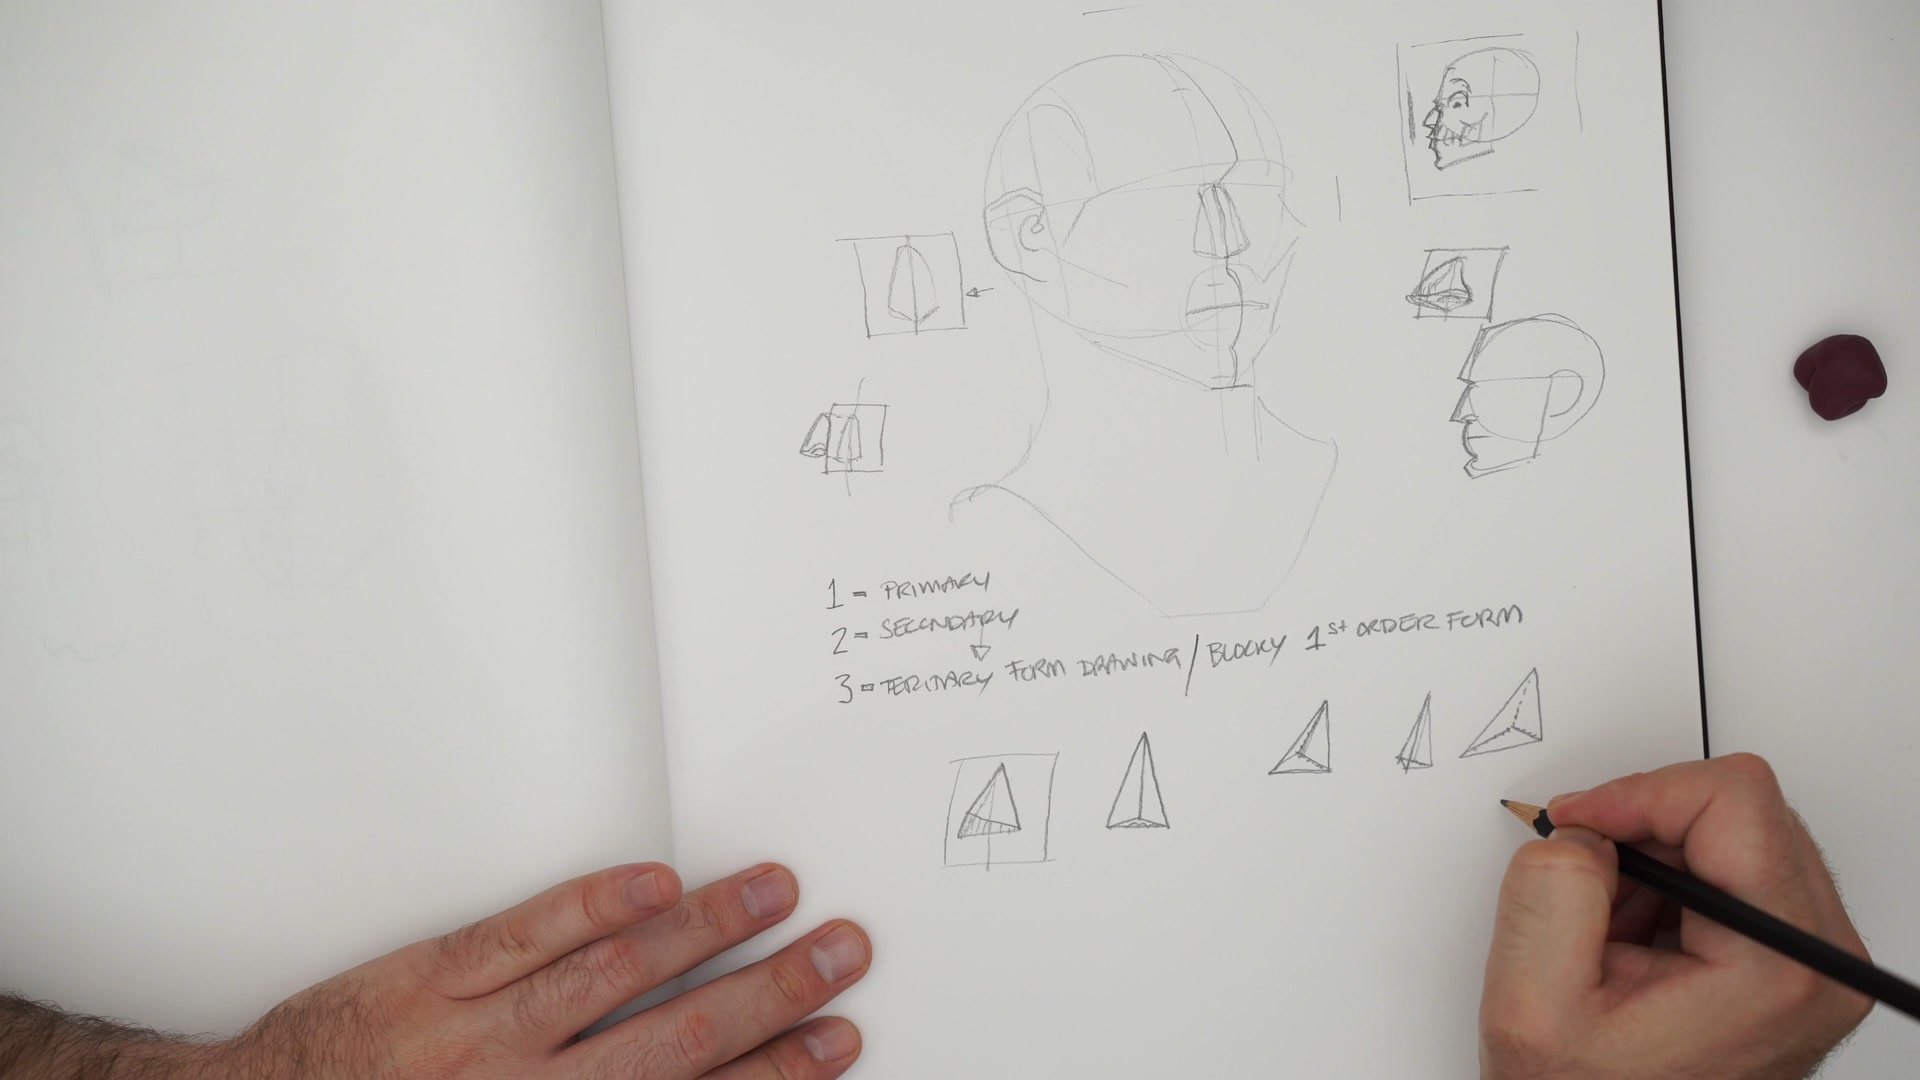
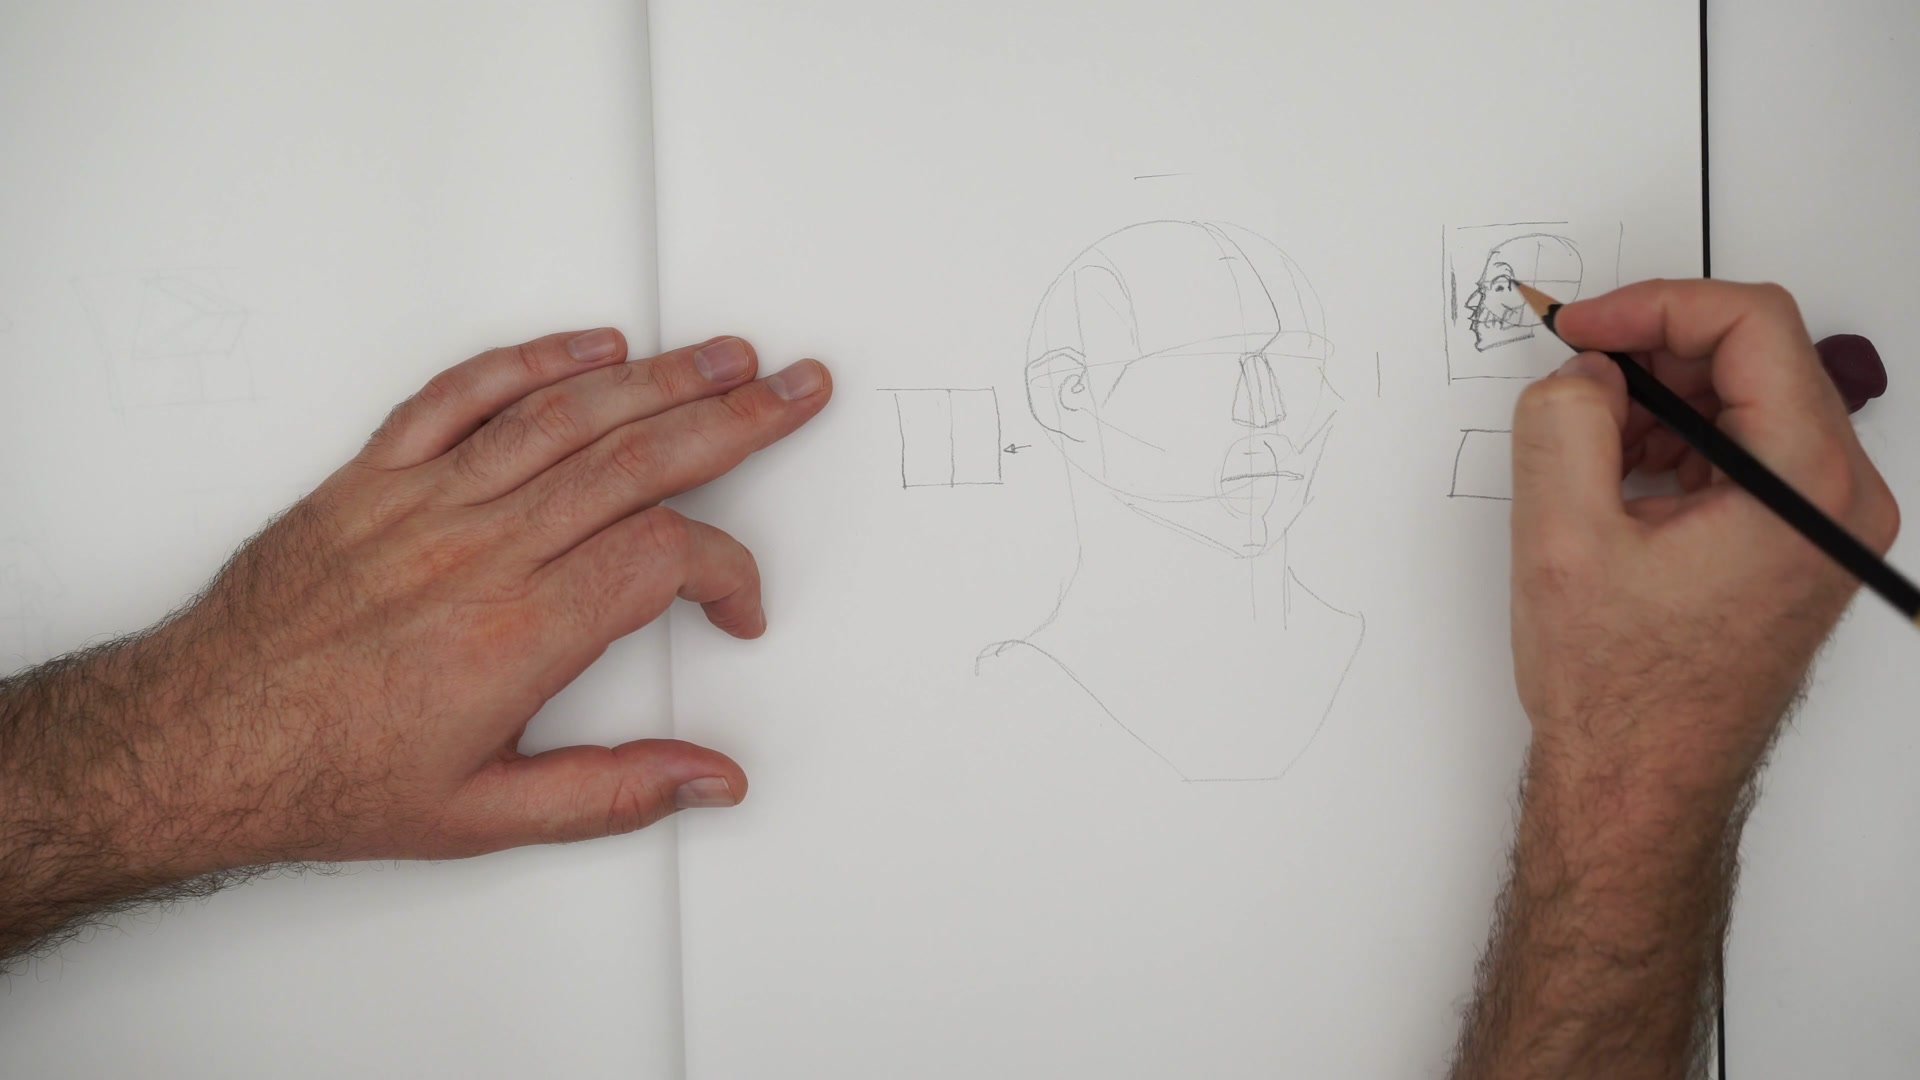
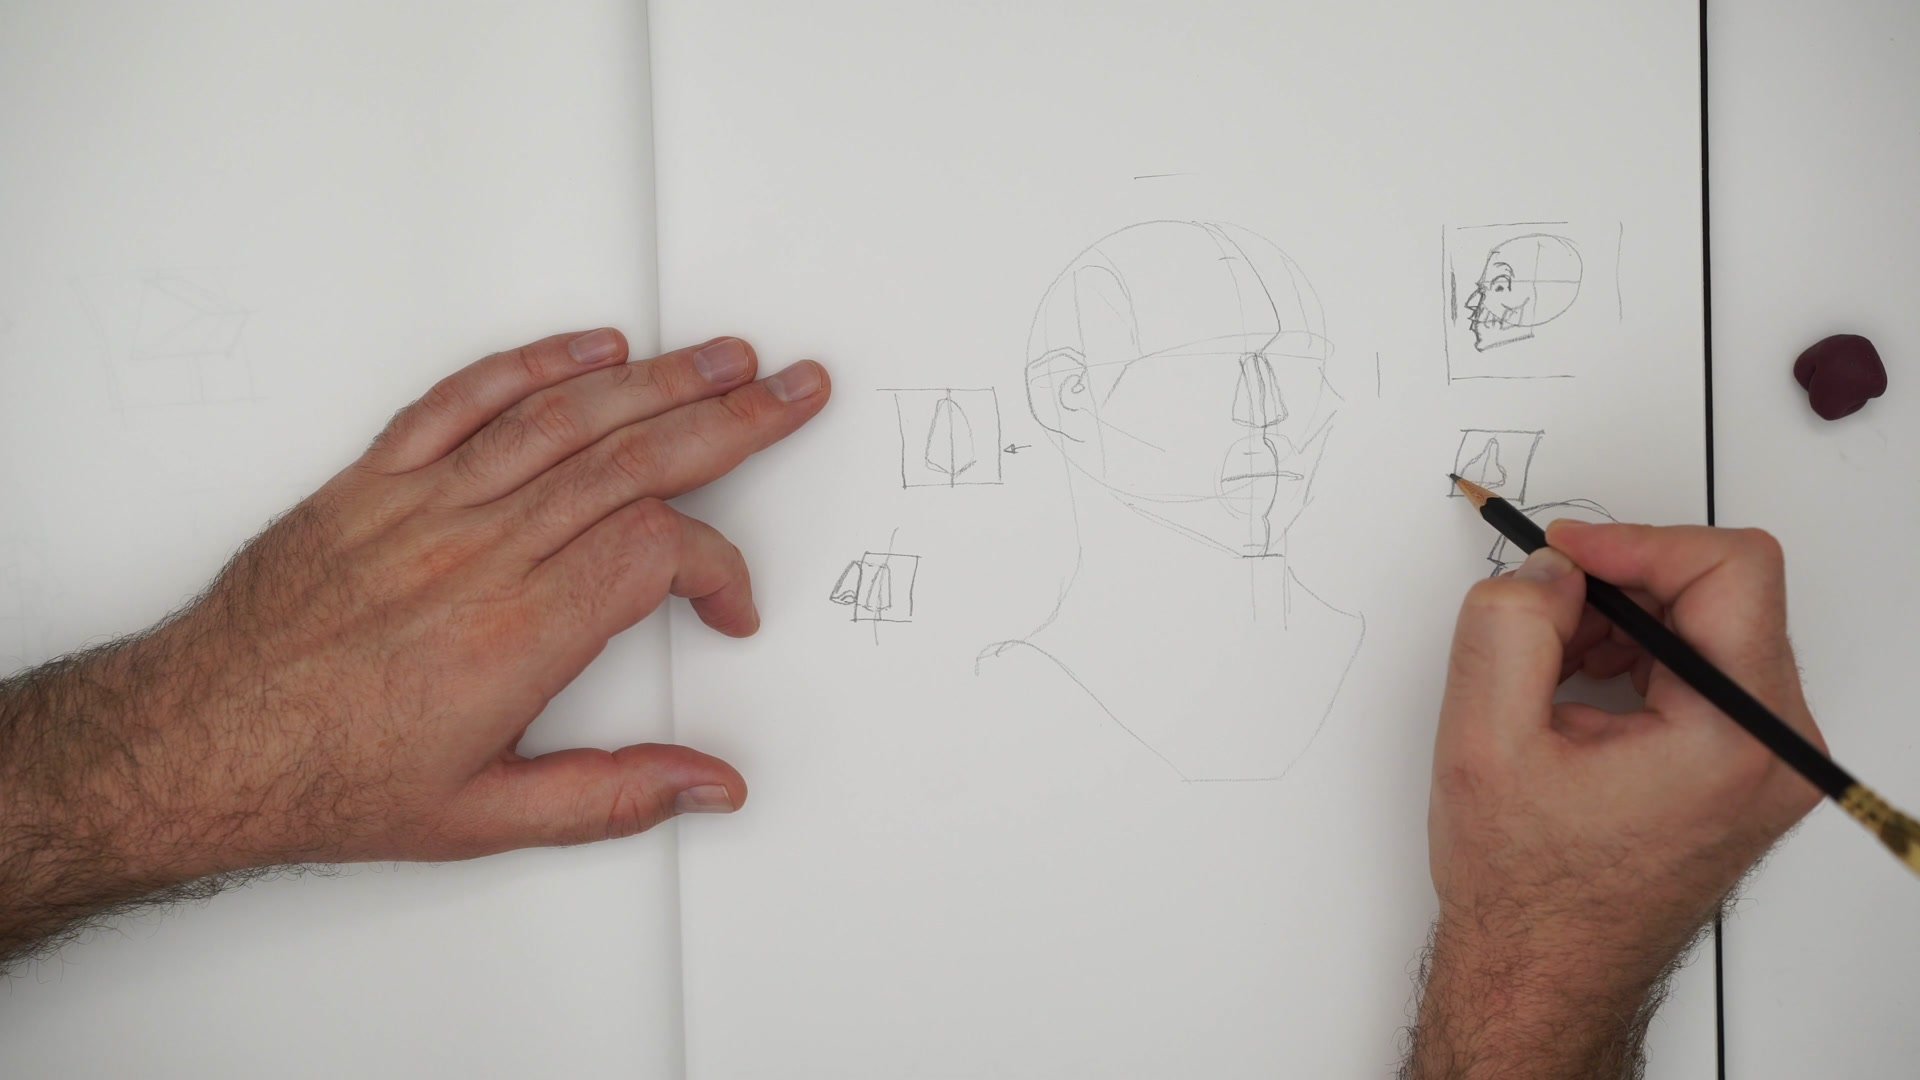
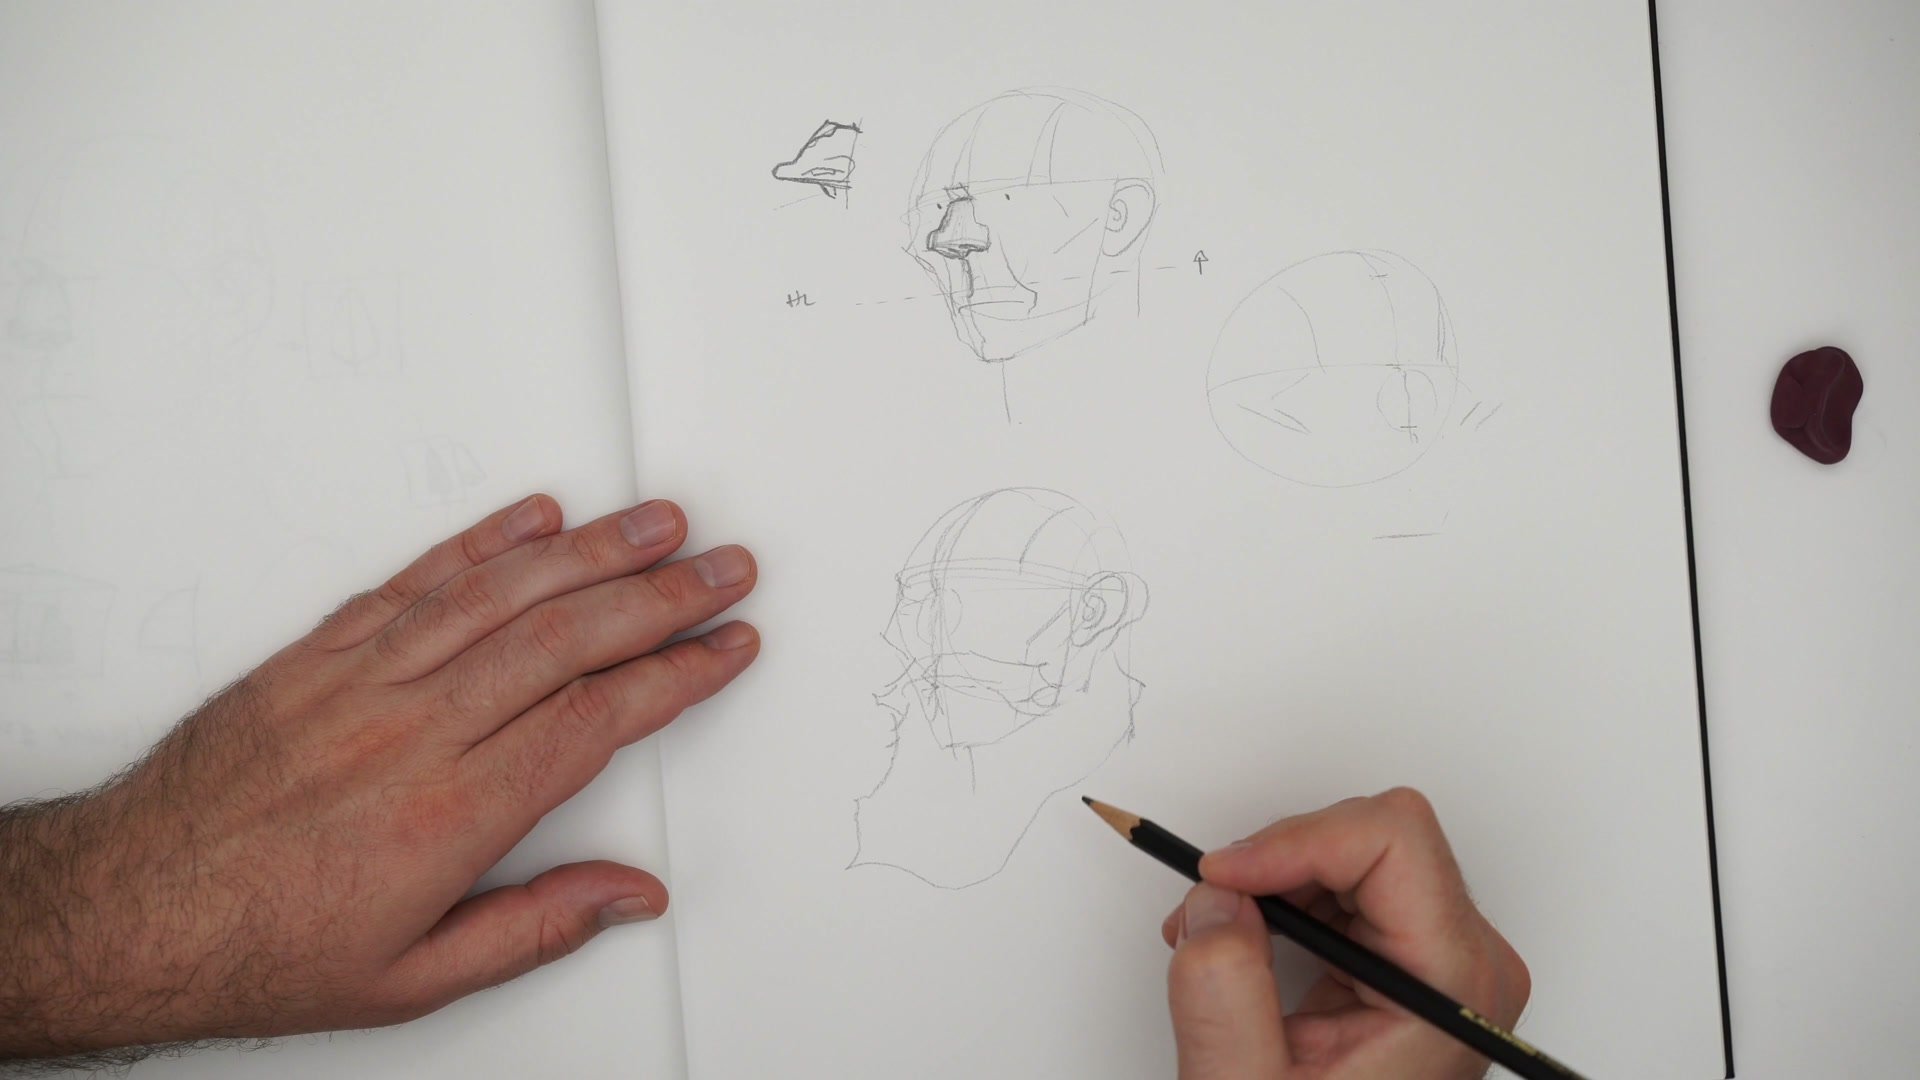
Primary Form Projection
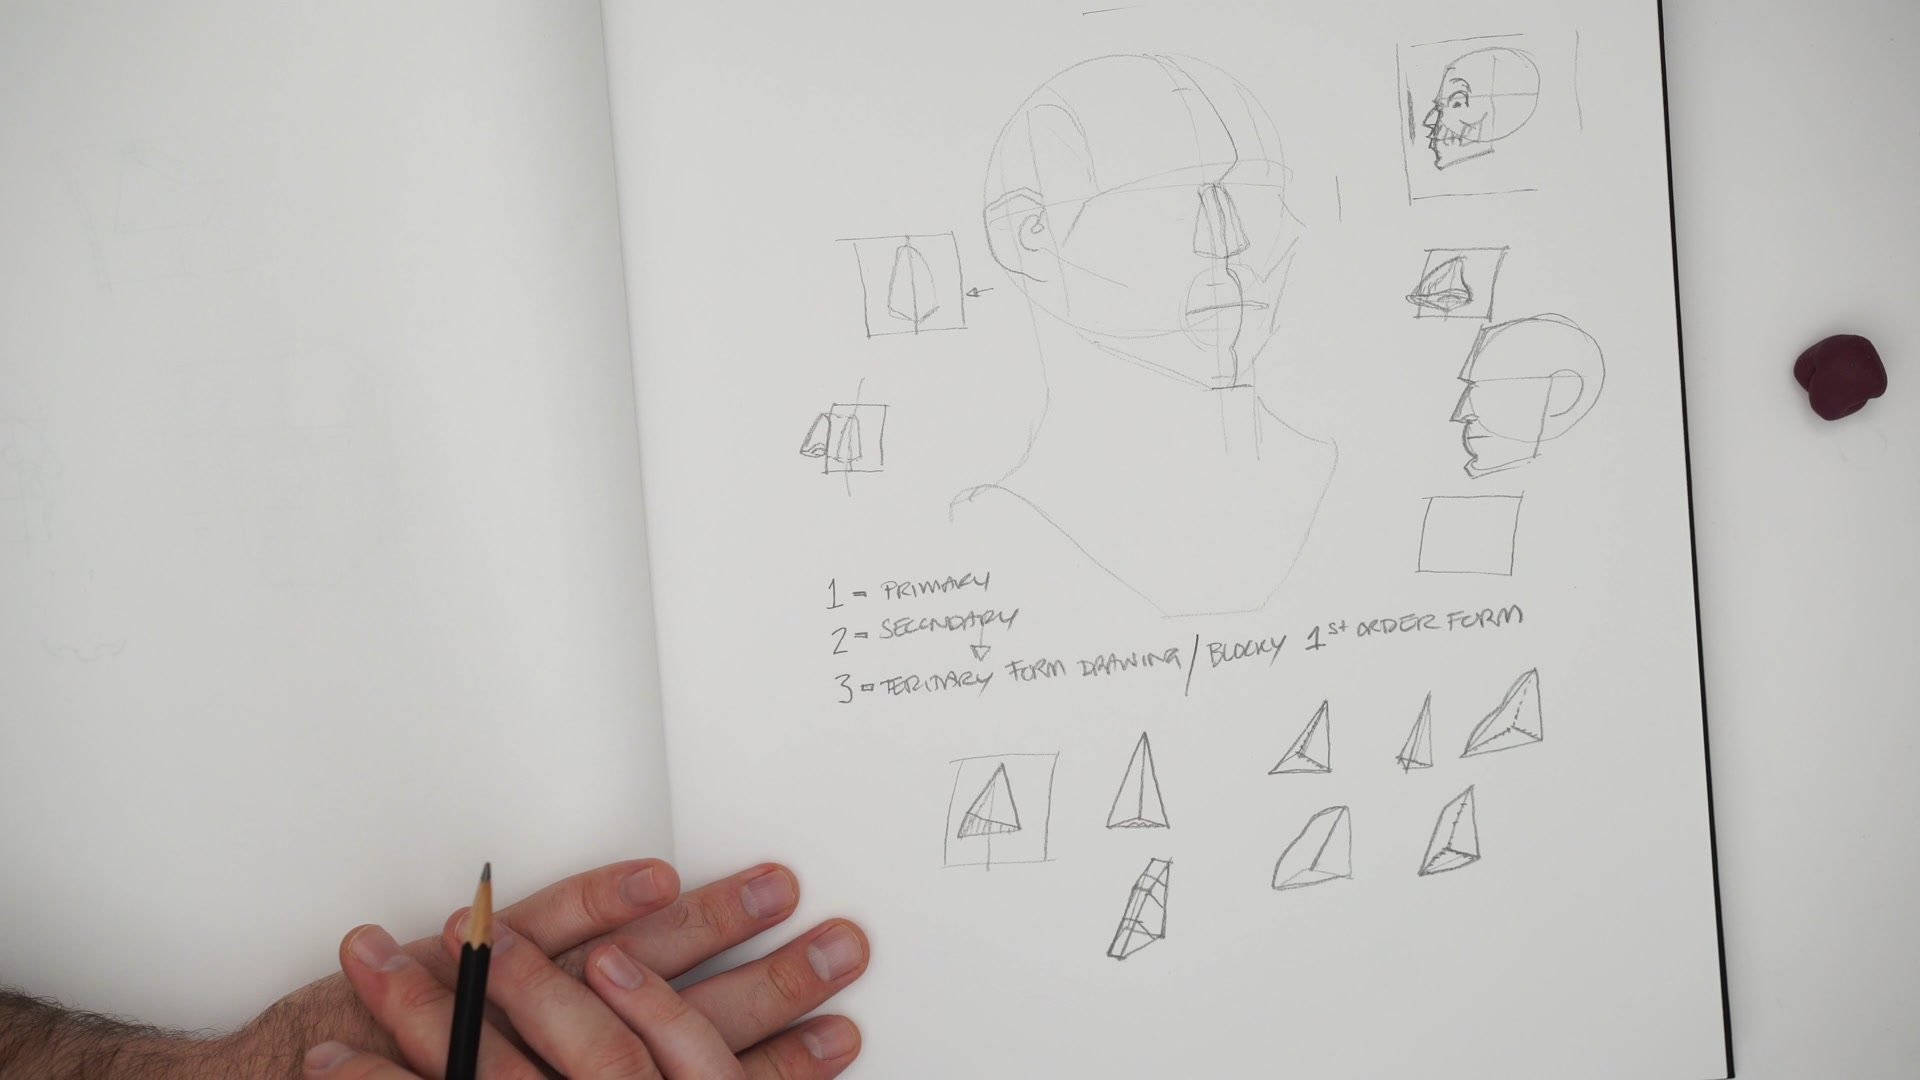
The nose at its most basic is a triangular pyramid projecting out from the face. This primary form is the minimum viable product for dimensional nose drawing. Getting comfortable with this shape means being able to rotate it, scale it, and modify its proportions to create entirely different nose types from the same constructive foundation.
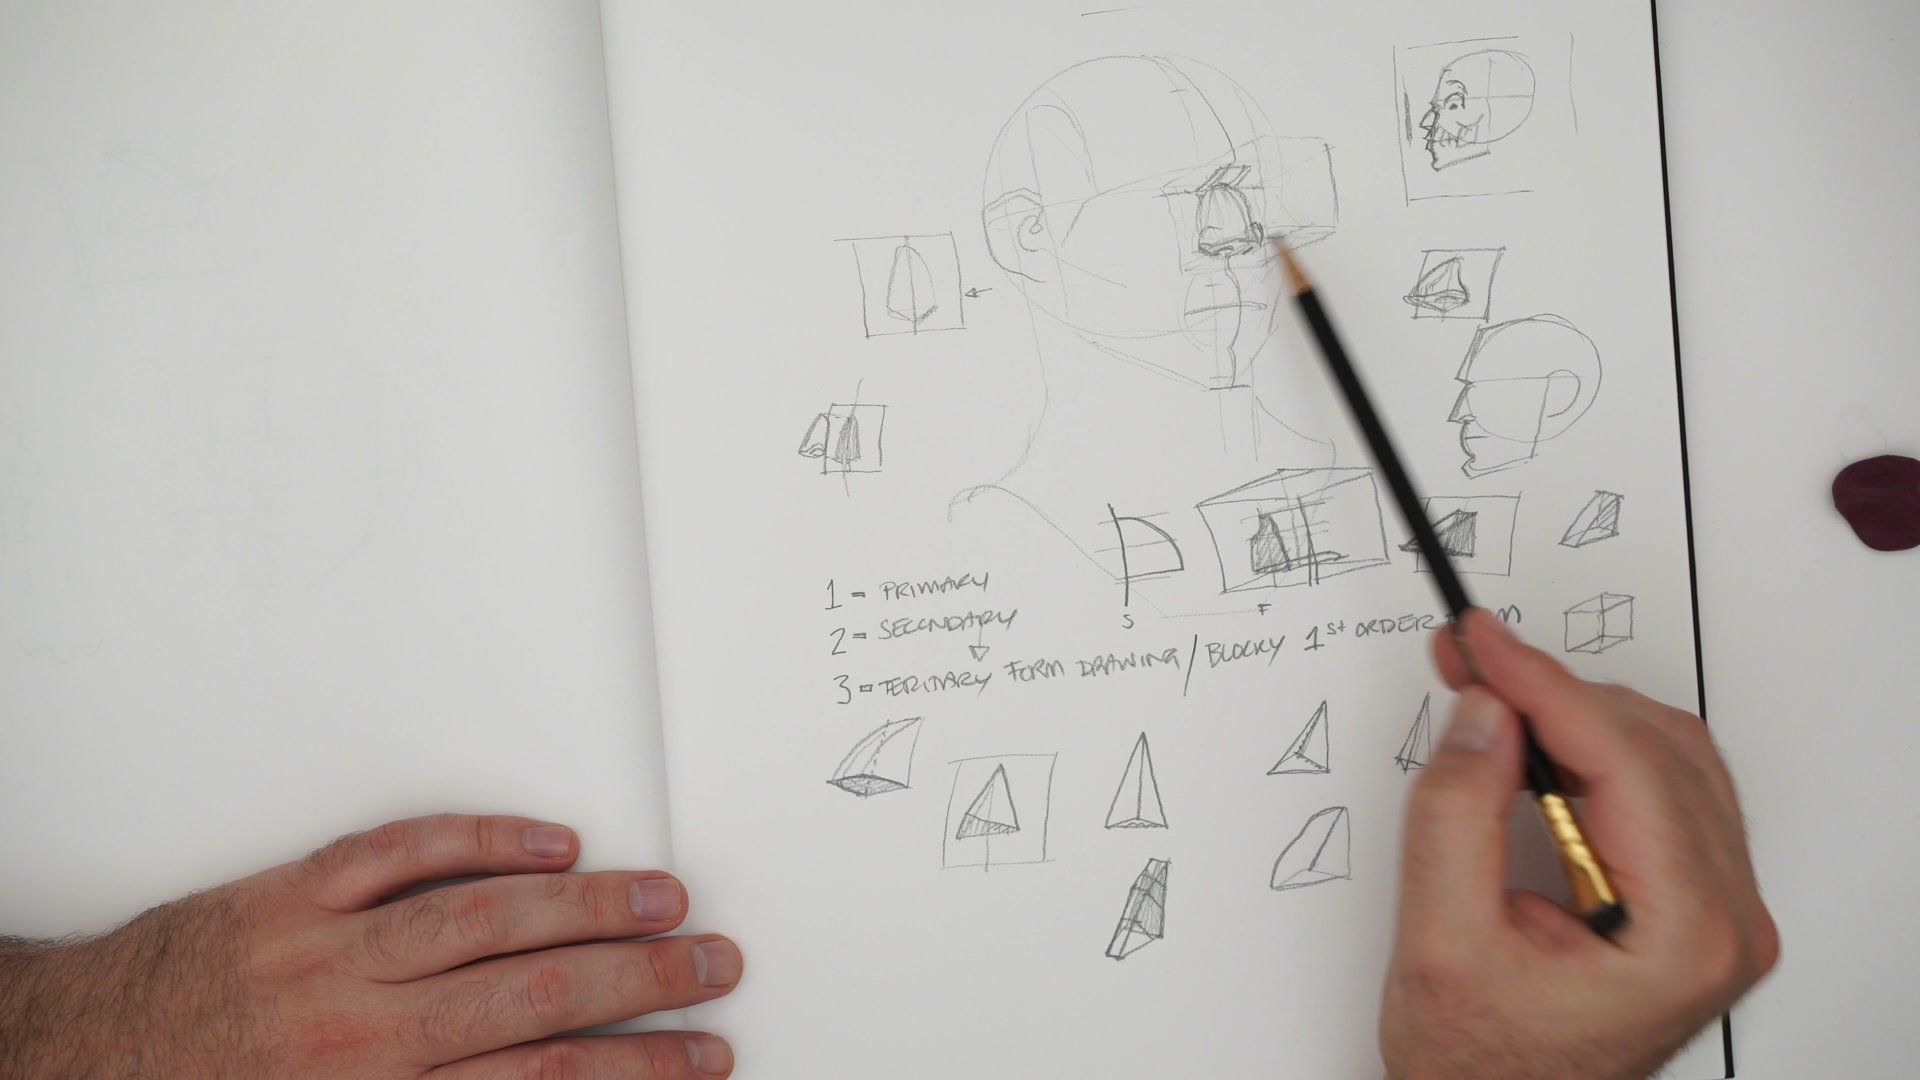
Projecting lines outward from the flat footprint creates the three-dimensional box or wedge that becomes the nose. This is the same principle as general form drawing: project surfaces out into space and connect the edges. The bridge gets added as a slight box refinement, giving the nose a bit more structural sophistication than a pure pyramid while still keeping things firmly in primary form territory. Secondary forms like nostrils and flanges come after the primary projection is solid. Tertiary forms, the subtle surface details and blending into the cheeks, come last. Jumping ahead to detail before the primary form is controlled is where most nose drawings fall apart.
Character Application
Designing Different Nose Types
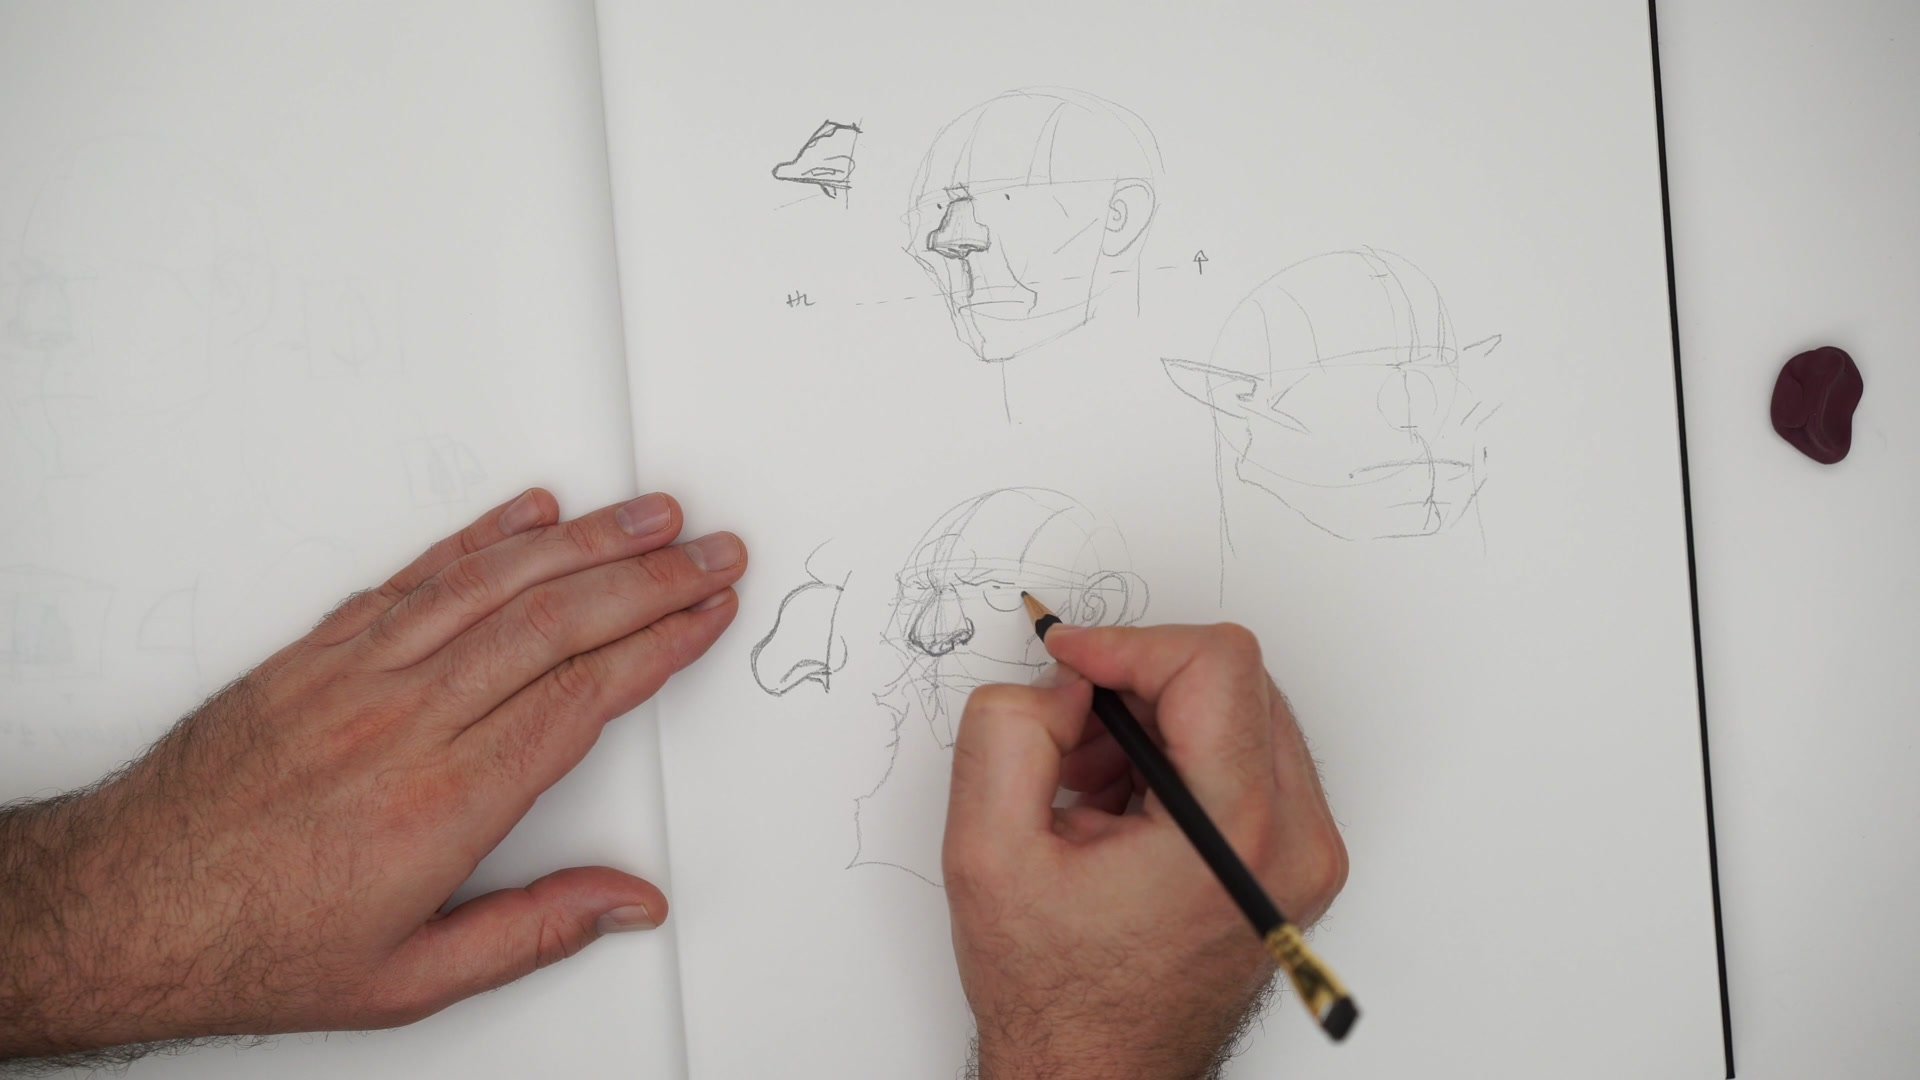
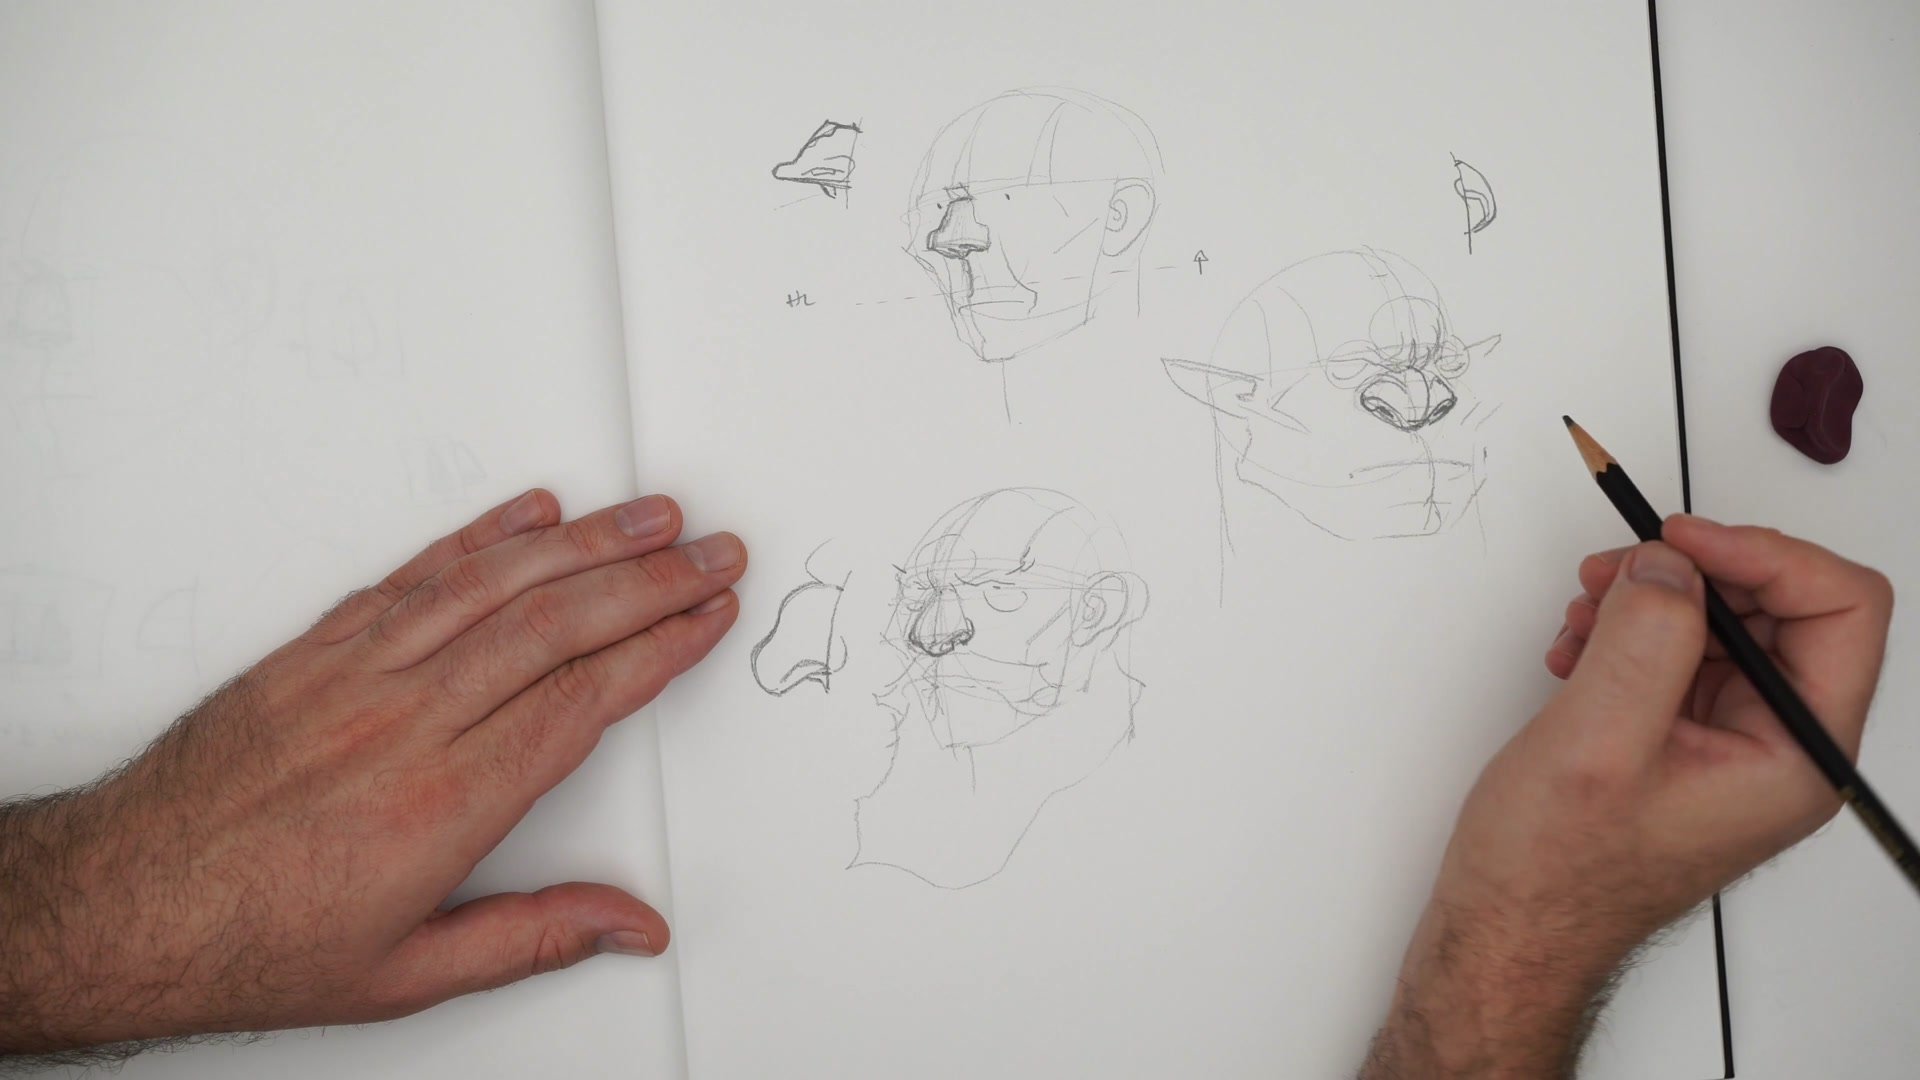
Where the technique becomes powerful is in character design. By modifying the primary form projection, completely different noses emerge. A character with an upturned nose gets a projection line that angles upward from the face. A dwarf gets a wide footprint with a downward-hooking center line. An orc barely projects outward at all but has nostrils that reach up aggressively toward the brow.
Each of these variations uses the same constructive sequence: define the footprint, establish the center line direction, project the primary form, then add secondary anatomical detail. The silhouette shape on the face combined with the projection direction is what gives each character their distinct nose. Remembering the general shape and projection means the same nose can be replicated from any viewing angle, which is the entire point of constructive anatomy. Once the primary form clicks, adding sophistication through curved bridges, asymmetric flanges, and stylized proportions becomes straightforward iteration rather than guesswork.
Dwarf and Orc Studies
Key Principles
Footprint First: Define where the nose sits on the flat face before adding any three-dimensional projection. This two-dimensional silhouette controls width, shape, and character.
Primary Form Controls Everything: The triangular pyramid projection is the minimum viable nose. Getting this right means every subsequent detail has a solid structural home.
Projection Direction Defines Character: Upward projection creates upturned noses, downward creates hooked noses, minimal projection creates flat animalistic noses. The same technique generates wildly different results.
Form Drawing Is Applied Here: Box projection and perspective skills directly power nose construction. Practicing noses improves general form drawing, and vice versa.
Practice This
Draw the Footprint: Pick three different nose shapes and draw them as flat silhouettes on a simple Loomis head. Do not add any dimension yet, just design the two-dimensional sticker.
Project the Primary Form: Take each footprint and project lines outward to create the triangular pyramid. Vary the projection distance and angle to see how character changes.
Apply to a Character: Choose a character type like a dwarf, orc, or stylized human and use the footprint-plus-projection method to design their nose from three different viewing angles.


