Draw Characters From Different Angles
Summary
Rotating the Figure in Space
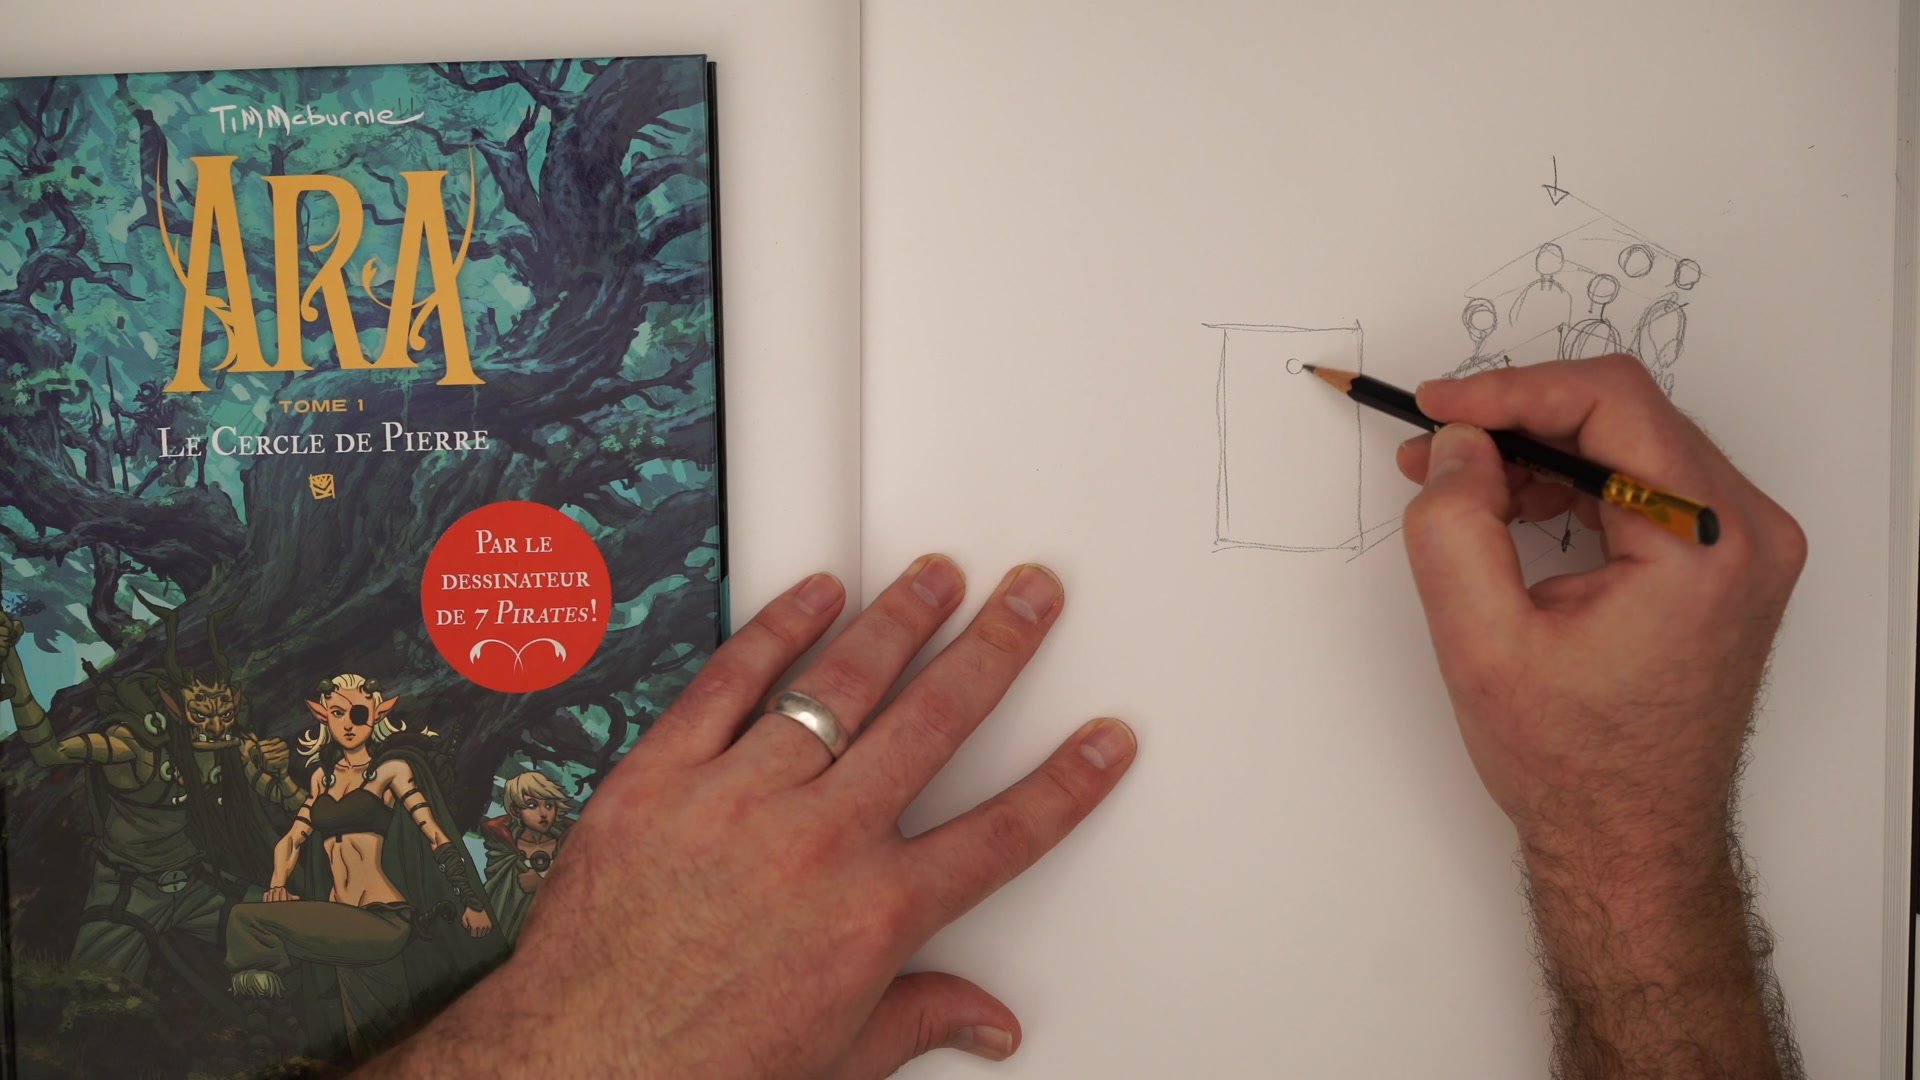
Drawing characters from different angles is one of the biggest challenges artists face, whether early in the journey or well into it. The typical advice boils down to "take a mannequin and rotate it in space," but that is far easier said than done. What most instruction misses is a practical entry point, a way to start applying perspective to the figure without needing to master every aspect of technical drawing first.
This lesson breaks down the problem into a manageable exercise: learn to divide space proportionally, find the halfway point of the figure, and use the center line as an anchor. These concepts come from the Loomis approach to figure drawing, but the focus here is on practical application rather than academic theory. The same methods apply whether drawing standard human mannequins or cartoony characters with completely different proportions.
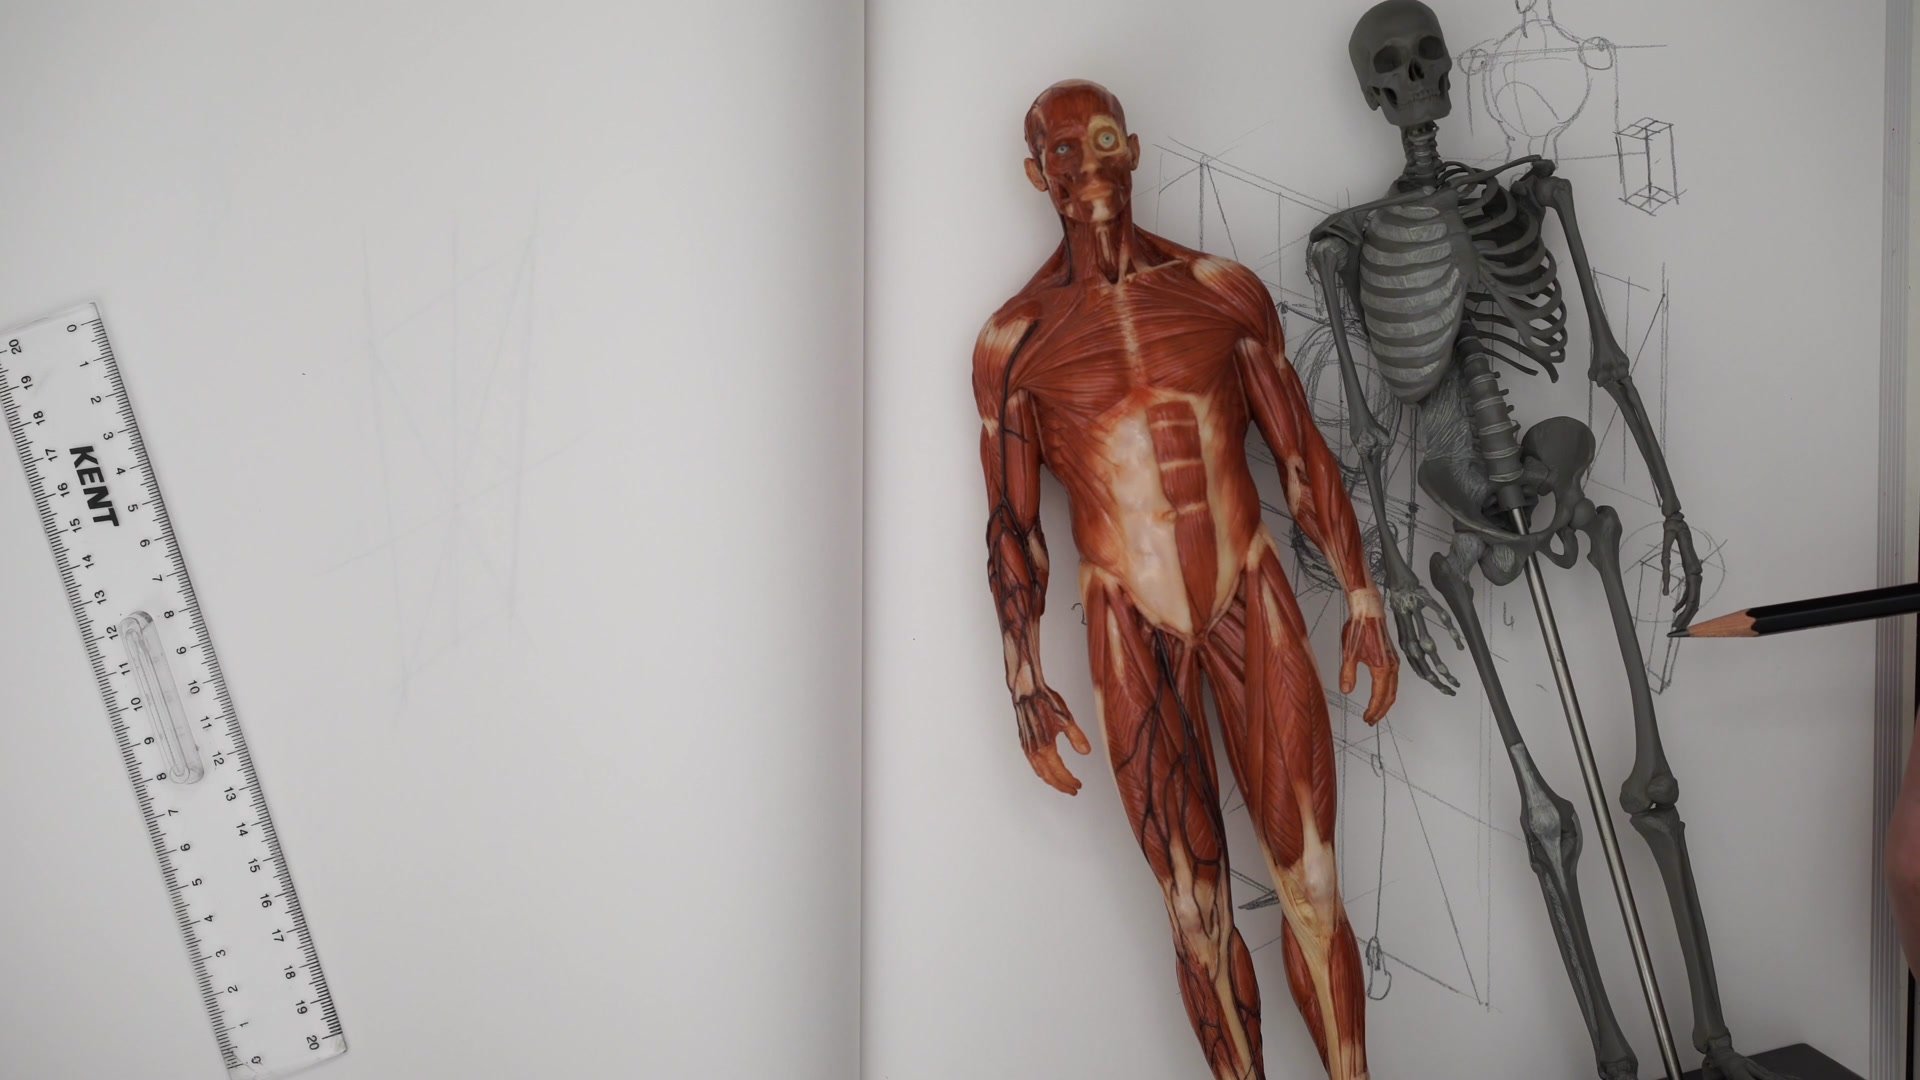
Reference and Setup

The Halfway Point Exercise
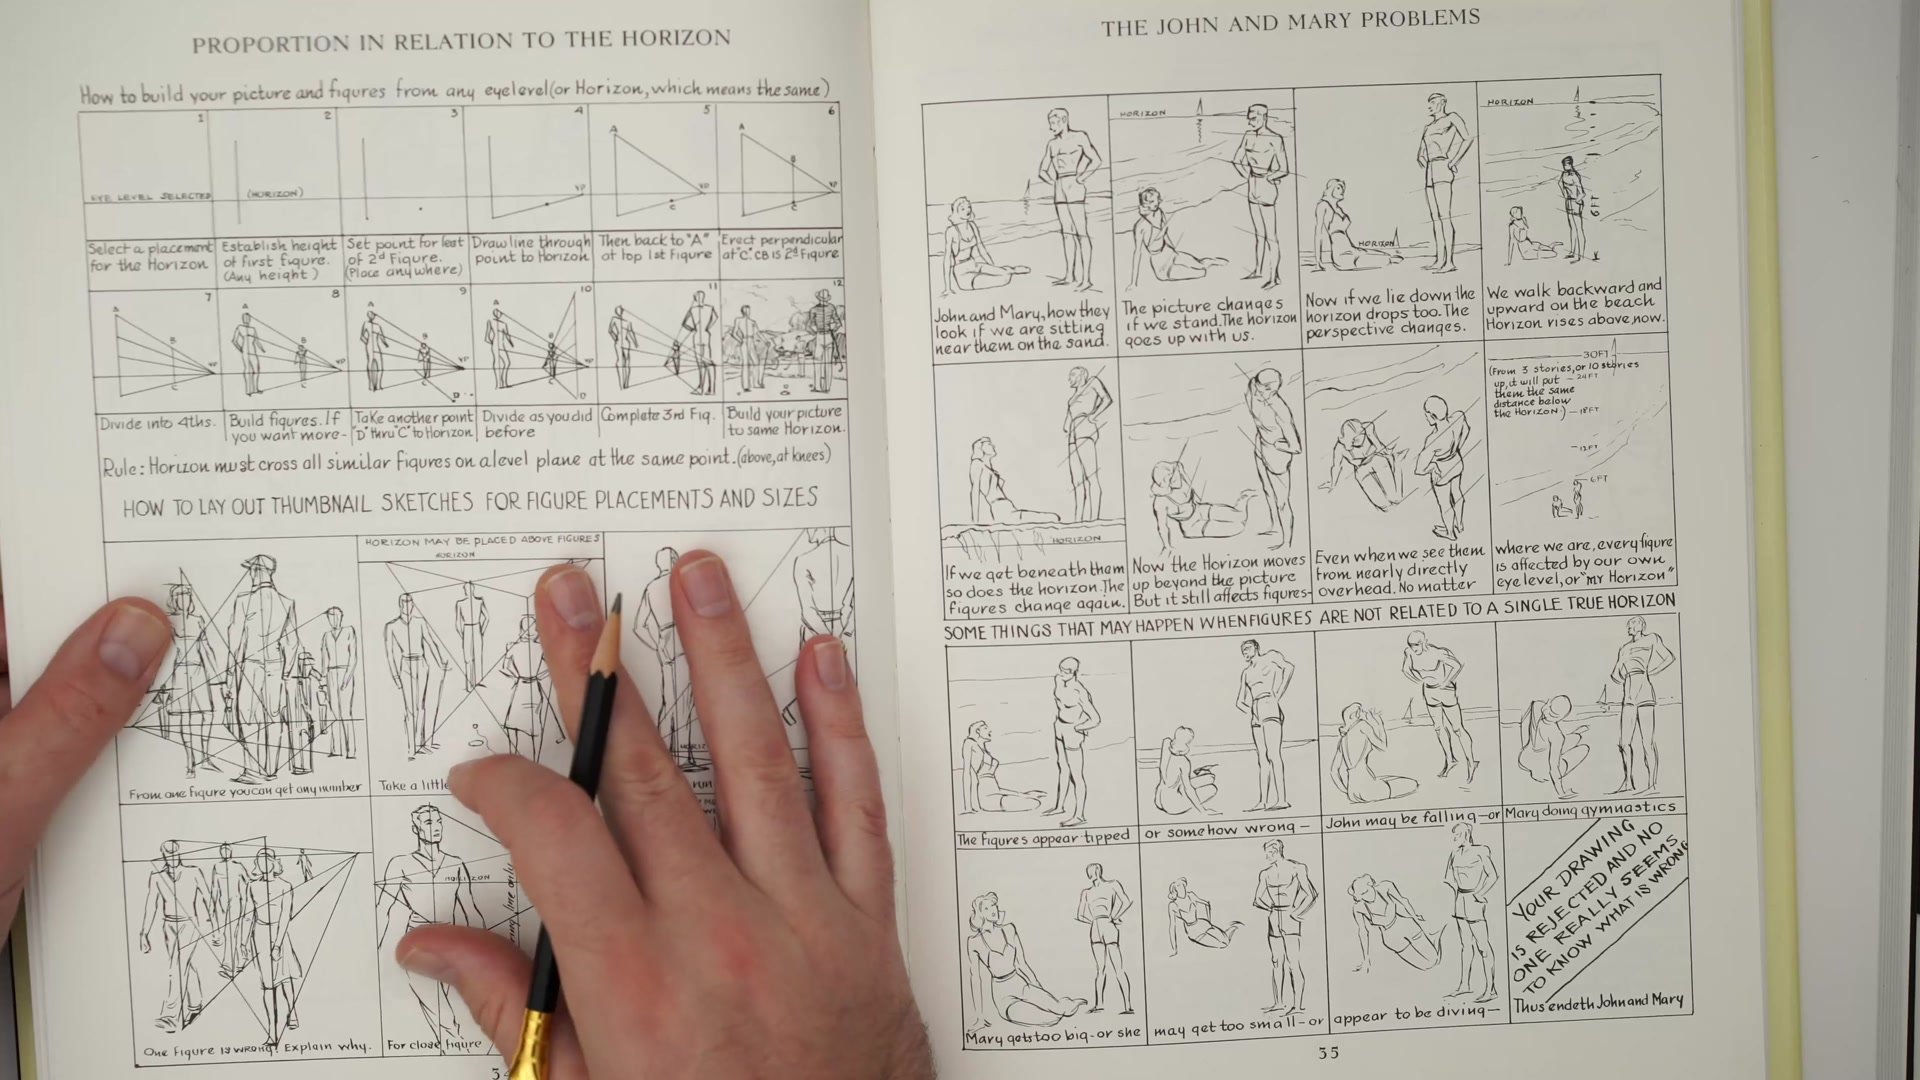
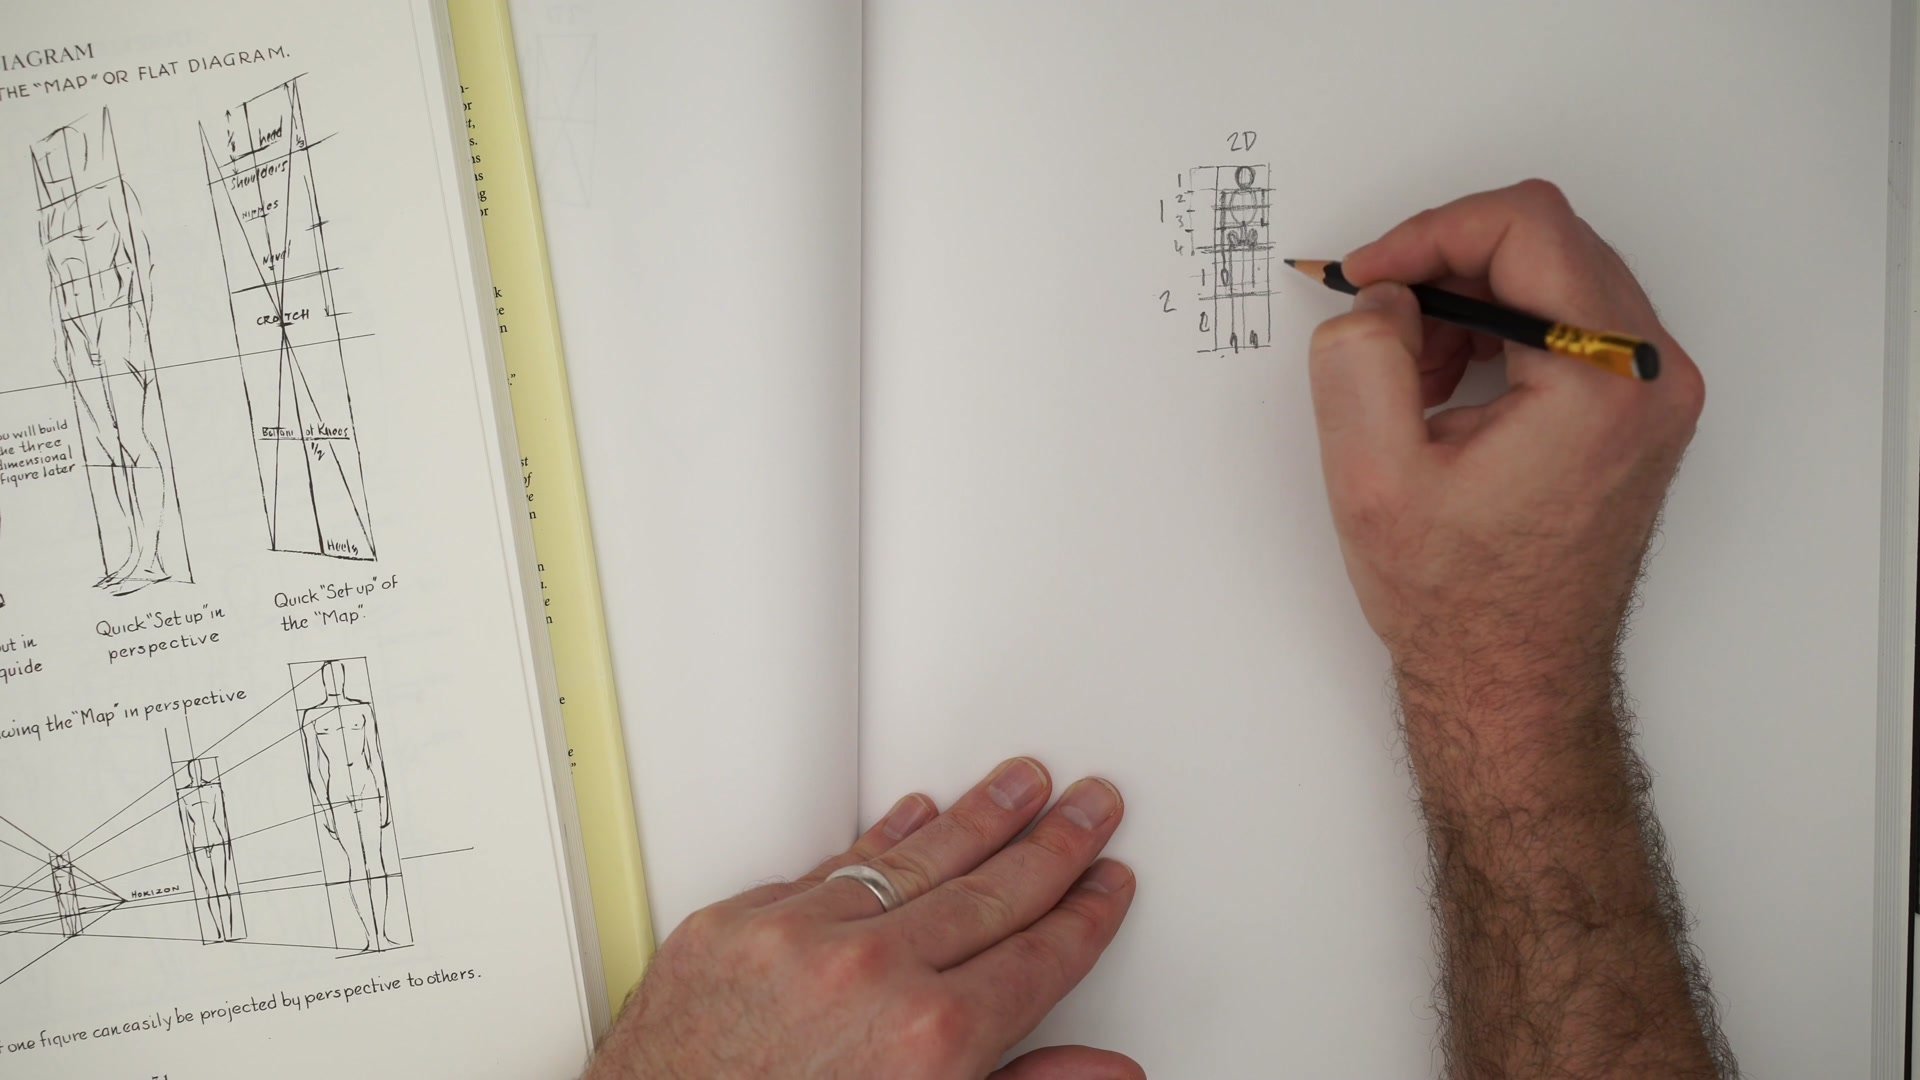
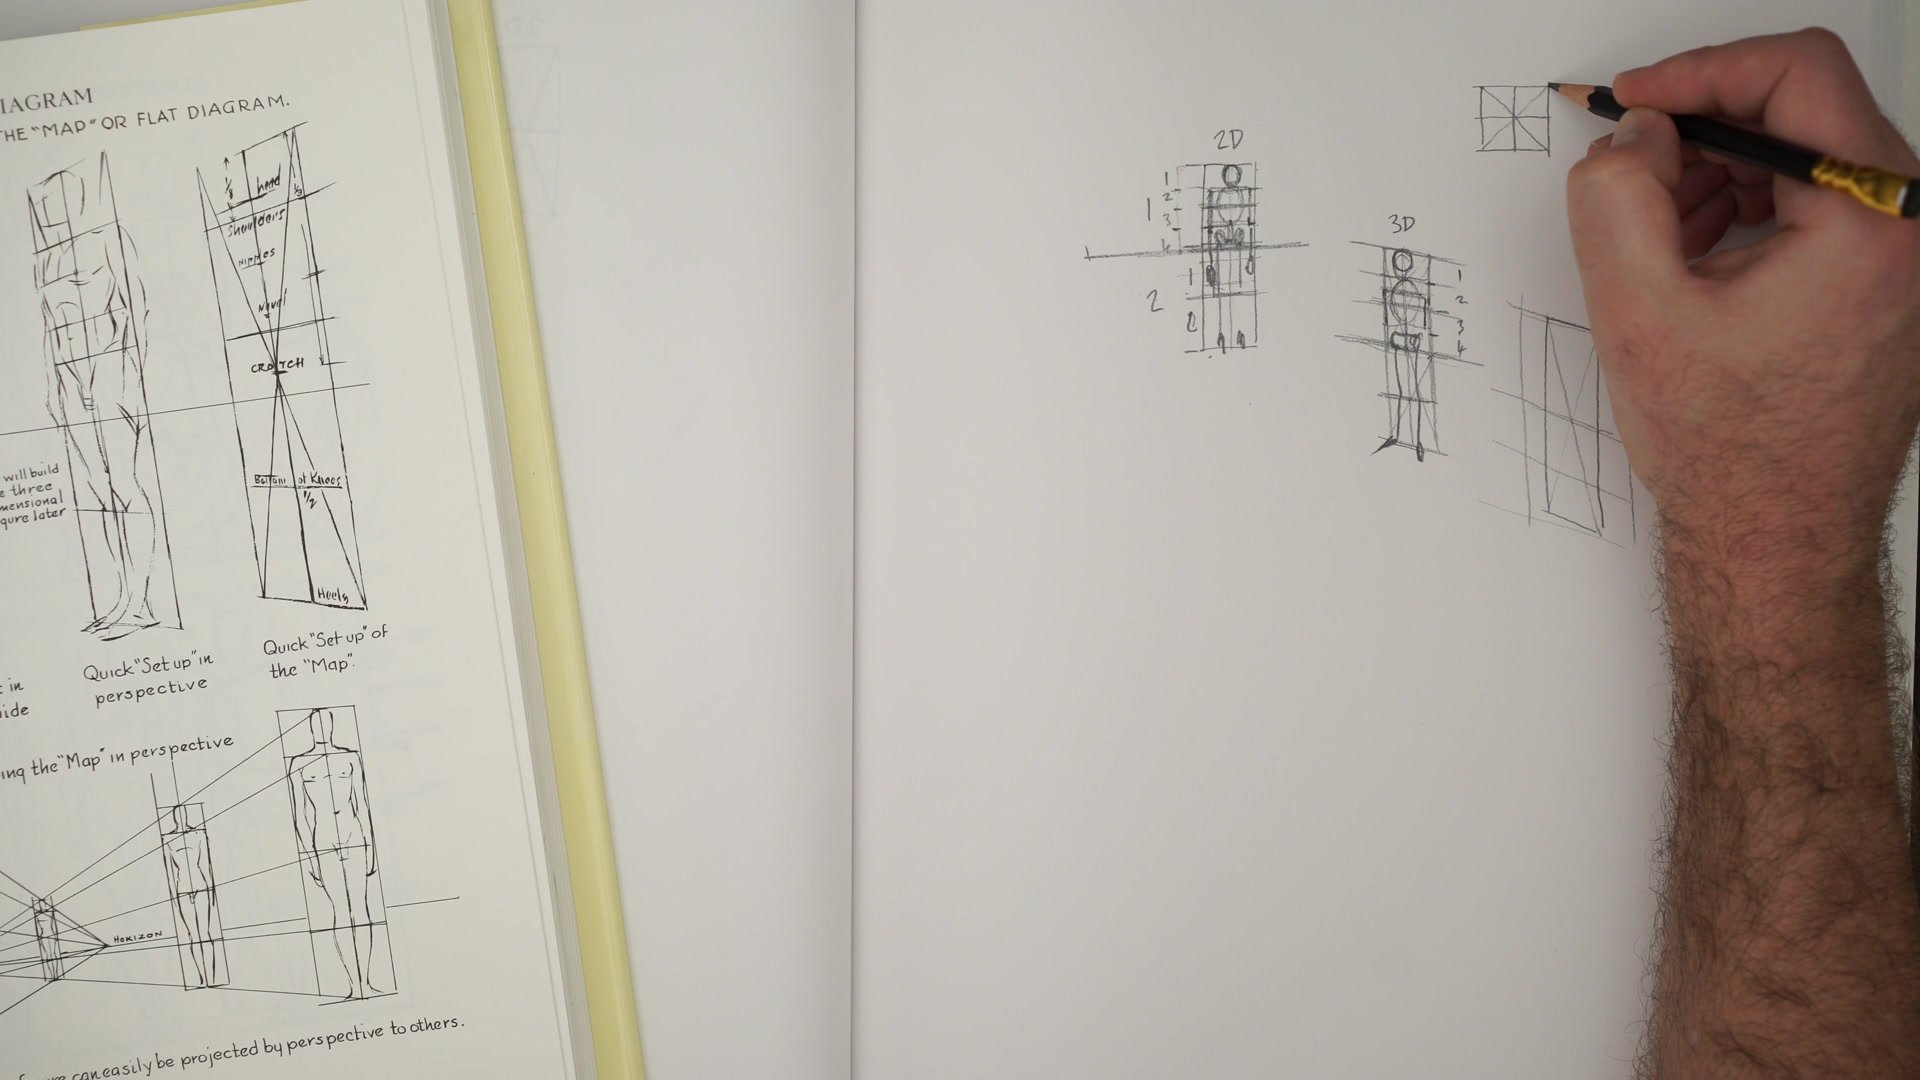
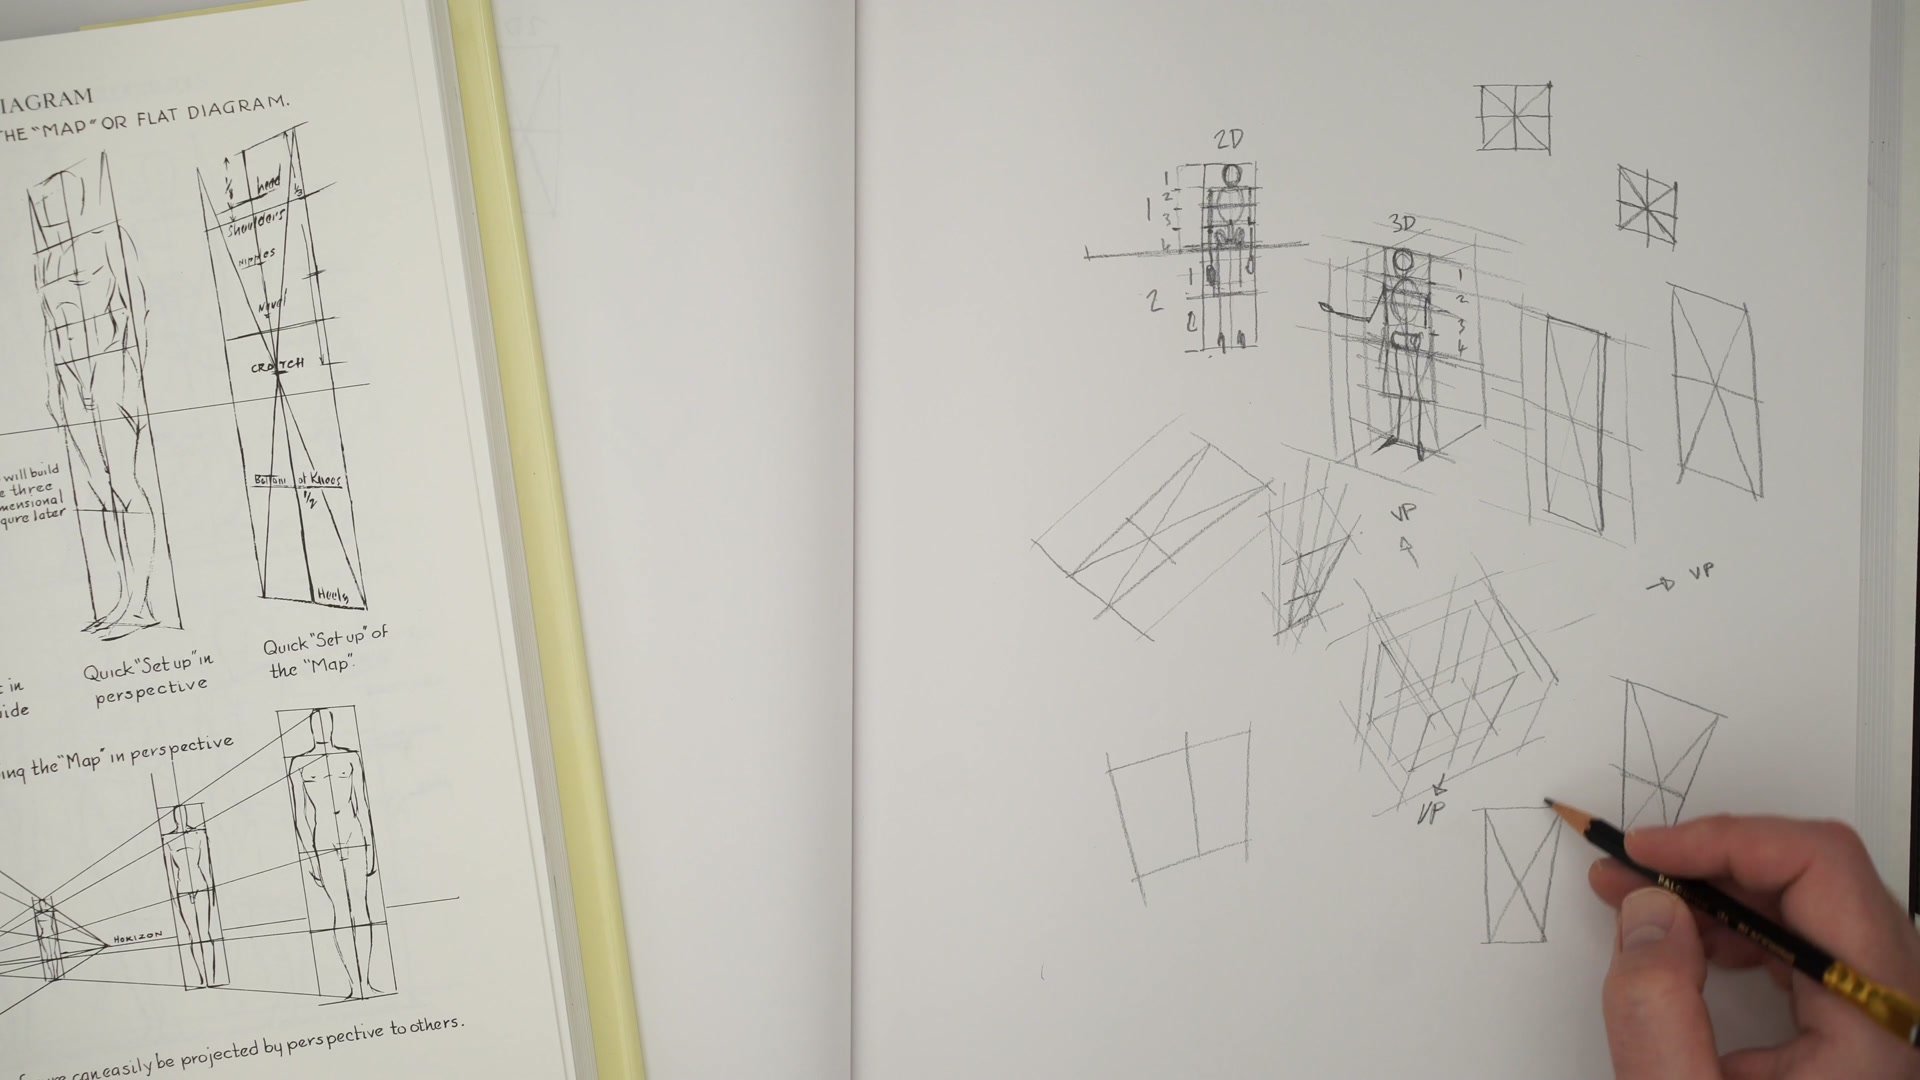
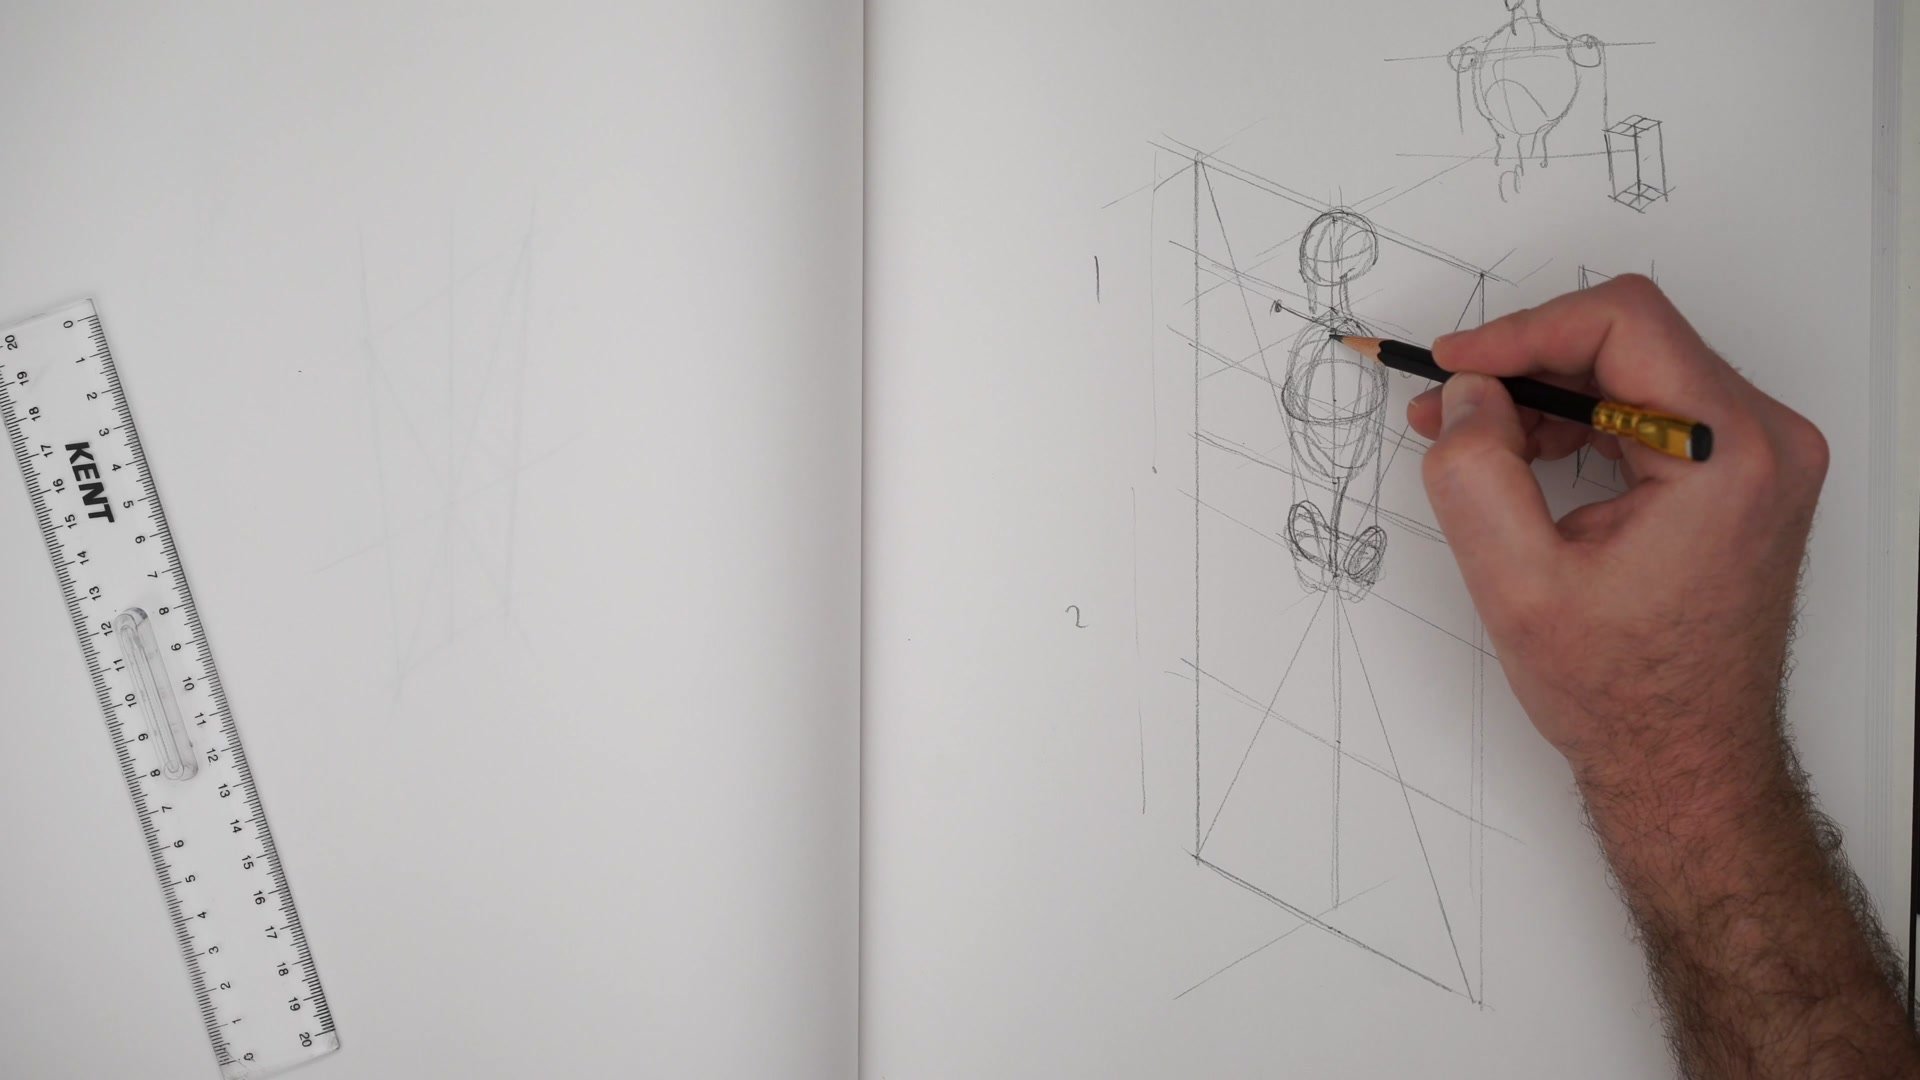
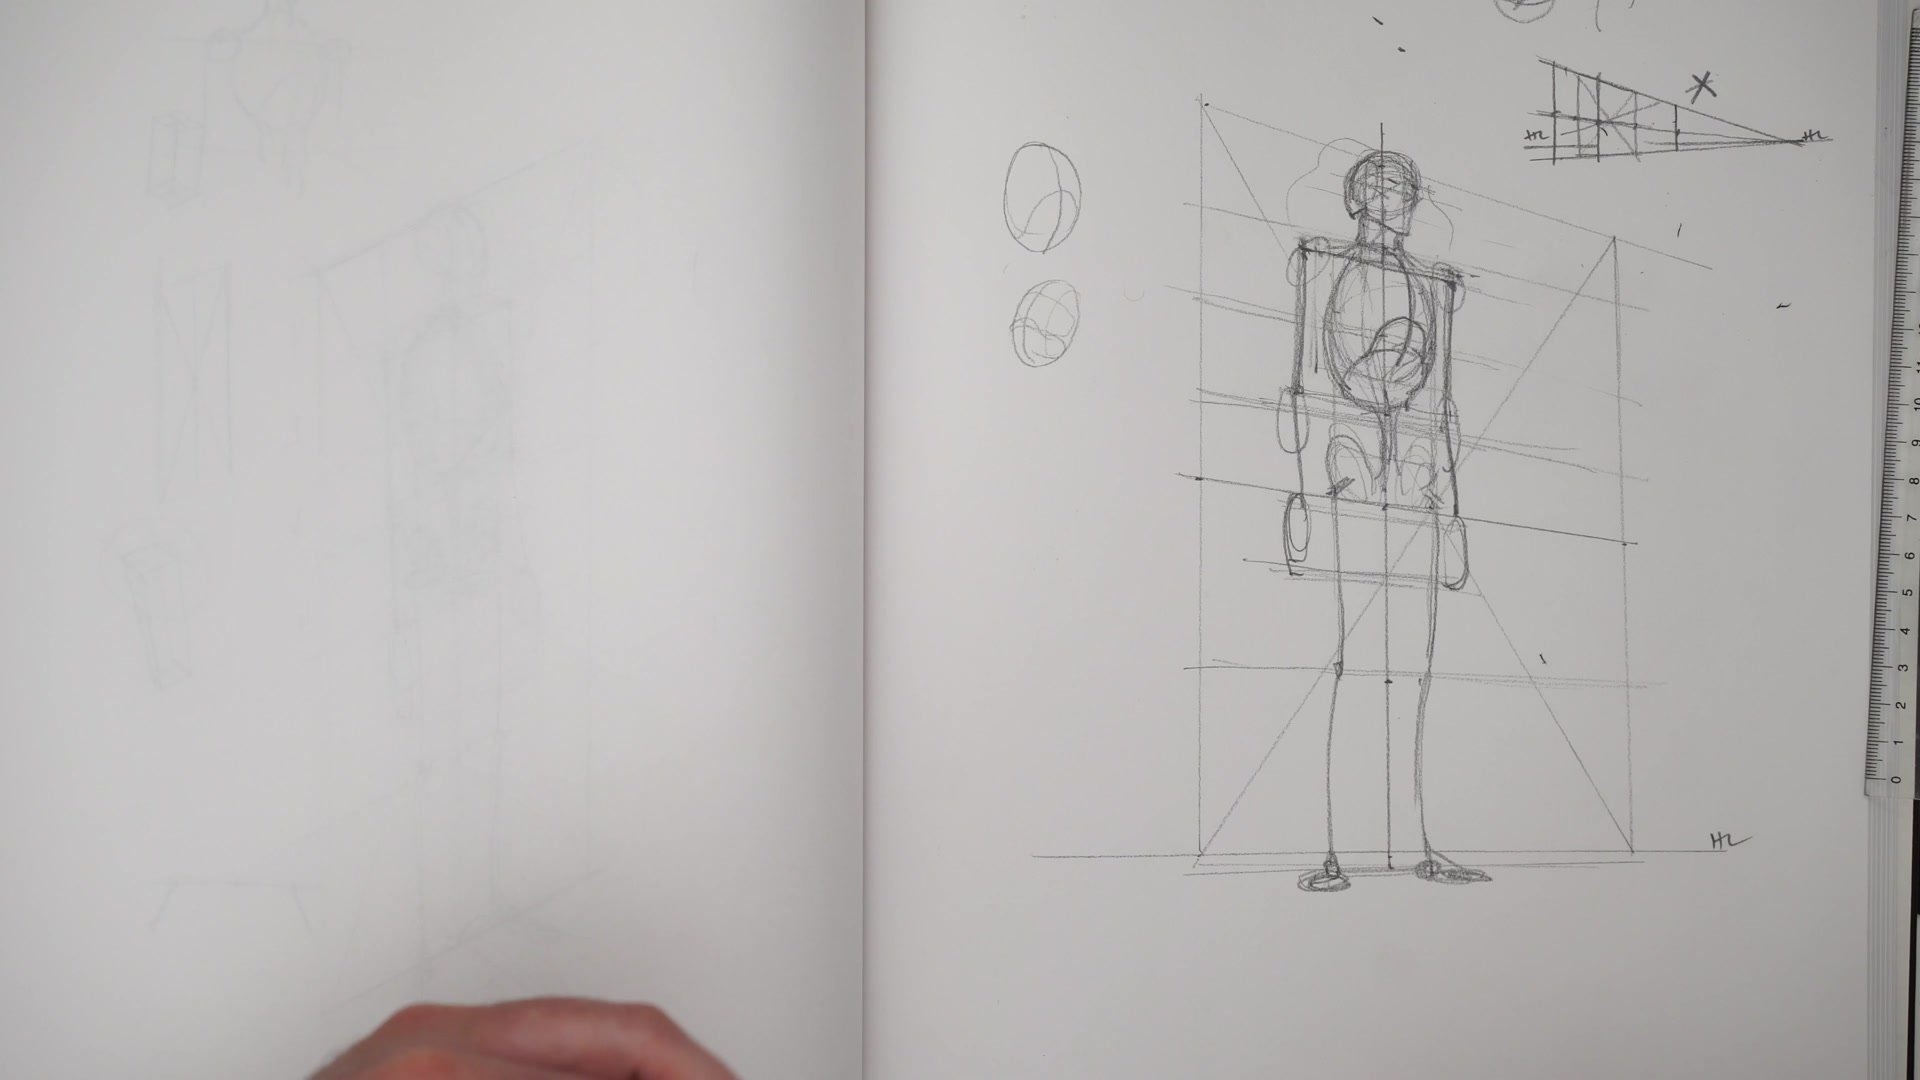
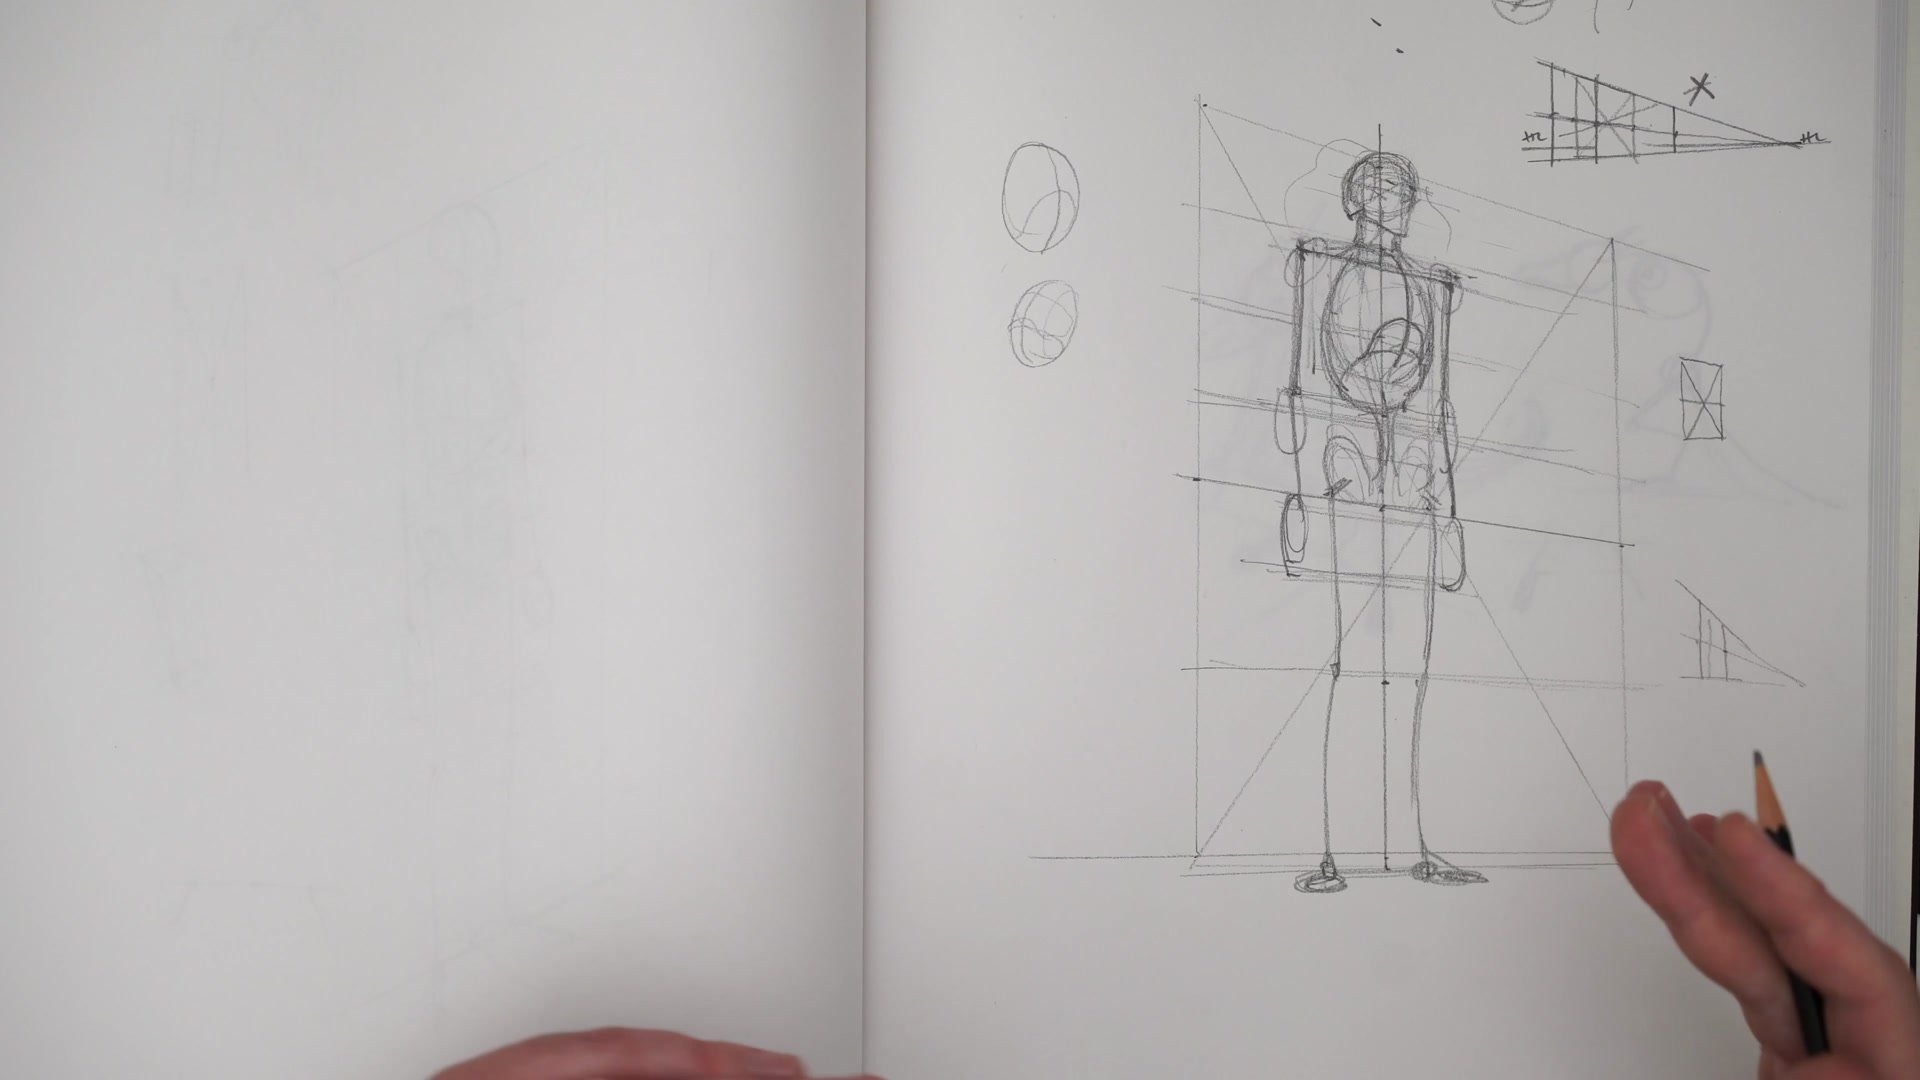
The foundational exercise centers on one critical measurement: finding the halfway point of the figure. This division falls at the bottom of the pelvis or crotch area and separates the legs from the upper body. It also lines up with the base of the hand. Getting this one proportion right makes everything else fall into place.
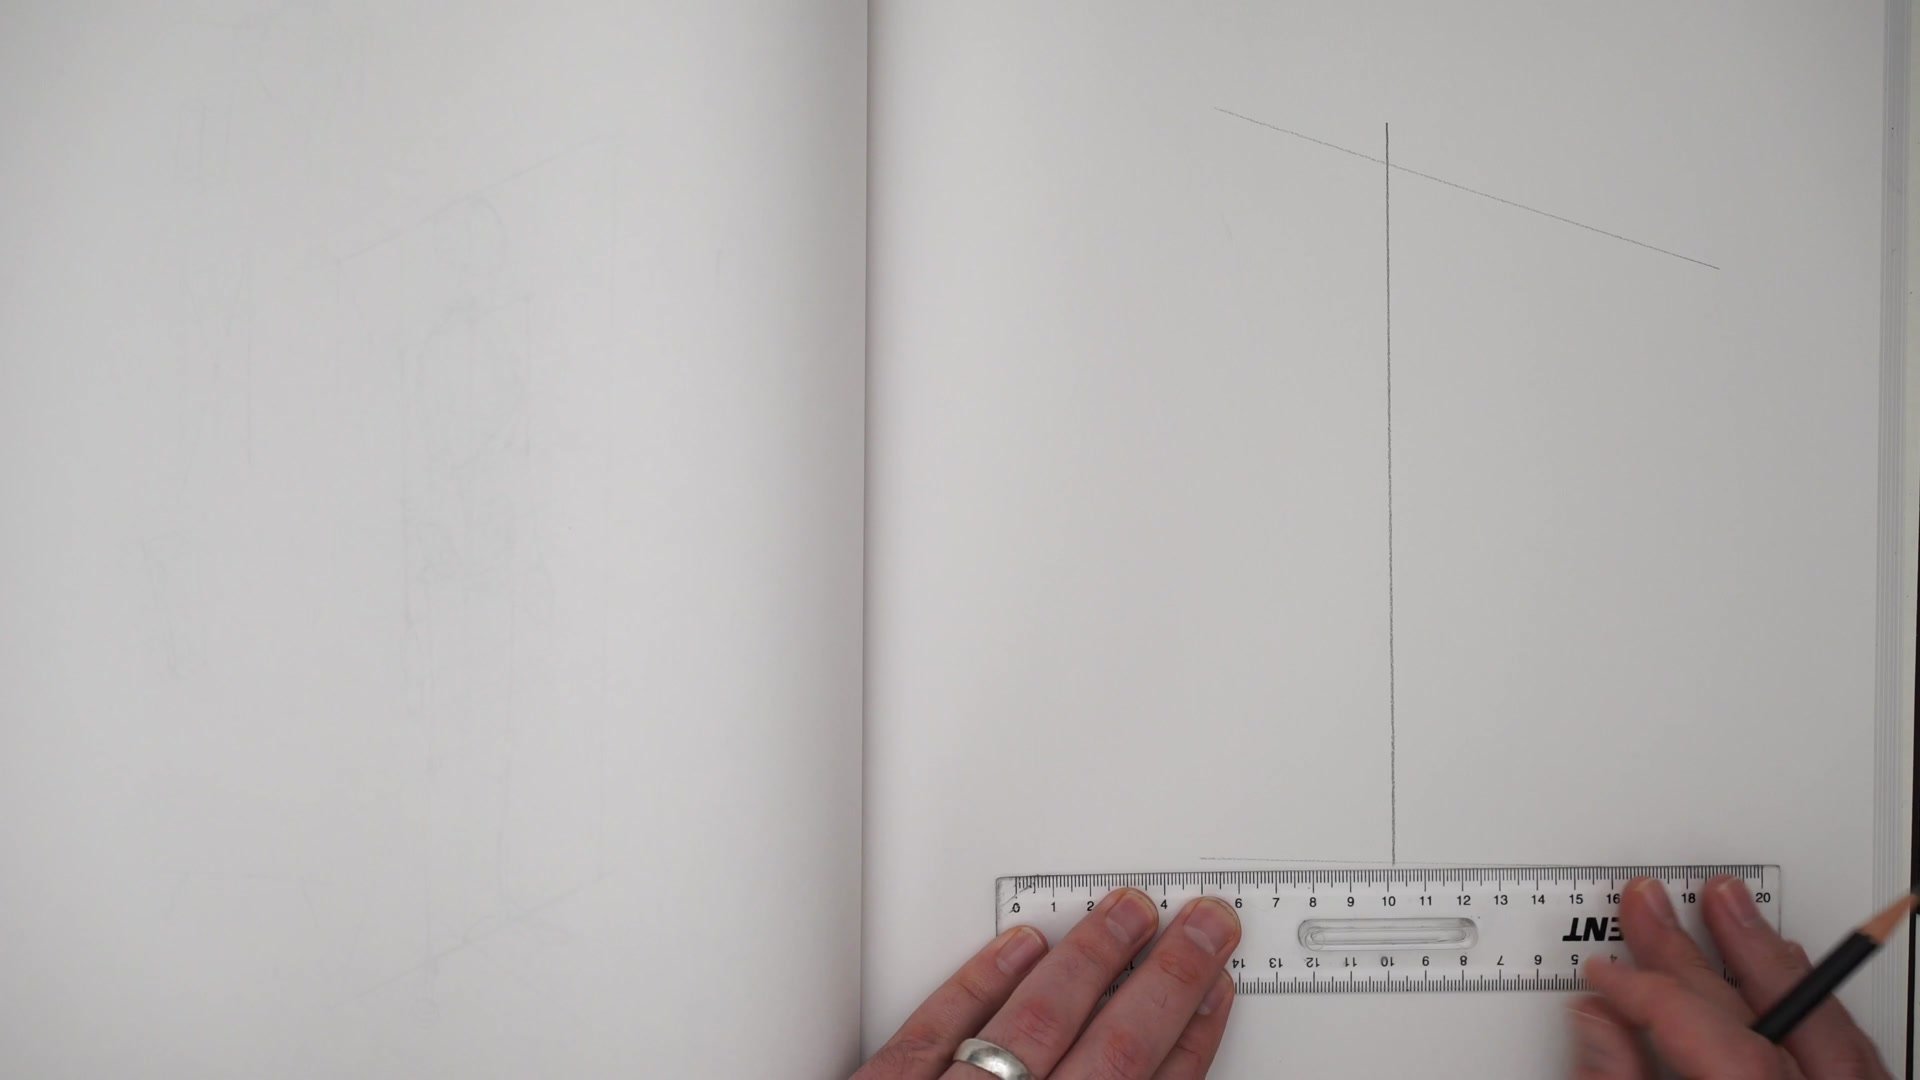
The approach starts in two dimensions. Draw the mannequin flat, divide it into its proportional sections, and get comfortable measuring those divisions by eye. Head, shoulders, nipple line, navel, elbow base, crotch, knee, and feet all have predictable positions within the proportional framework. Once that 2D proportion feels solid, the same divisions transfer into three dimensions using basic perspective. The key insight is that whatever works in 2D geometry can be applied in 3D perspective, as long as the vanishing points and grid are roughly established.
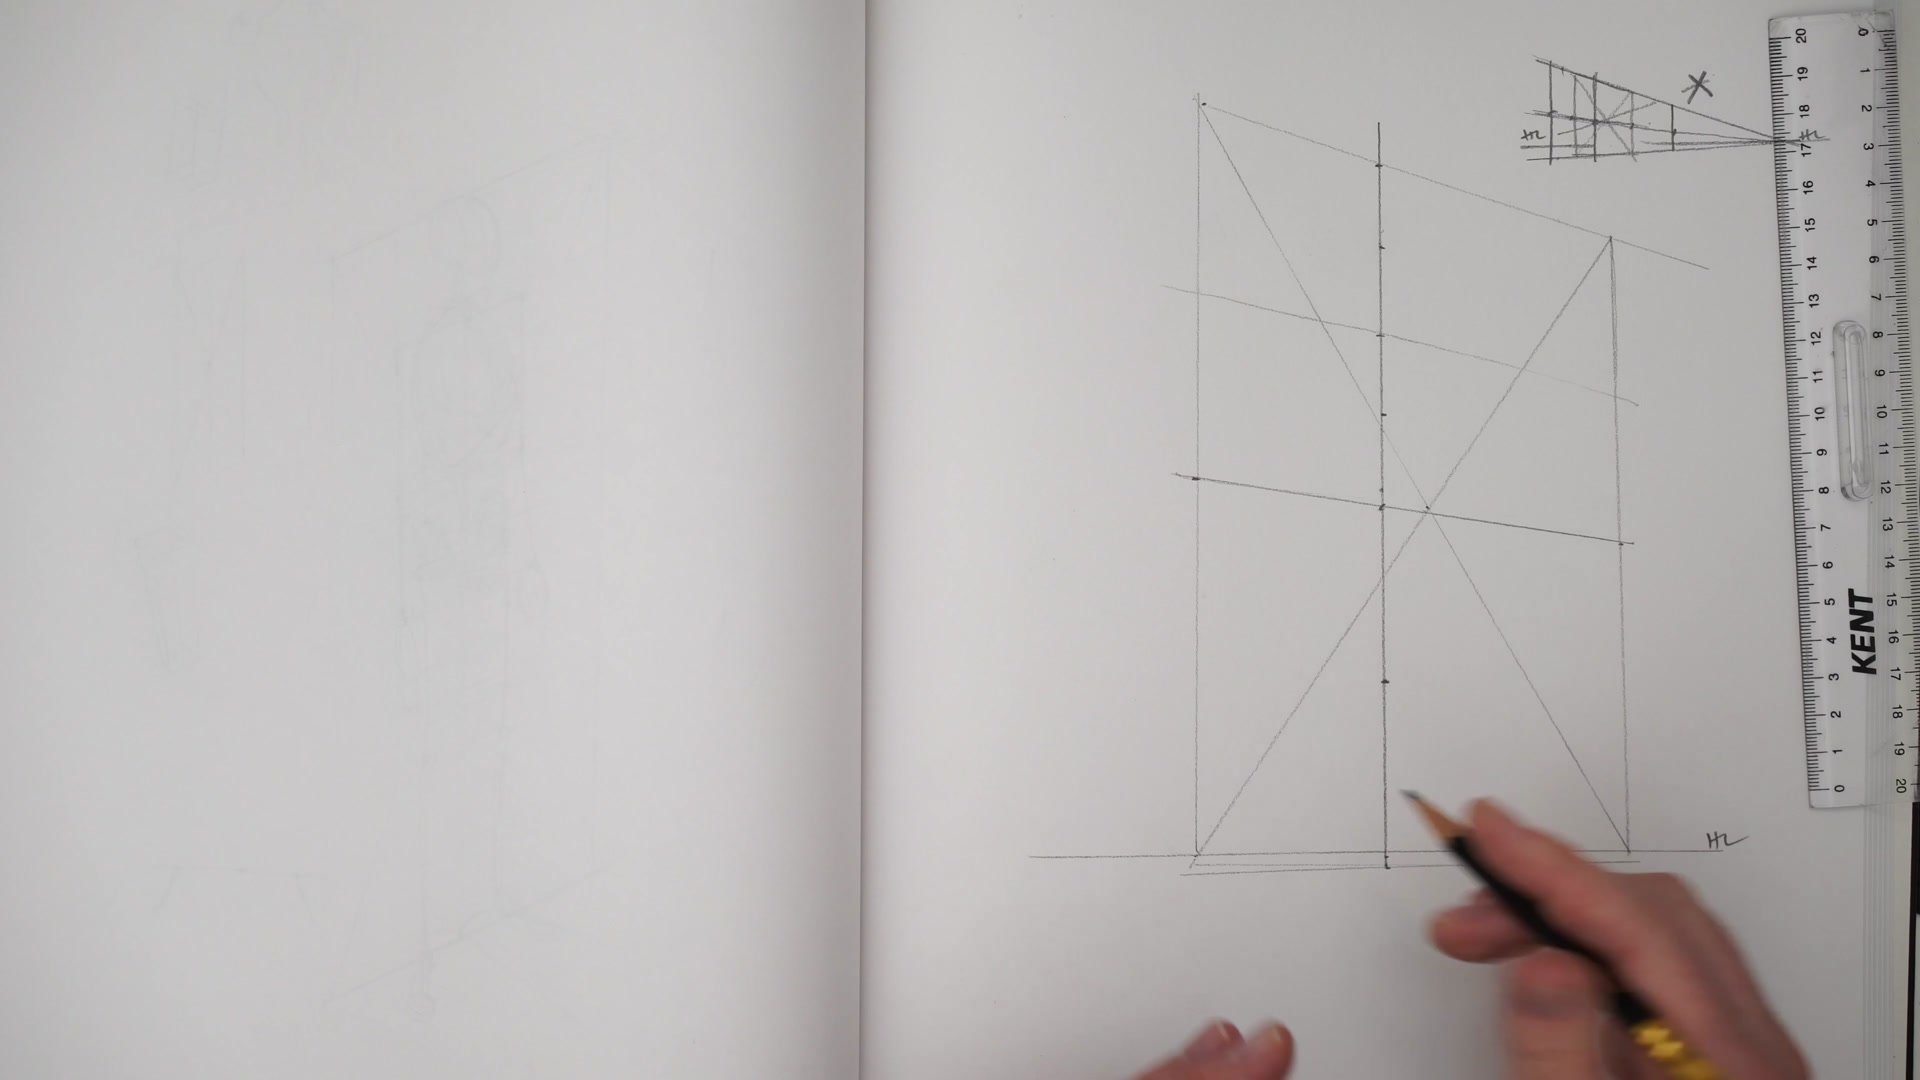
Proportion and Grids
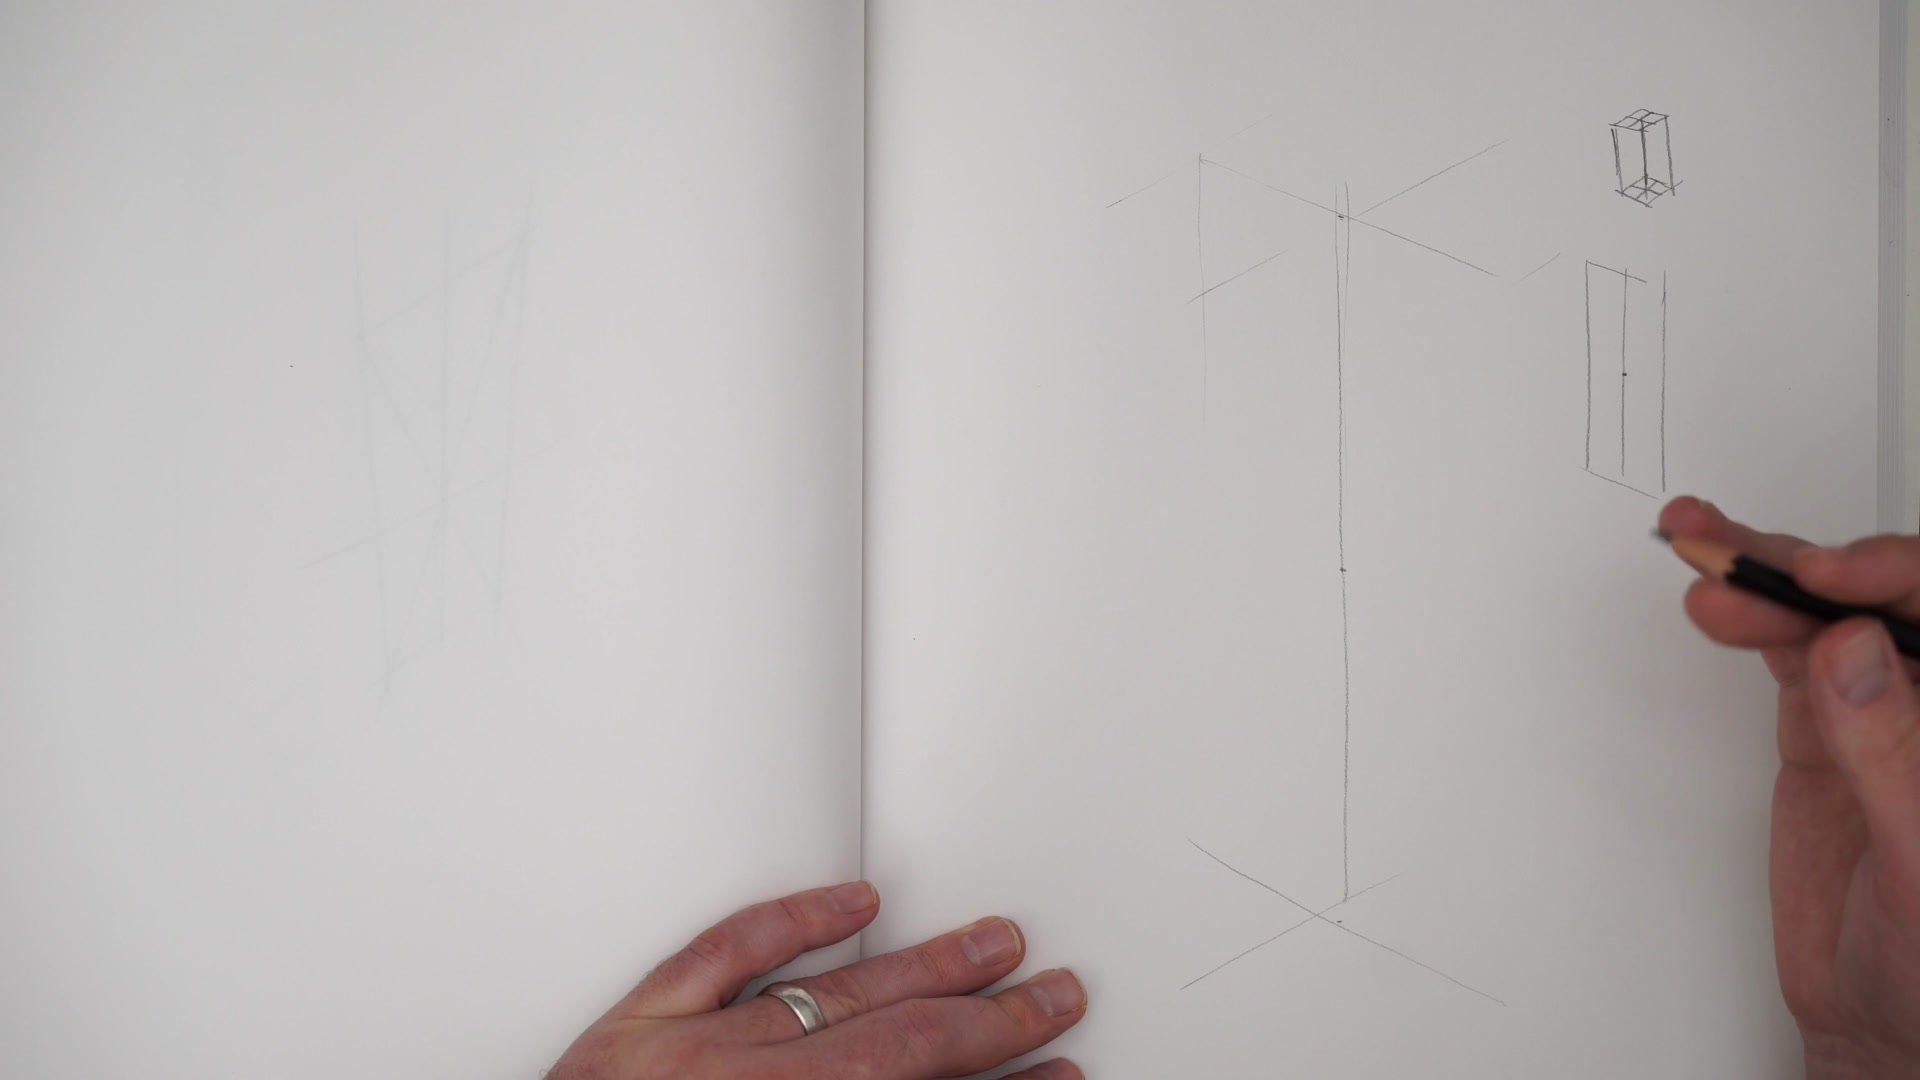
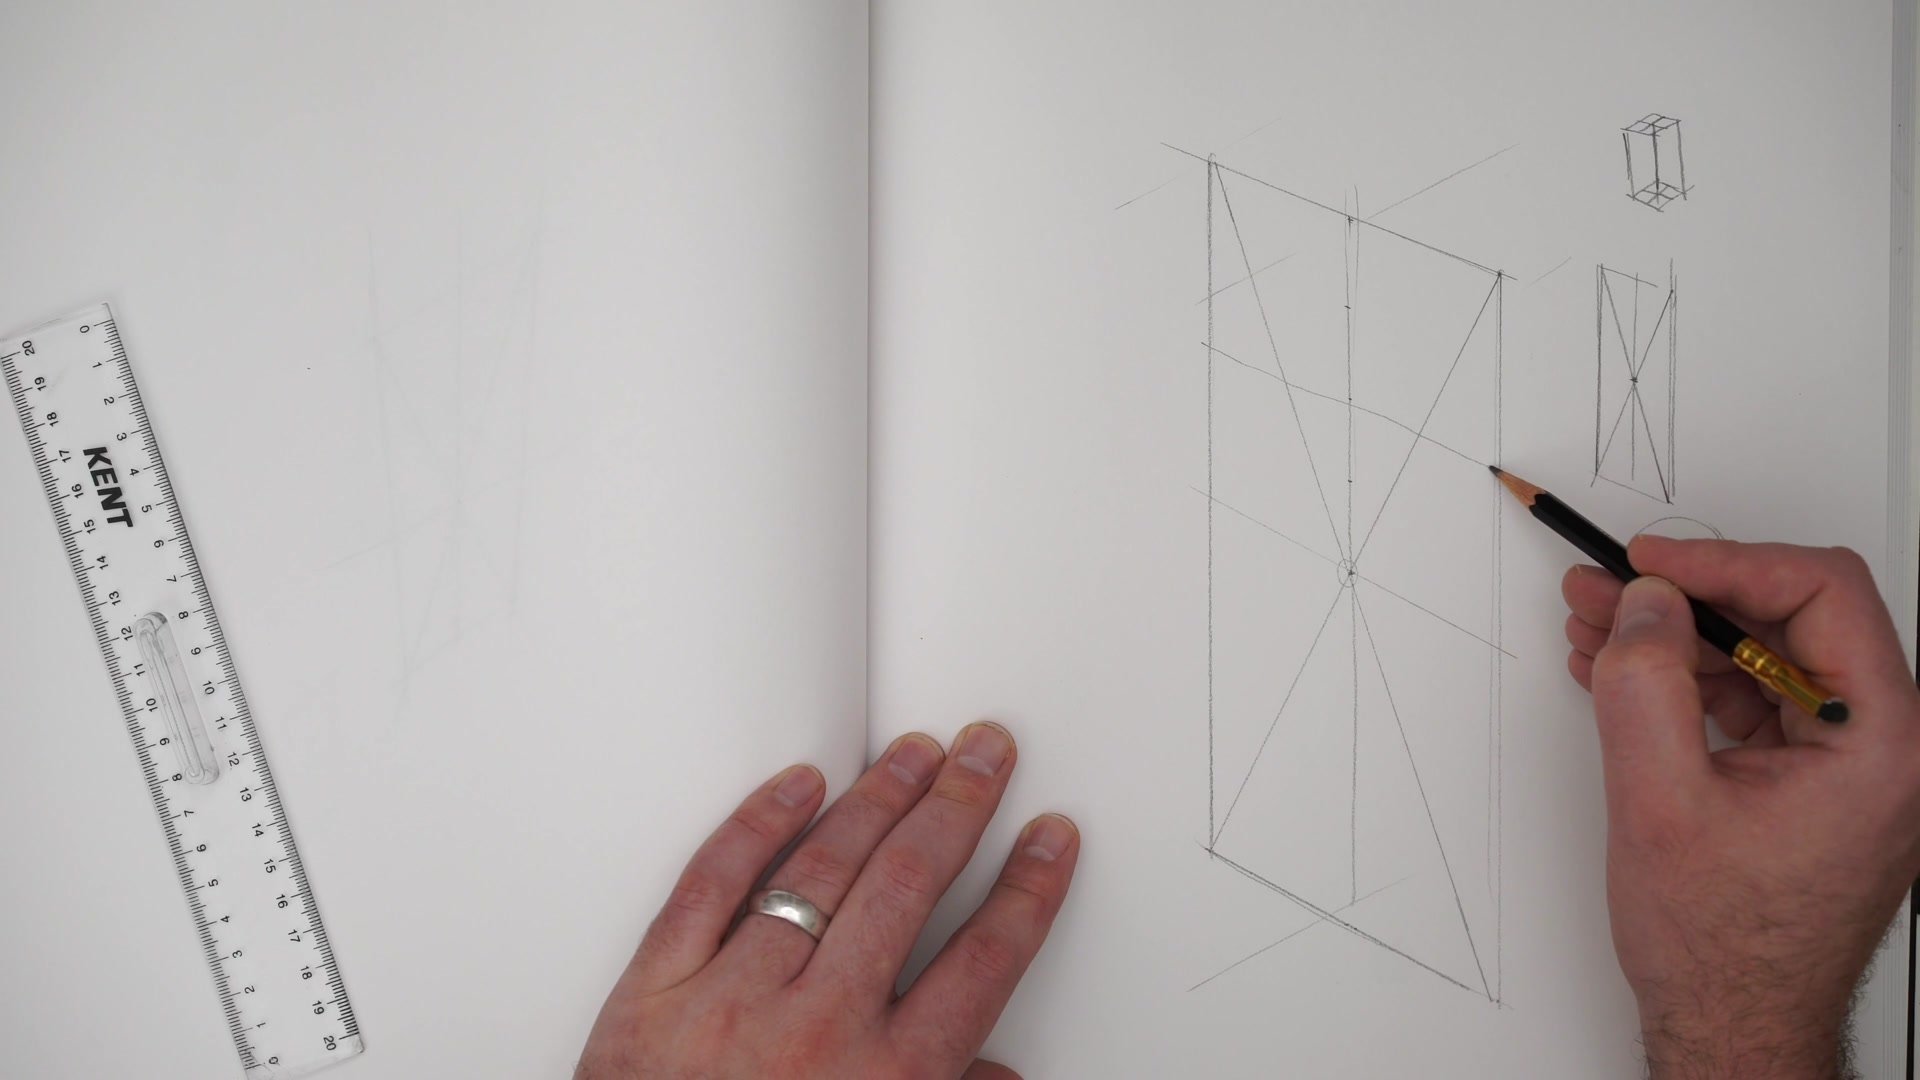
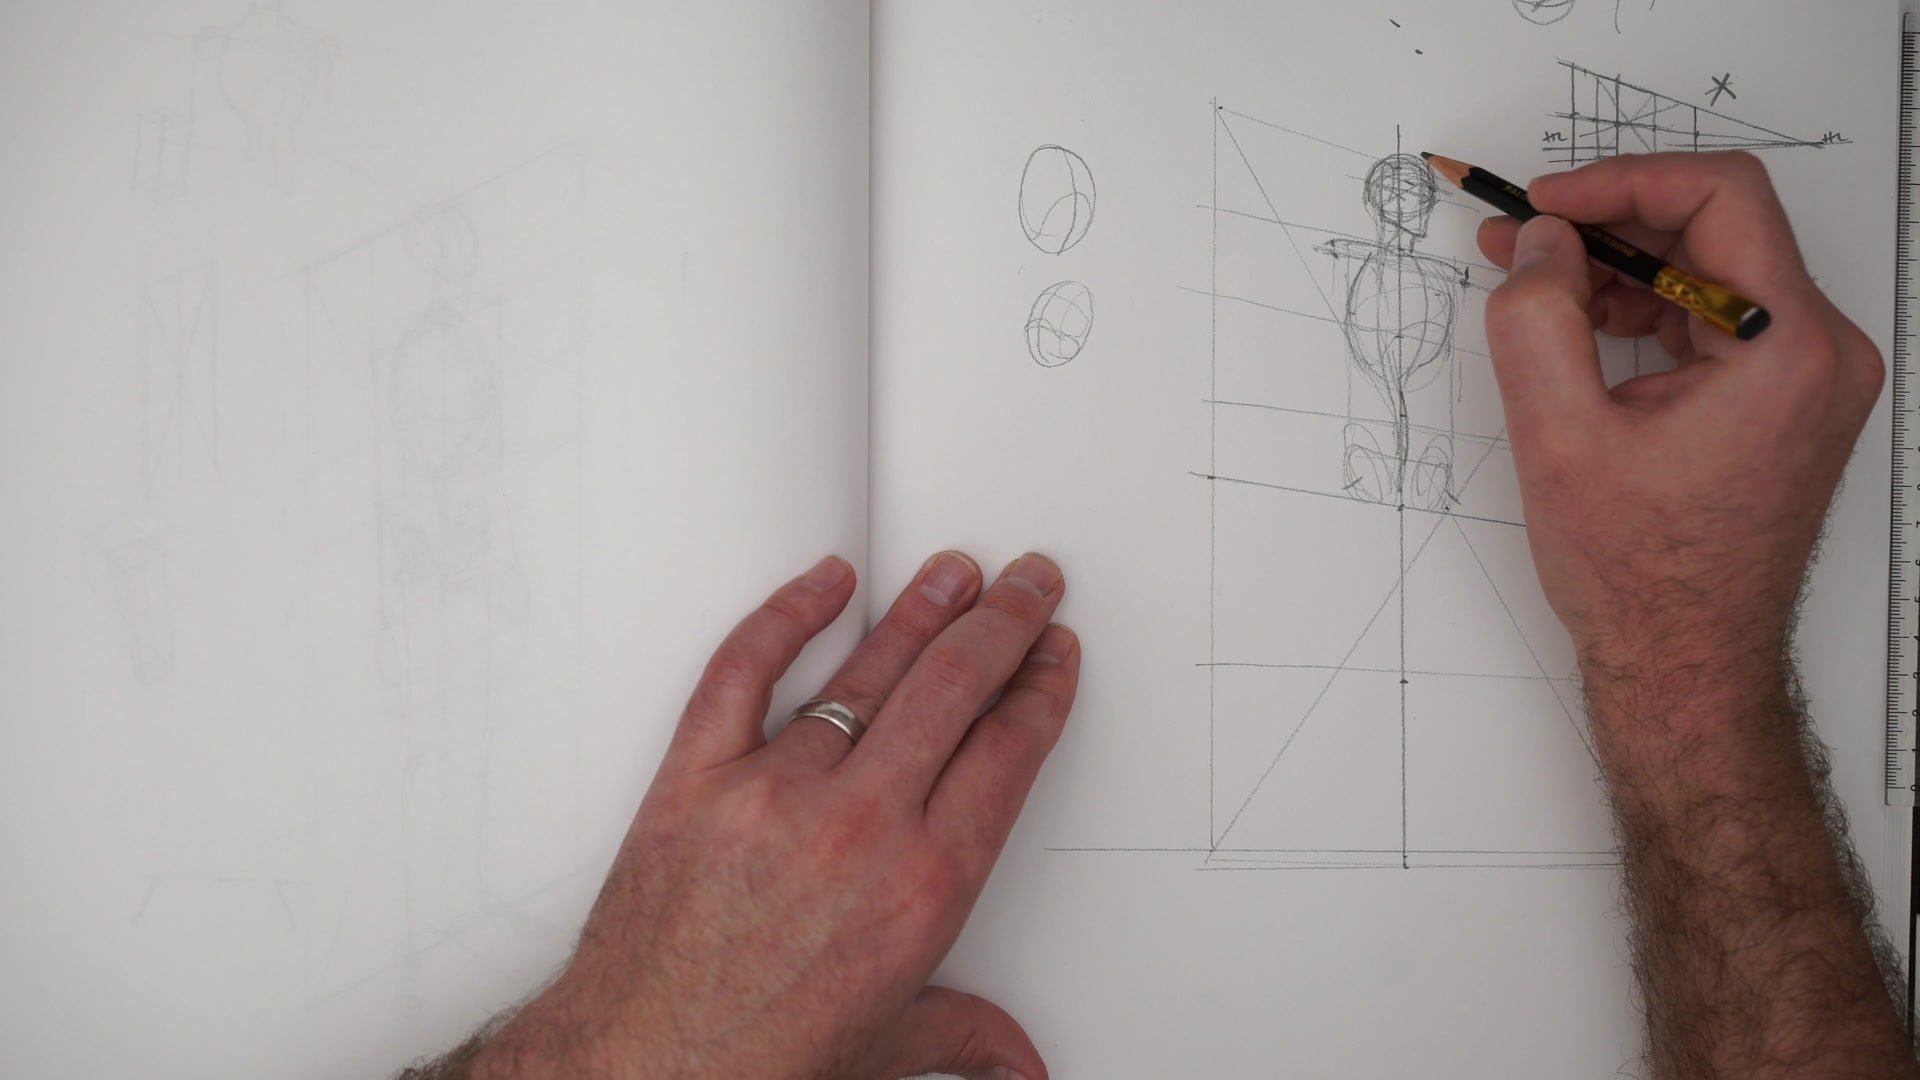
Center Line as Anchor
The center line is the single most important element for rotating the figure. Rather than trying to fit a character inside a box, starting with the center line that runs down the spine gives immediate structural control. It helps establish symmetry, positions key landmarks like shoulders and hips equidistant from the center, and keeps the figure feeling solid even when viewed from above or below.
The practical approach uses minimal perspective. Most comic panels and illustrations do not require extreme distortion. Starting with nearly isometric grids where the lines are almost parallel teaches the fundamentals of alignment without the added complexity of dramatic foreshortening. Camera angle and lens distortion are separate concerns from the basic ability to line things up. Artists can ratchet up the complexity once the simple rotations feel controlled, rather than jumping straight to extreme worm's eye or bird's eye views that combine multiple challenges at once.
Figure Construction
Applying to Any Character
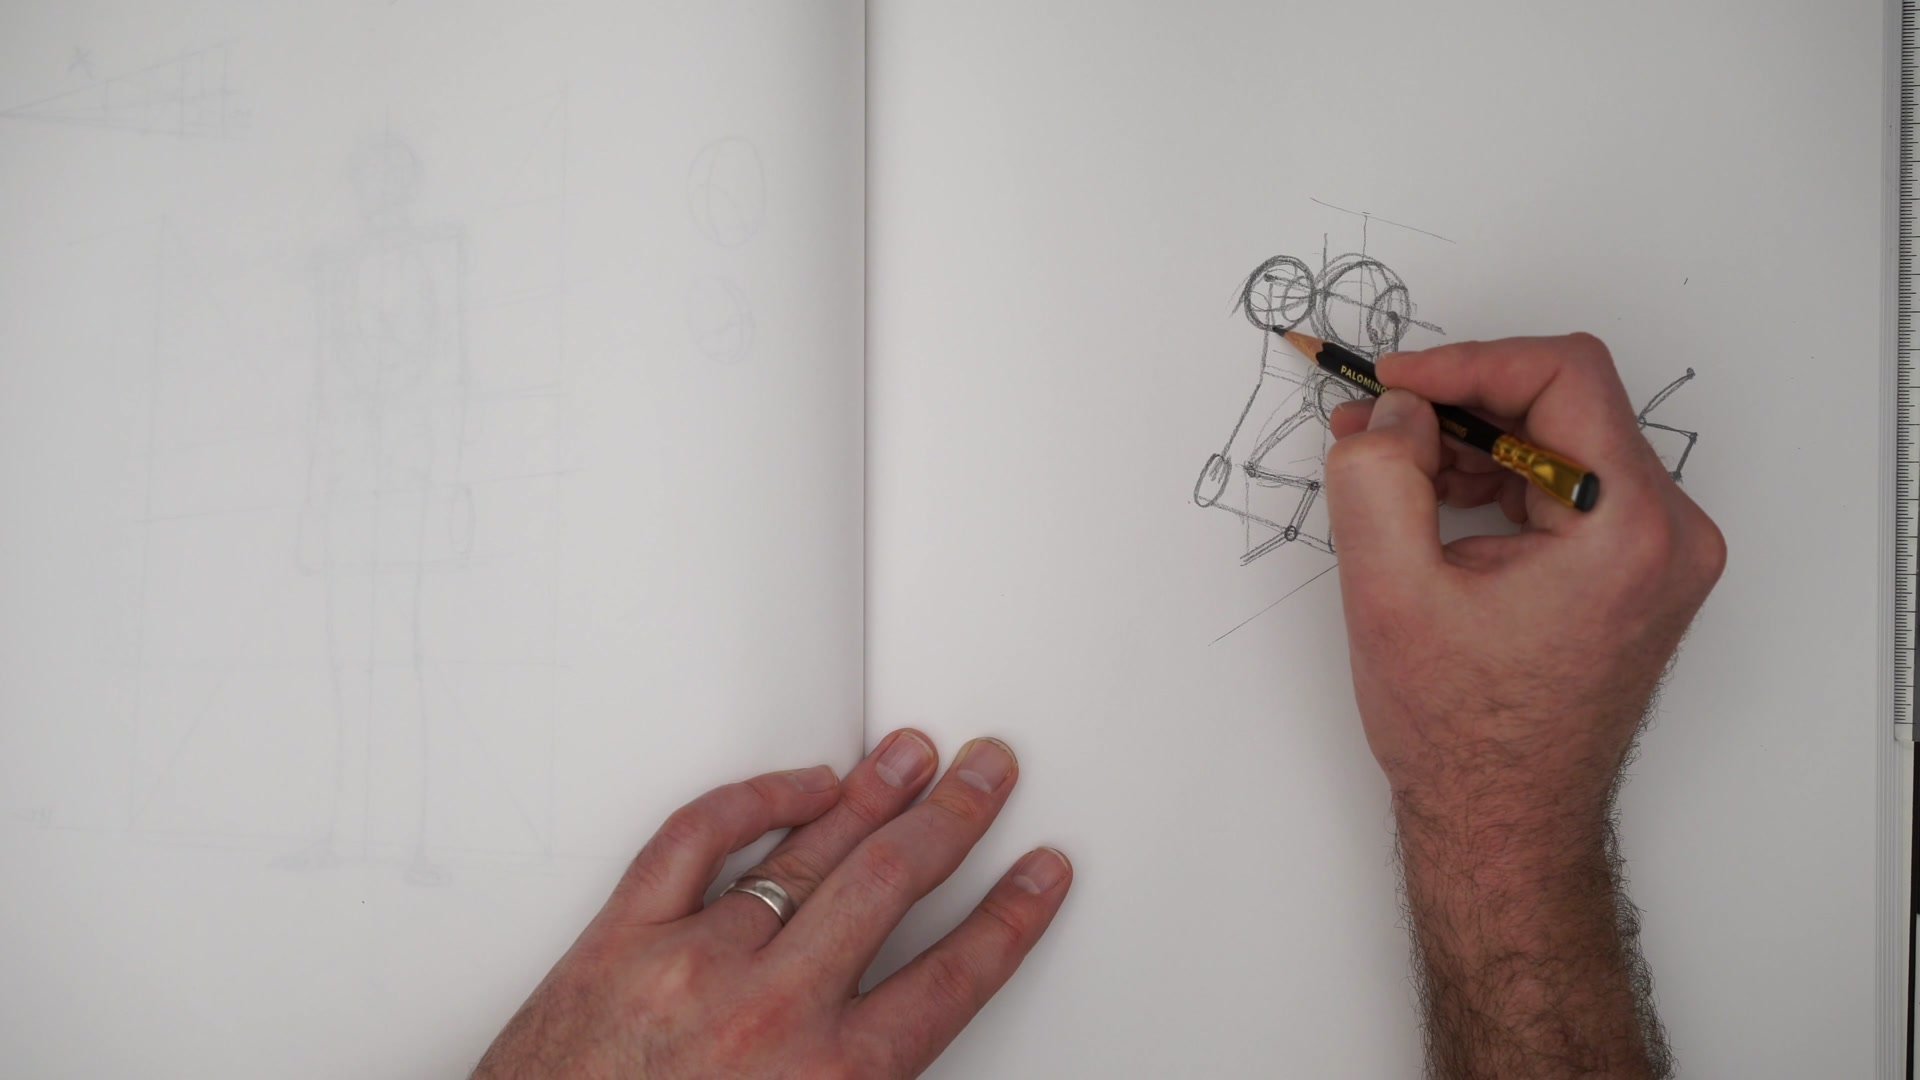
The same proportional and center line logic applies to non-human characters. A dragon creature with animalistic legs and a tail still requires finding where the pelvis sits, where the limbs connect to the ground, and how the center line traces through the spine. The forms change but the process of locating points in space, establishing symmetry from the center, and lining up corresponding landmarks stays identical.
The real learning happens in the back-and-forth between technical exercises and drawing for fun. Practicing grid division, then drawing interesting characters from angles, then going back to fix proportion errors builds both the intuitive and the technical side simultaneously. Failure is expected and useful. Getting something wrong, recognizing which fundamental is missing, and then studying that specific gap creates a much stronger learning cycle than trying to perfect perspective theory before ever attempting a real drawing.
Application and Results
Key Principles
Halfway Point First: Finding the midpoint of the figure at the pelvis or crotch is the single most important proportion. Once that division is accurate, all other proportional landmarks become much easier to place in perspective.
Center Line Over Box: Starting with the center line running down the spine gives better structural control than trying to fit the figure inside a perspective box. The center line establishes symmetry and anchors every other measurement.
Start With Low Distortion: Begin with nearly isometric grids where perspective lines are almost parallel. Extreme angles combine too many challenges at once. Ratchet up the distortion as the fundamentals solidify.
Back and Forth Learning: Alternate between technical grid exercises and drawing interesting characters. The connection between studying proportion and applying it to real subjects is where lasting skill develops.
Practice This
Draw the 2D Mannequin: Start by drawing the flat stick figure with all proportional divisions marked. Head, shoulders, rib cage base, navel, crotch, knee, and feet. Get comfortable finding these by eye.
Add Simple Perspective: Draw a basic grid with minimal distortion and transfer the same proportional divisions into 3D. Use the diagonal cross method to find the halfway point of any plane in perspective.
Rotate Gradually: Draw the mannequin from slightly above, then slightly below, then from behind. Keep the perspective nearly isometric at first. Only increase the distortion once the simple versions feel solid.


