Learn Leg and Torso Anatomy - How They Connect
Summary
Connecting the Leg to the Torso
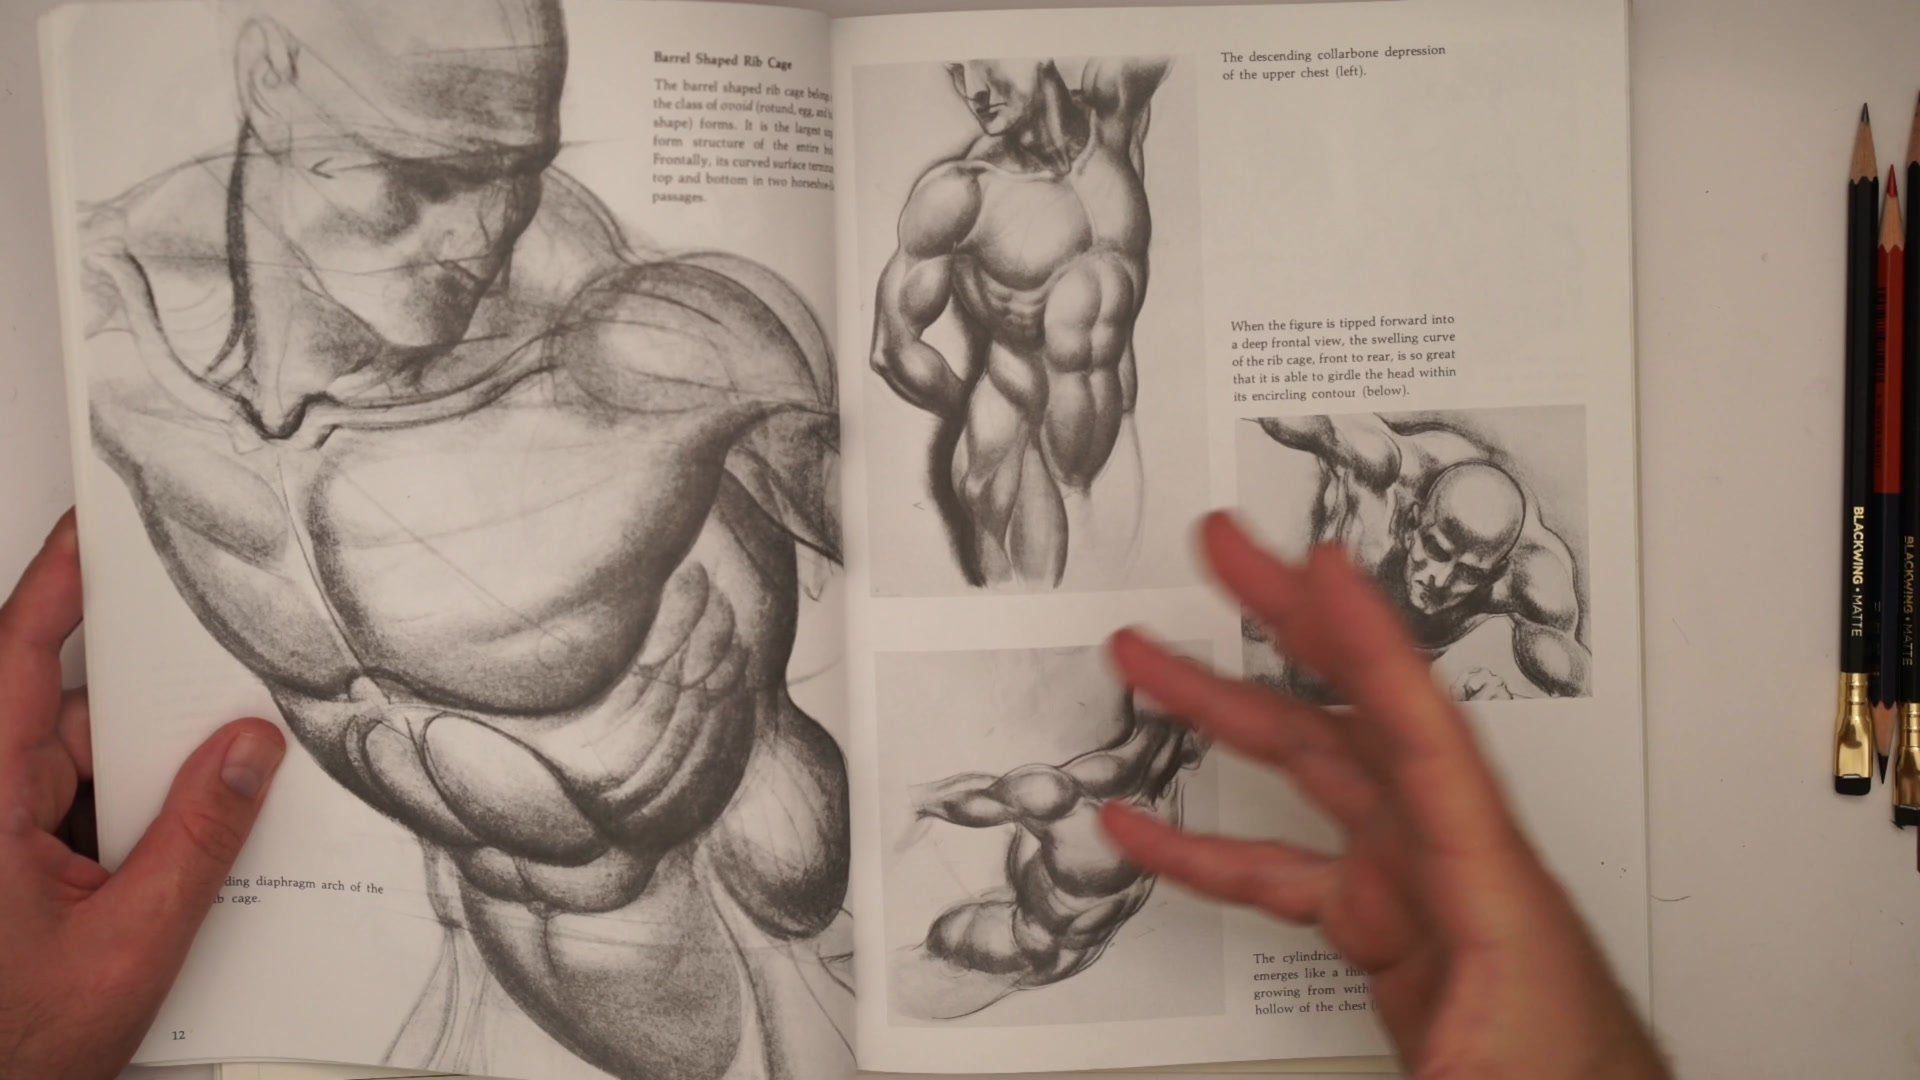
The leg-to-torso connection is one of the most challenging areas in figure drawing because the pelvic region is where two major muscle systems meet. All the abdominal muscles from above and all the leg muscles from below attach to the same bones, creating enormous complexity when the body moves and poses.
Solving this connection starts not with memorizing muscles but with understanding three primary forms and how they relate to each other. Using references from Hogarth, Bammes, and the Loomis mannequin system, this lesson breaks the problem down into manageable stages, from skeleton to primary form to the specific surface lines that actually need to appear in a finished drawing.
Anatomy References

Three Primary Forms
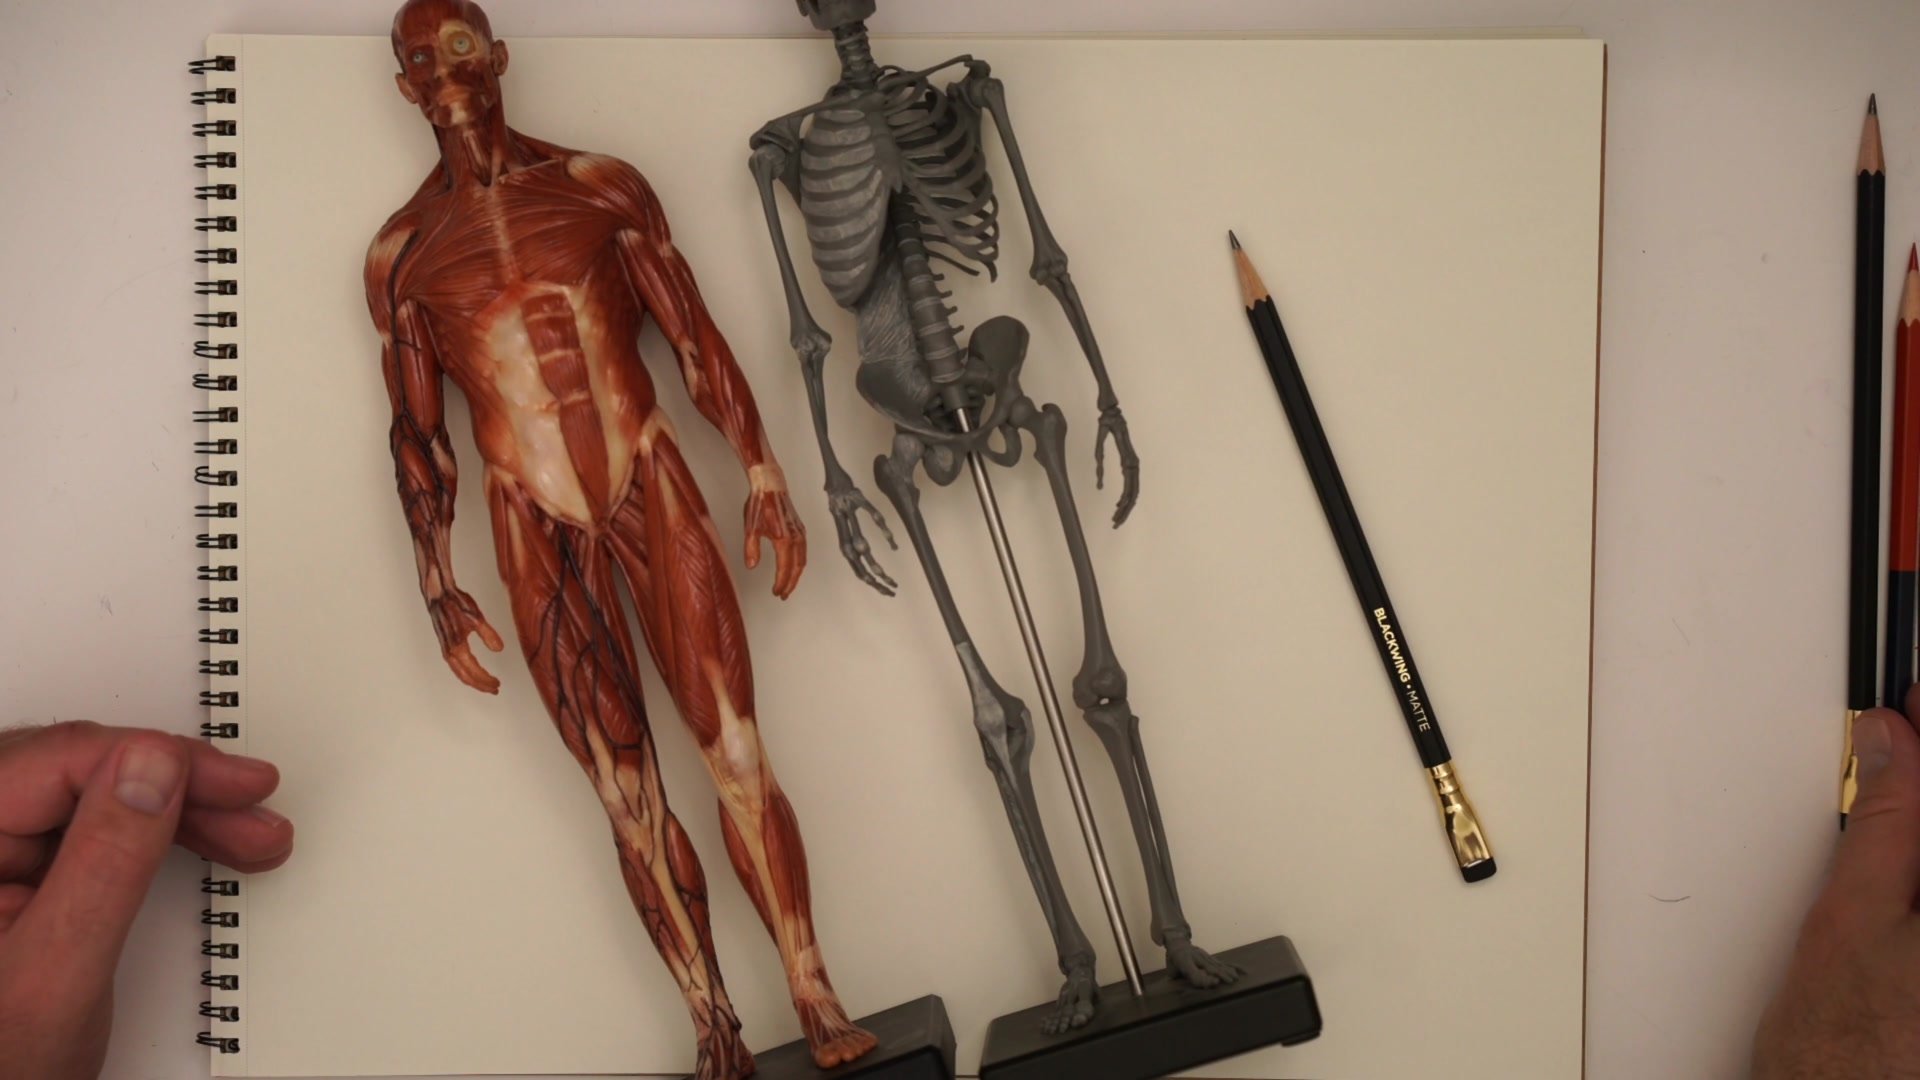
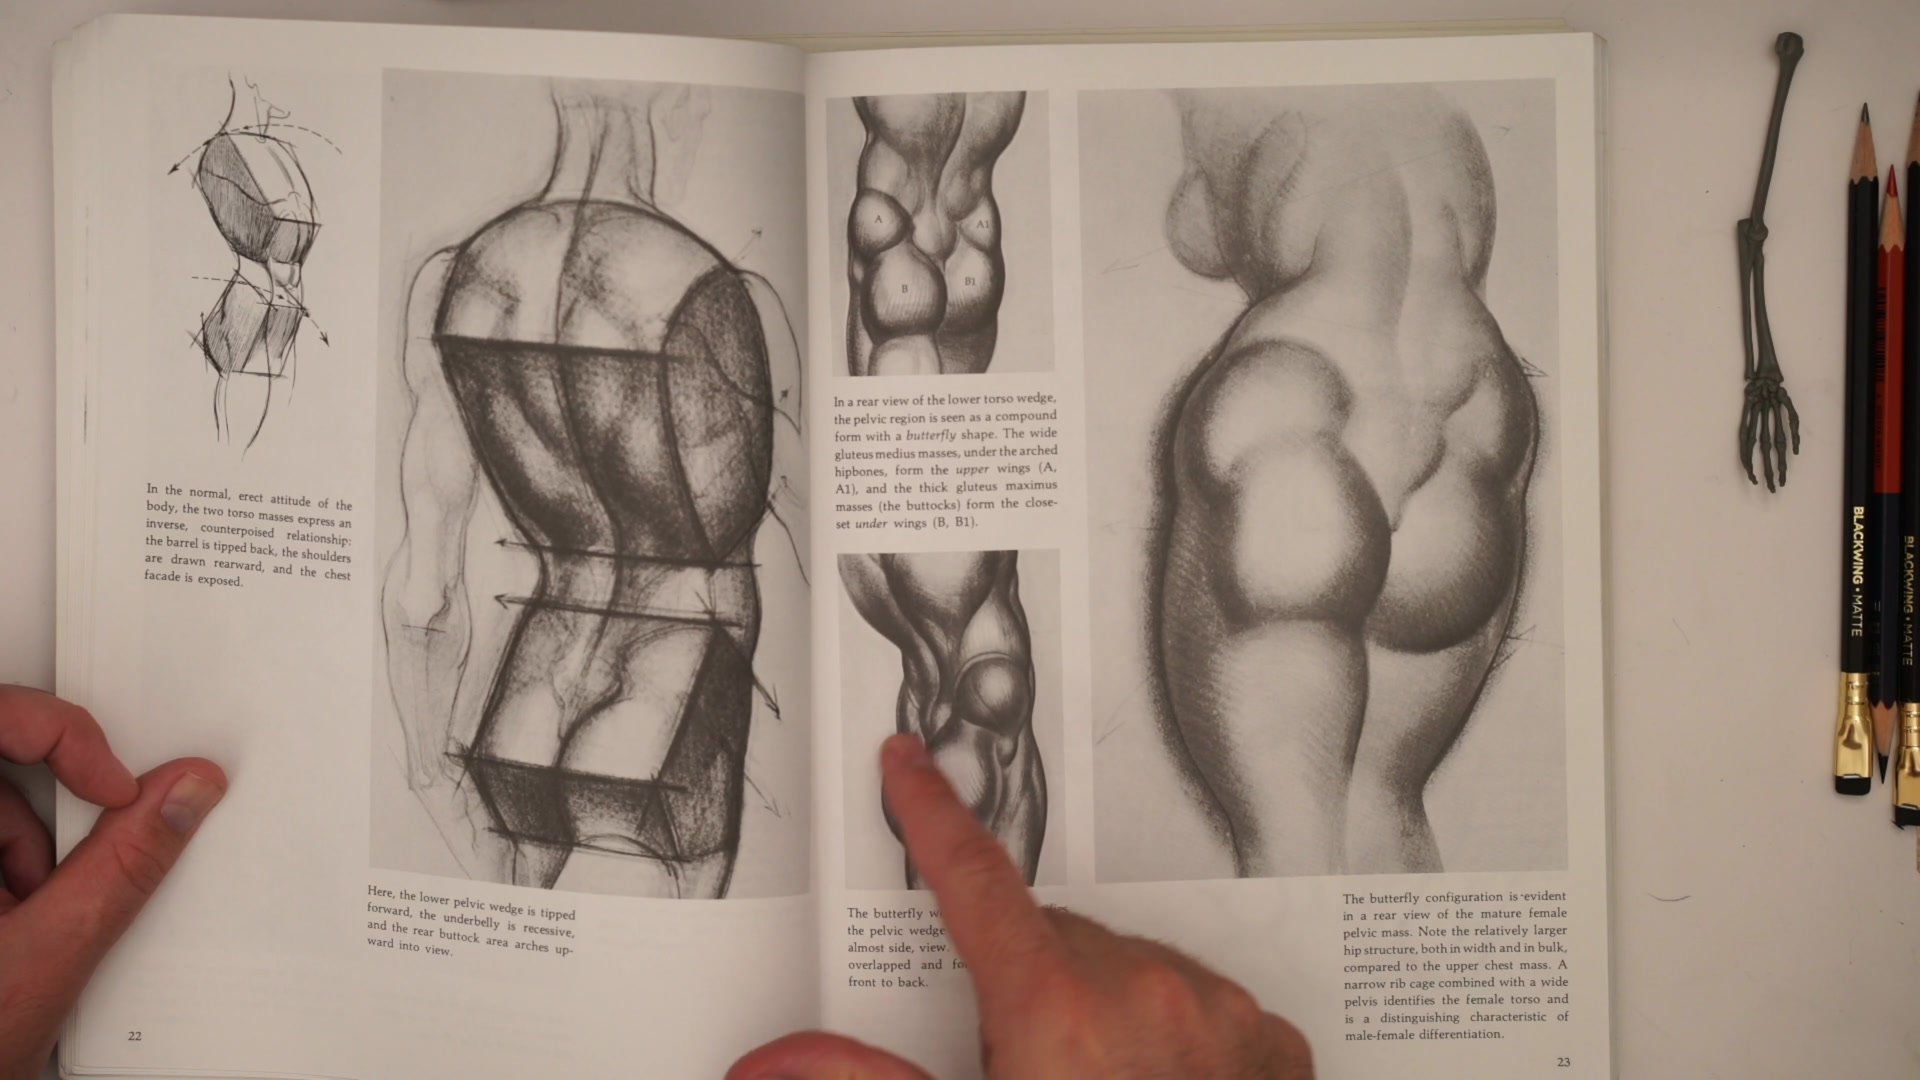
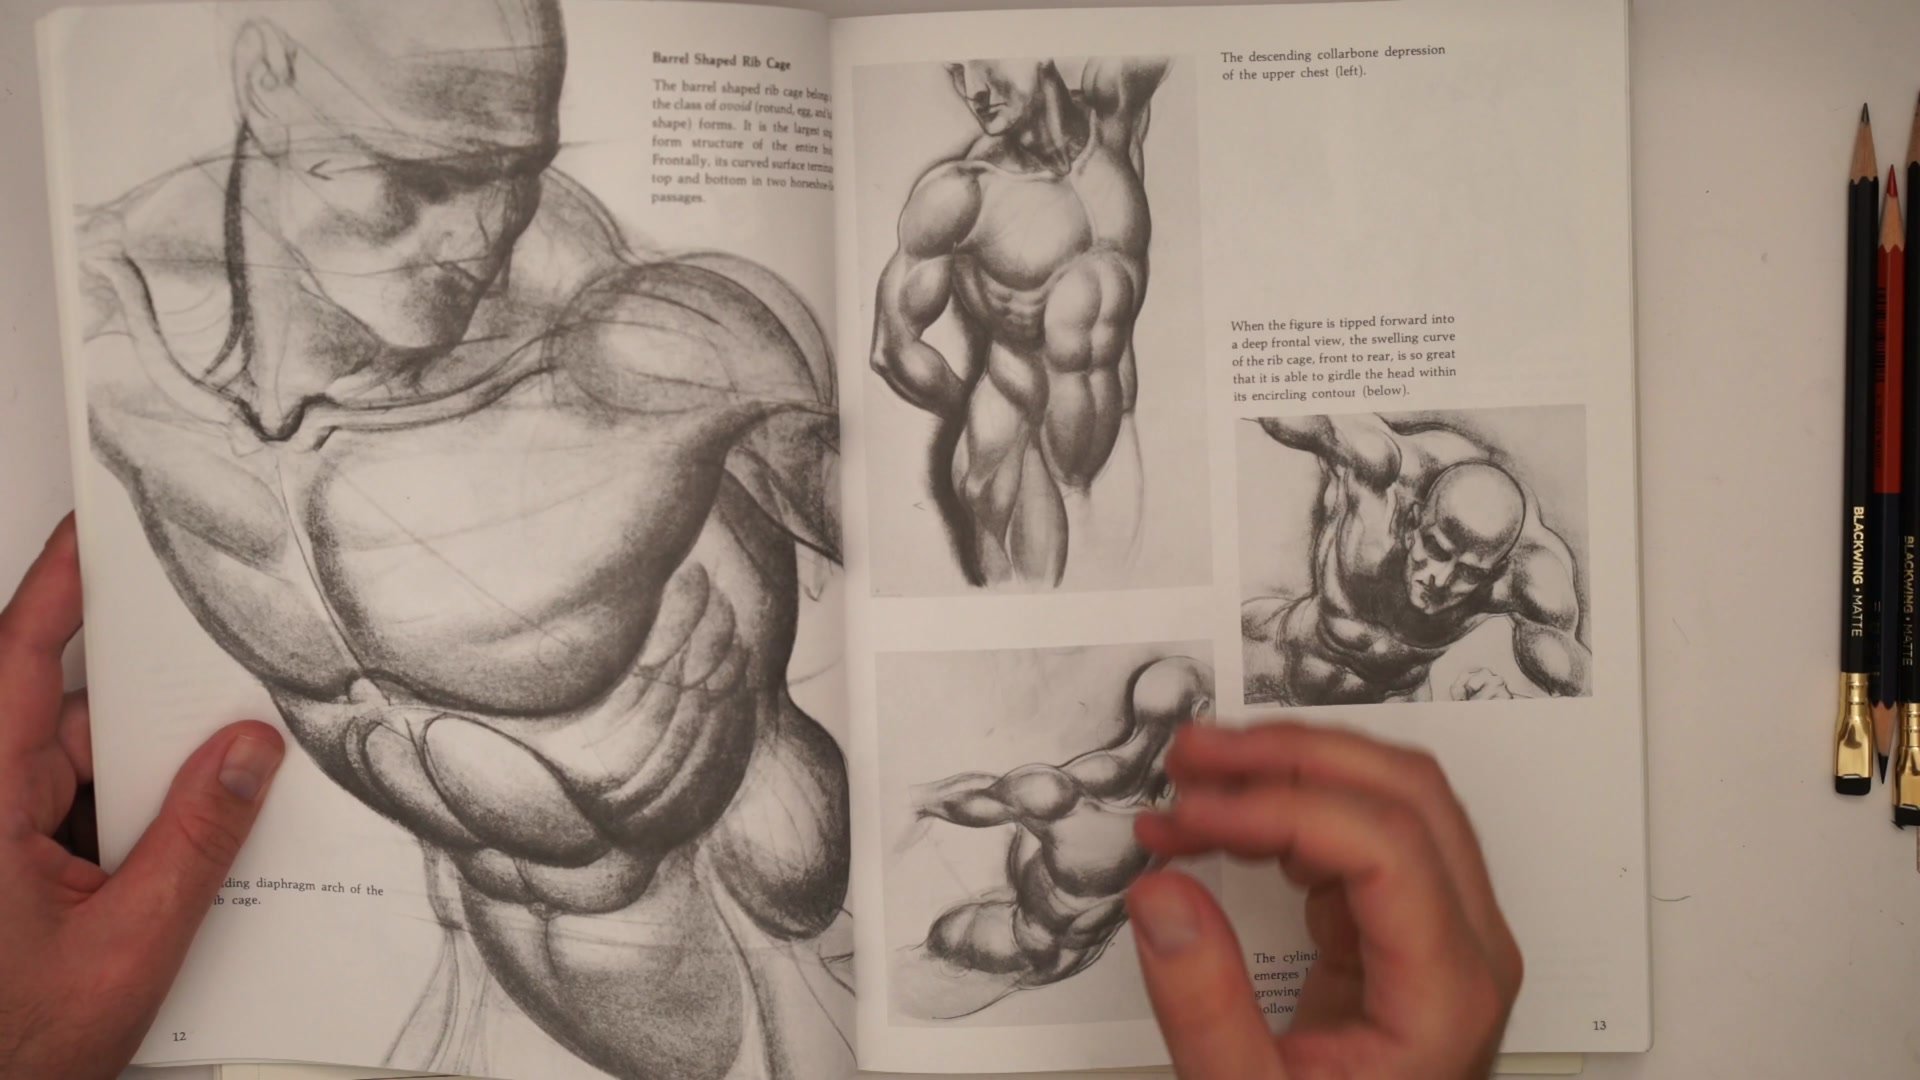
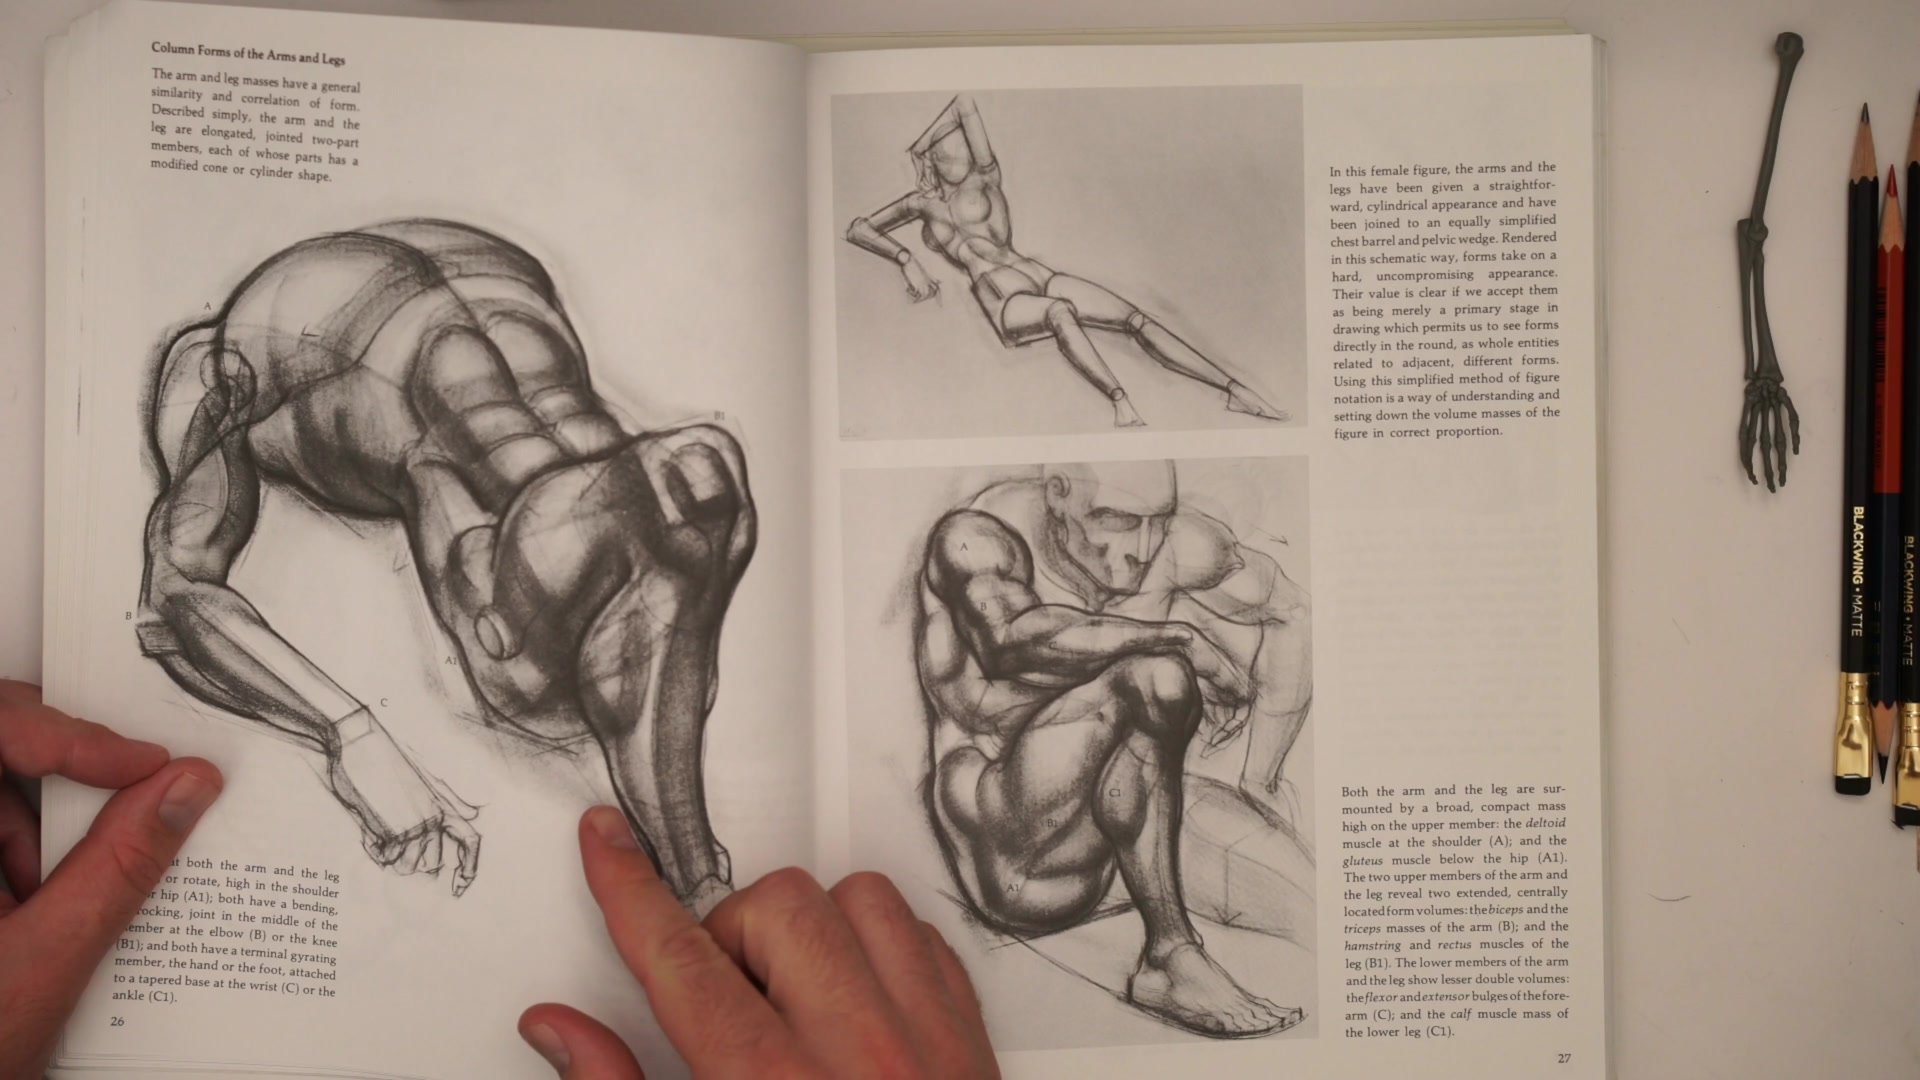
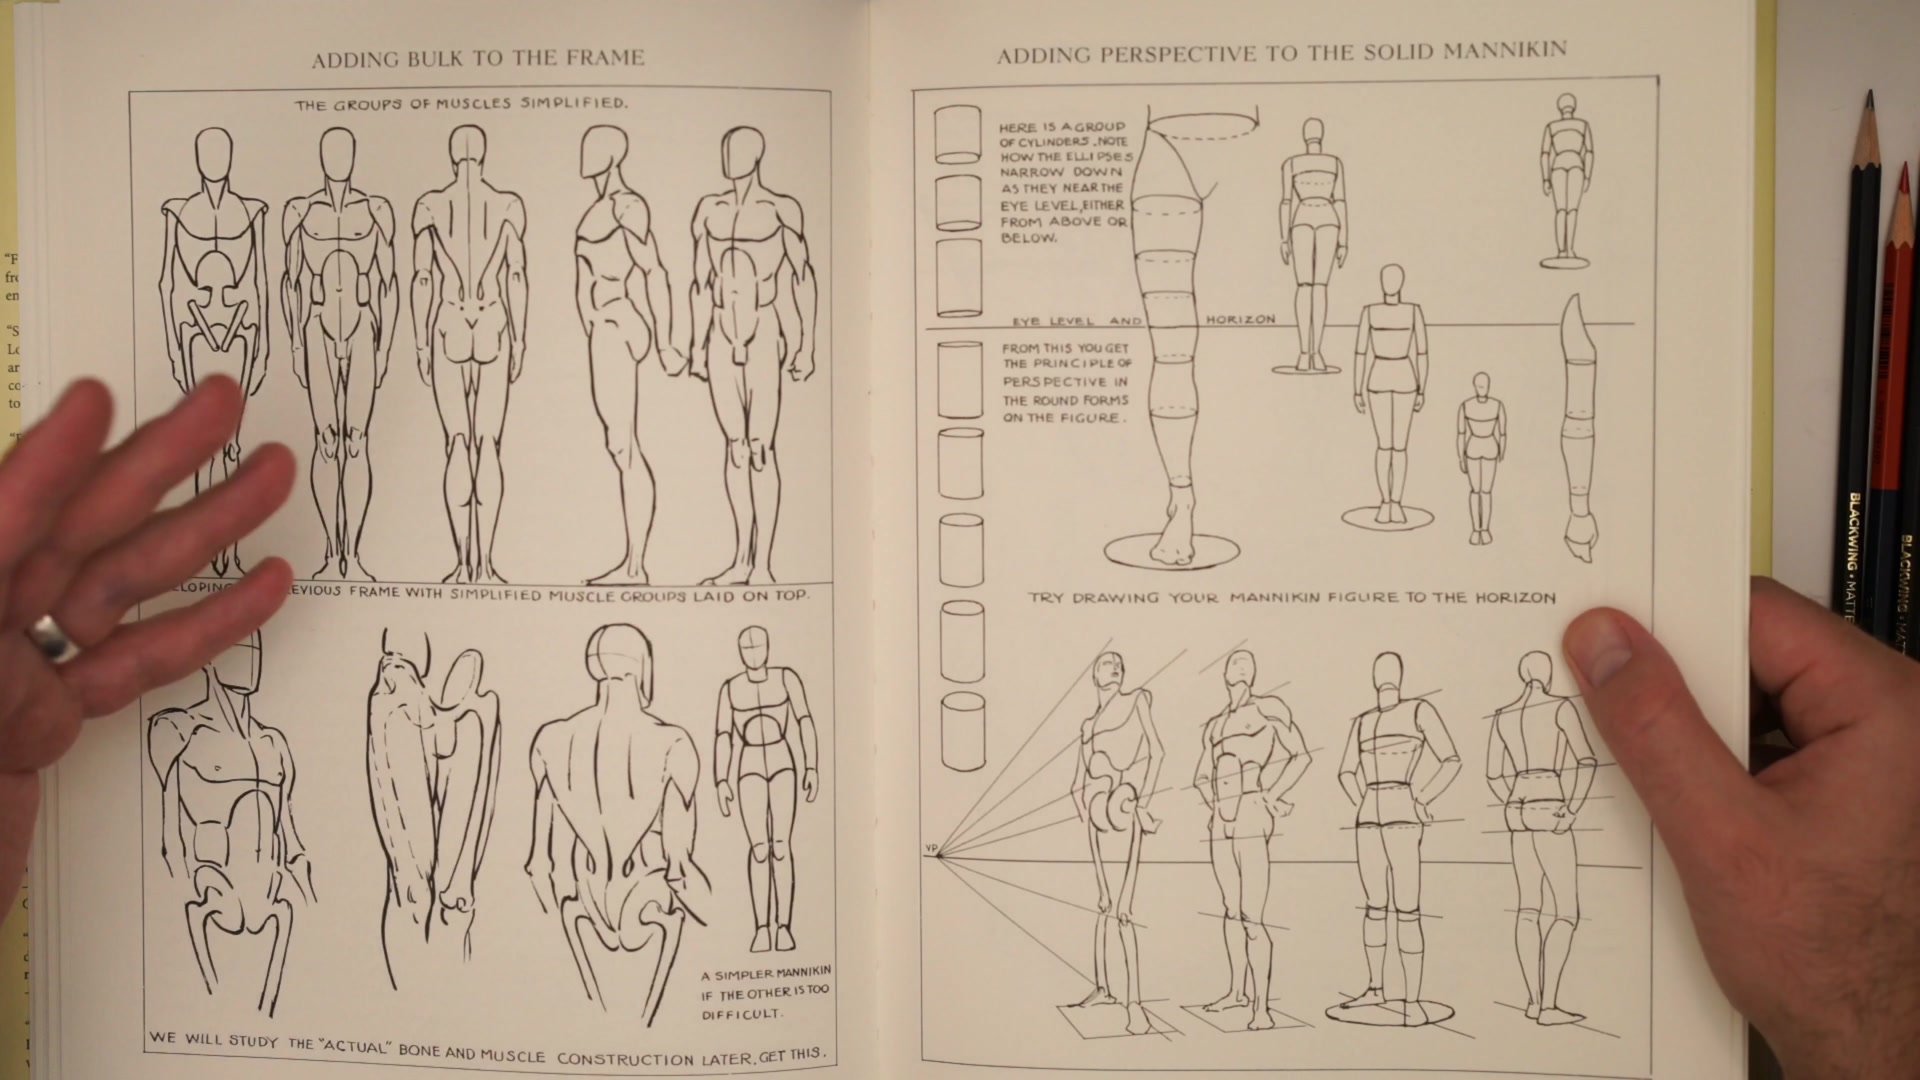
The real trick to drawing the leg-to-torso connection is getting the primary form right before worrying about detailed anatomy. Three masses need to be positioned correctly relative to each other: the rib cage, the pelvis, and the upper leg. The pelvis functions like a bucket or cup that connects the upper and lower body, with the spine entering from above and the legs attaching from below.
Getting these three forms arranged with correct proportions and relationships solves most of the connection problem. Without that foundation, adding muscle detail just decorates a broken framework. The Loomis mannequin system teaches building figures from these primary forms first, using simplified shapes that represent the skeleton's basic structure before adding the minimal anatomical information needed to make the figure read as human.
Skeletal Construction
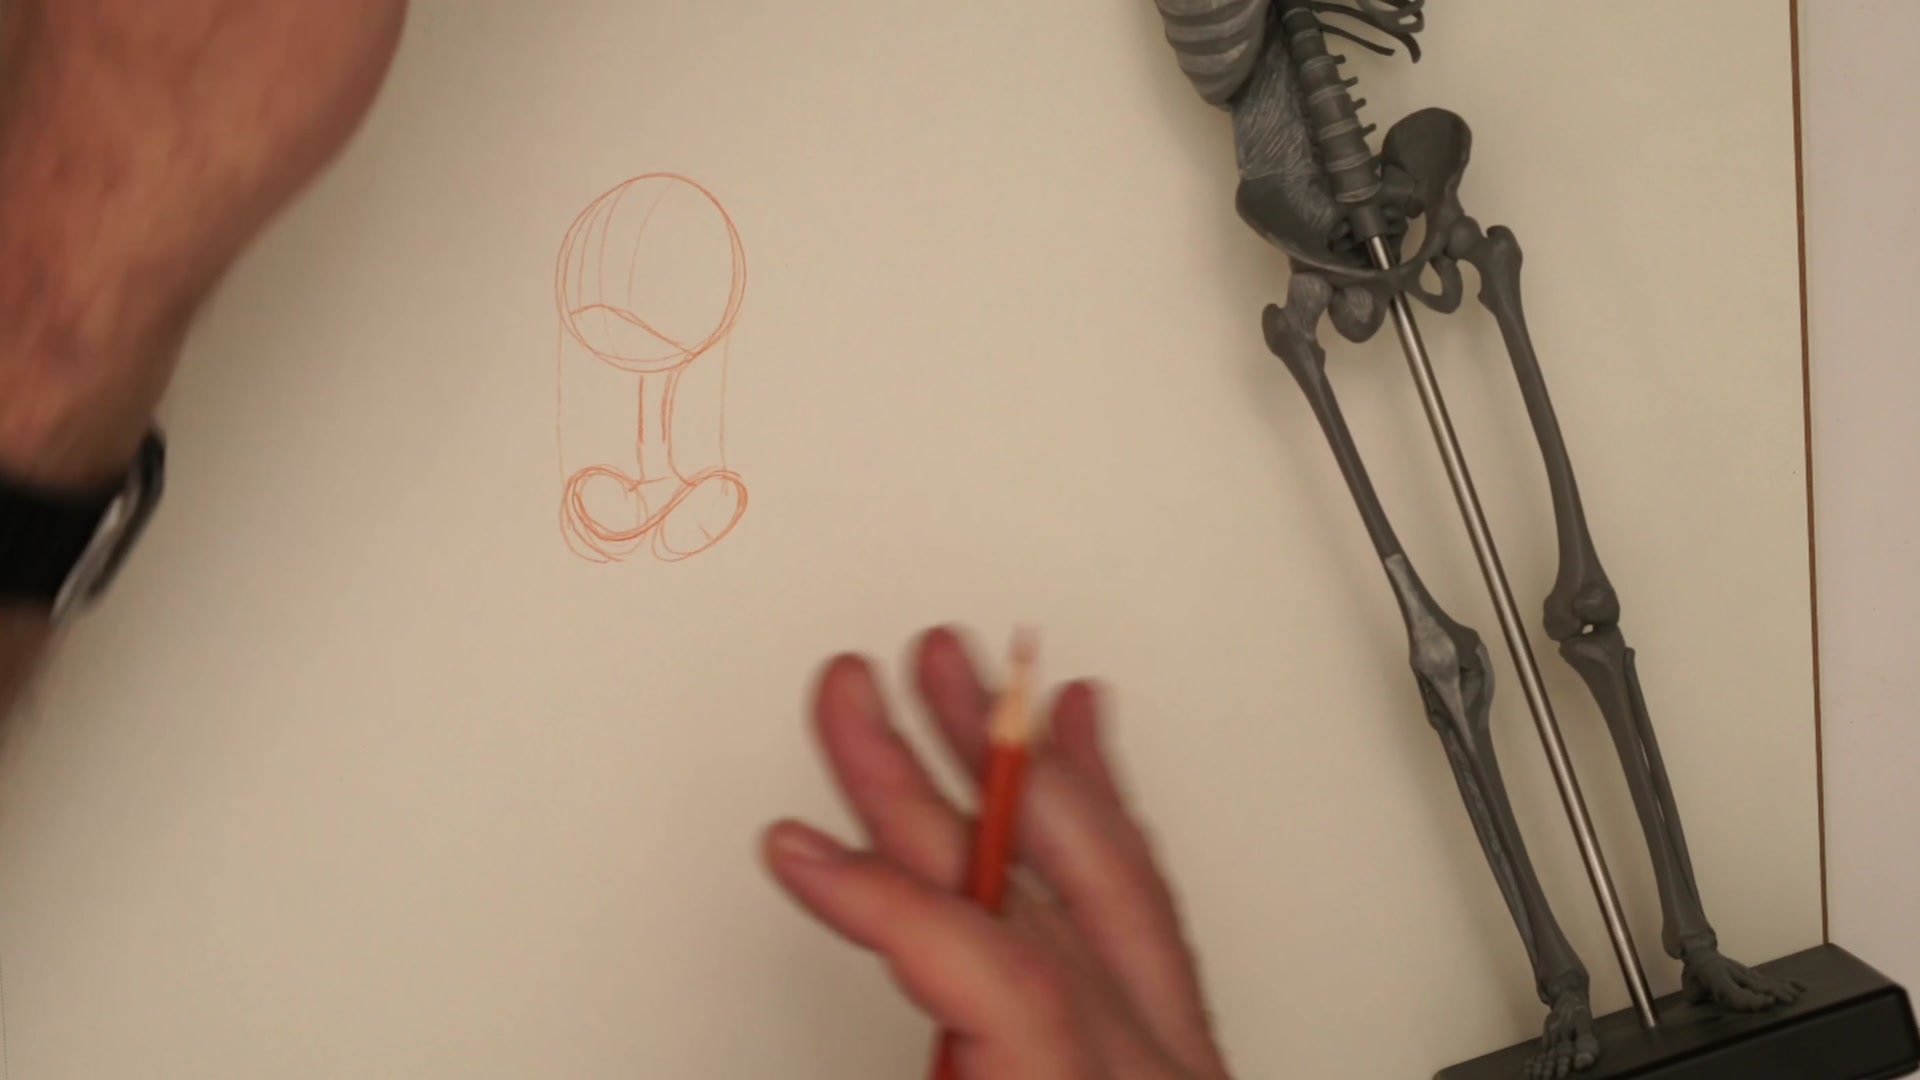
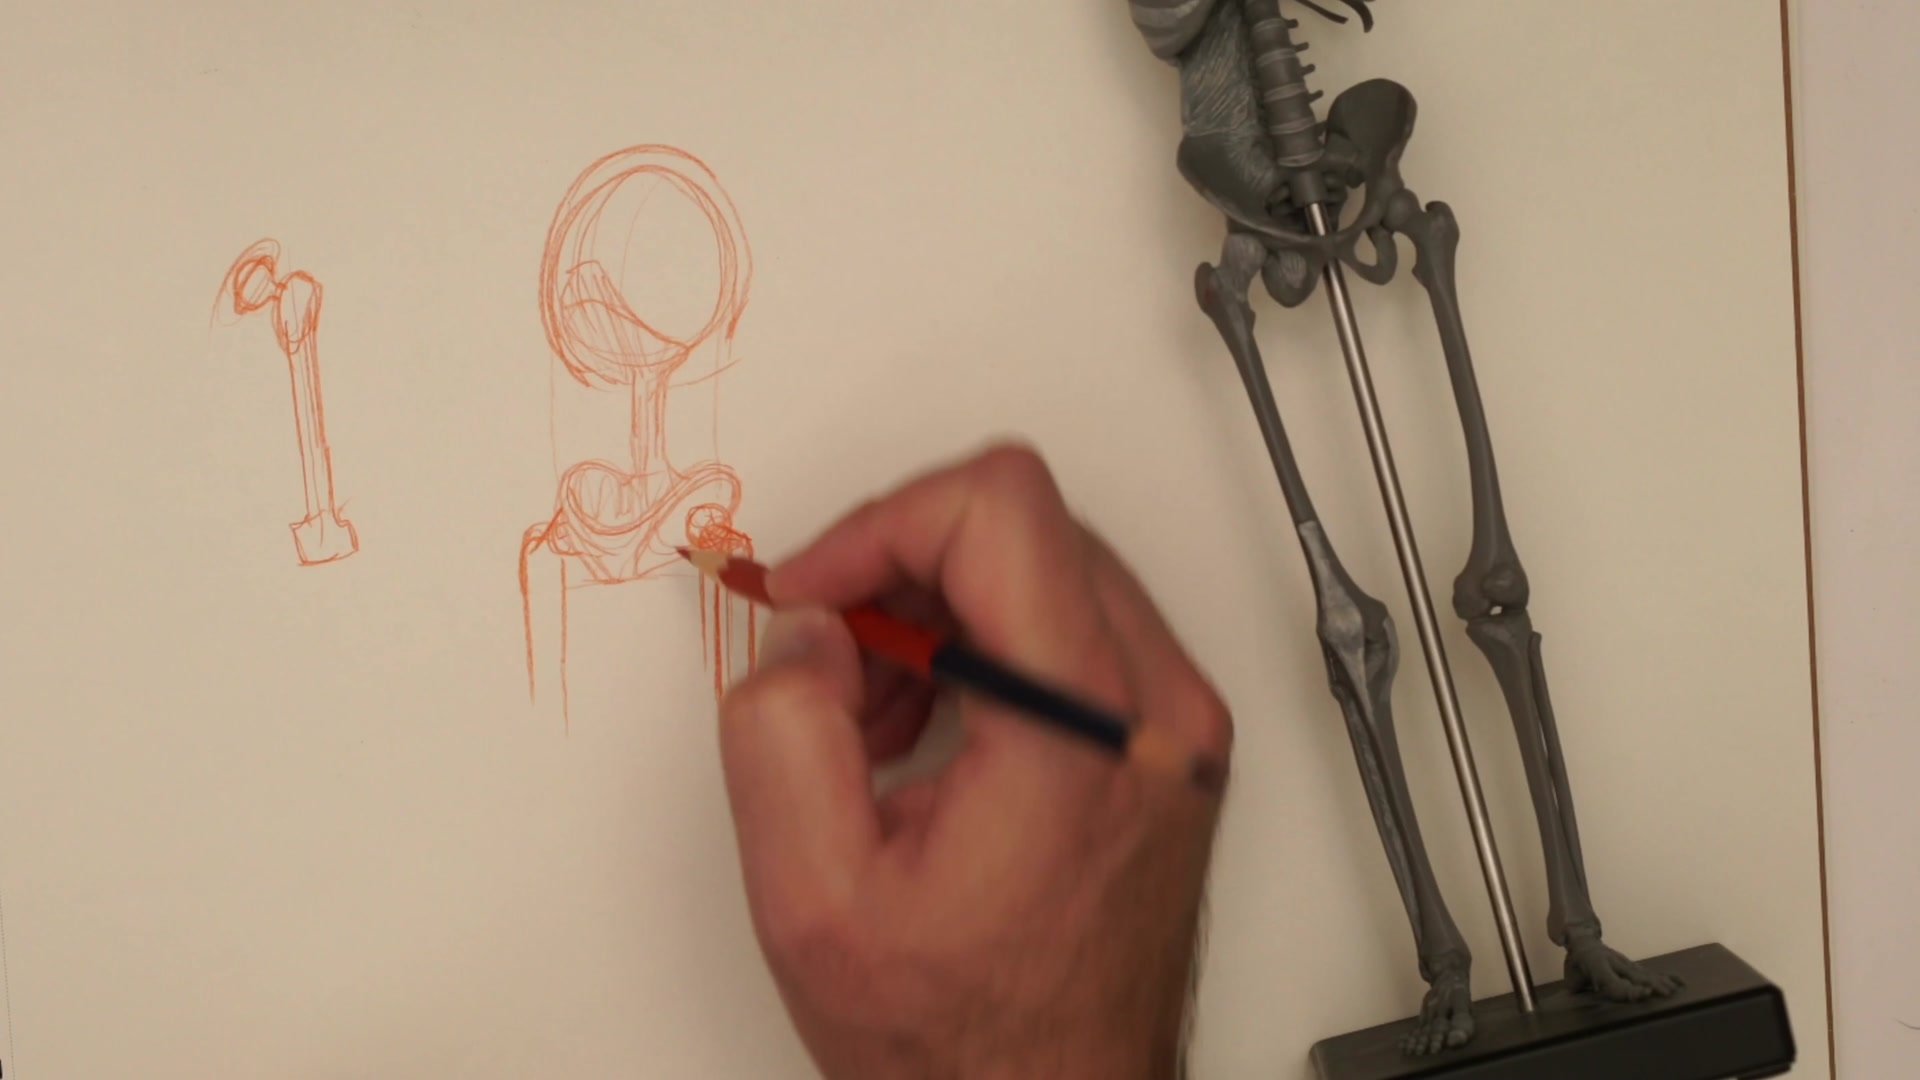
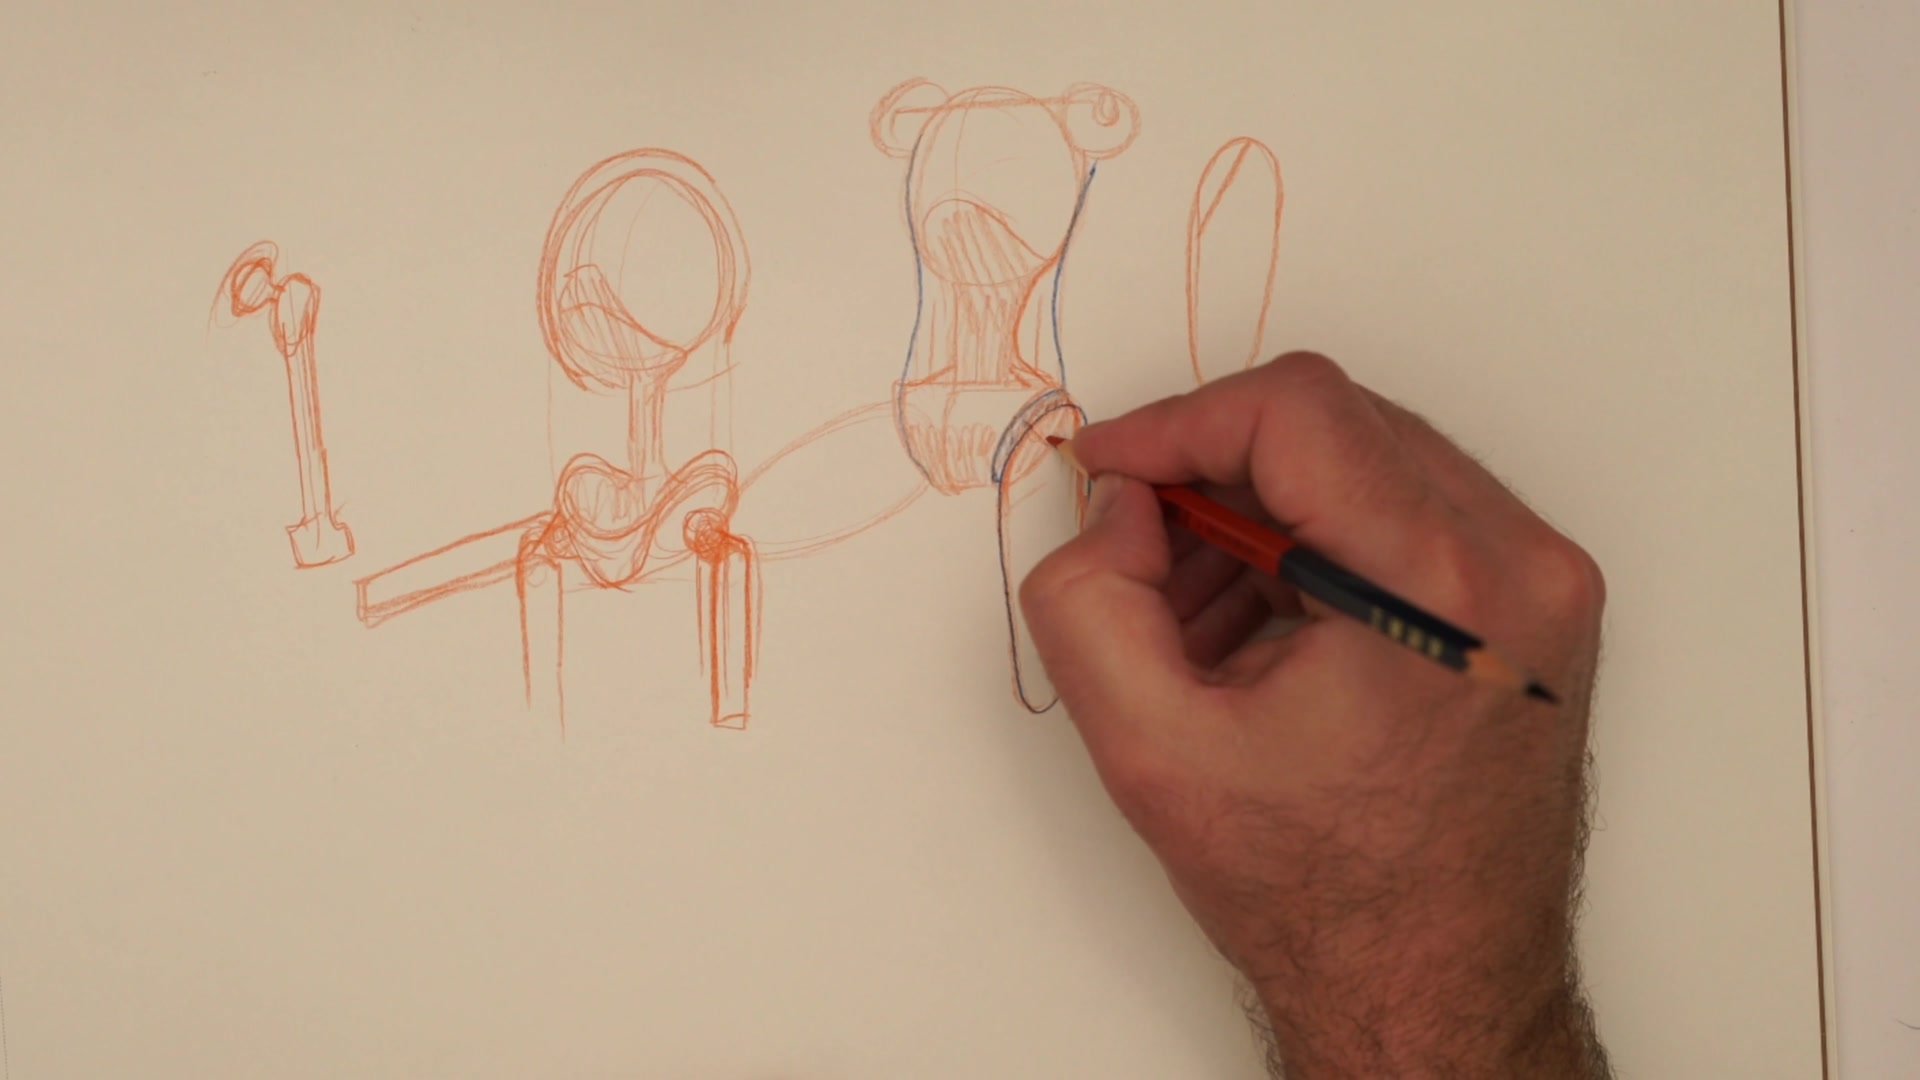
The Hip Socket Deception
One of the most critical anatomical points in this area is that the leg bone's pivot point sits inside the pelvis, not at the visible outer thigh. The femur has a ball-and-socket joint that connects within the pelvic socket, but the bone then angles outward to where it becomes visible on the side of the leg. This separation between the pivot point and the visible bone is deceptive and frequently missed.
When the leg lifts or rotates, the movement originates from that interior socket, meaning the visible portion of the bone moves through a specific arc that differs from what most beginners expect. Getting this mechanical relationship correct prevents poses from feeling structurally wrong. The Loomis mannequin approach accounts for this by placing the hip socket inside the simplified pelvic form and angling the leg bone outward from there.
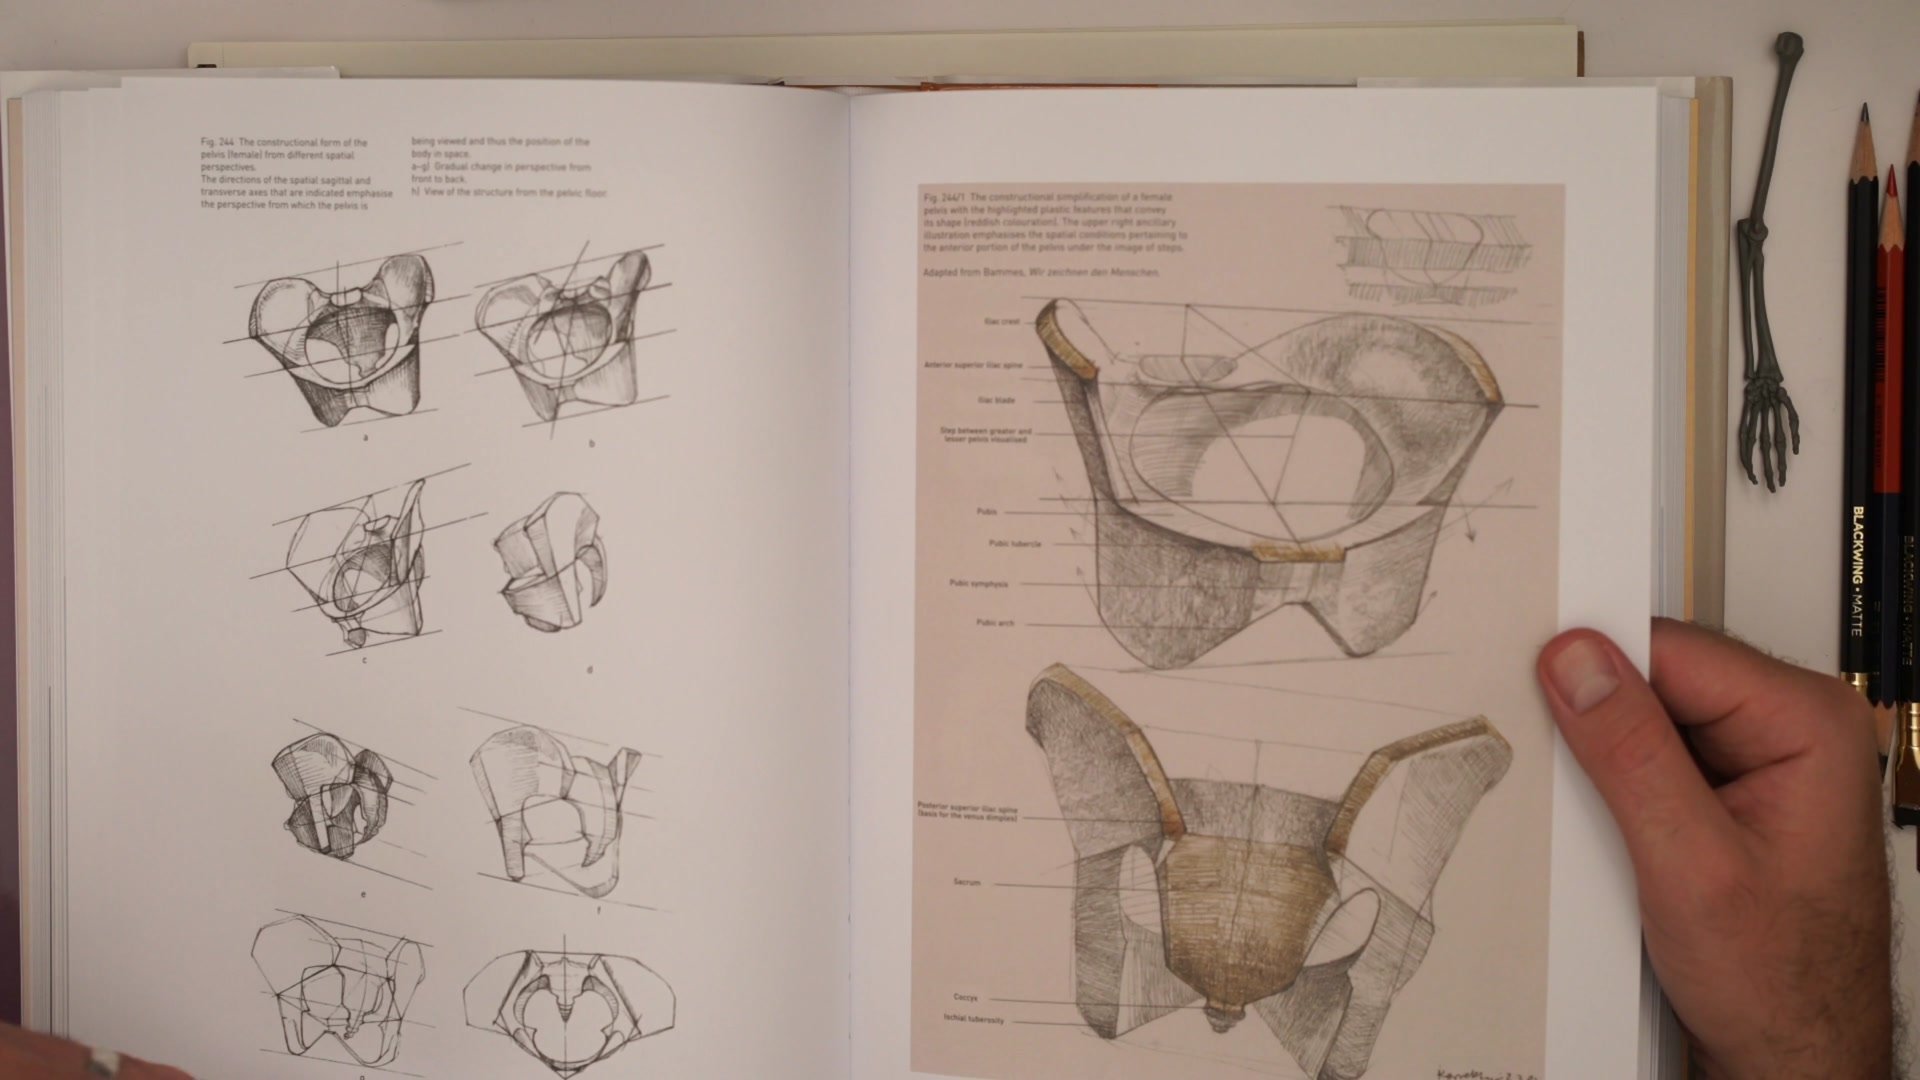
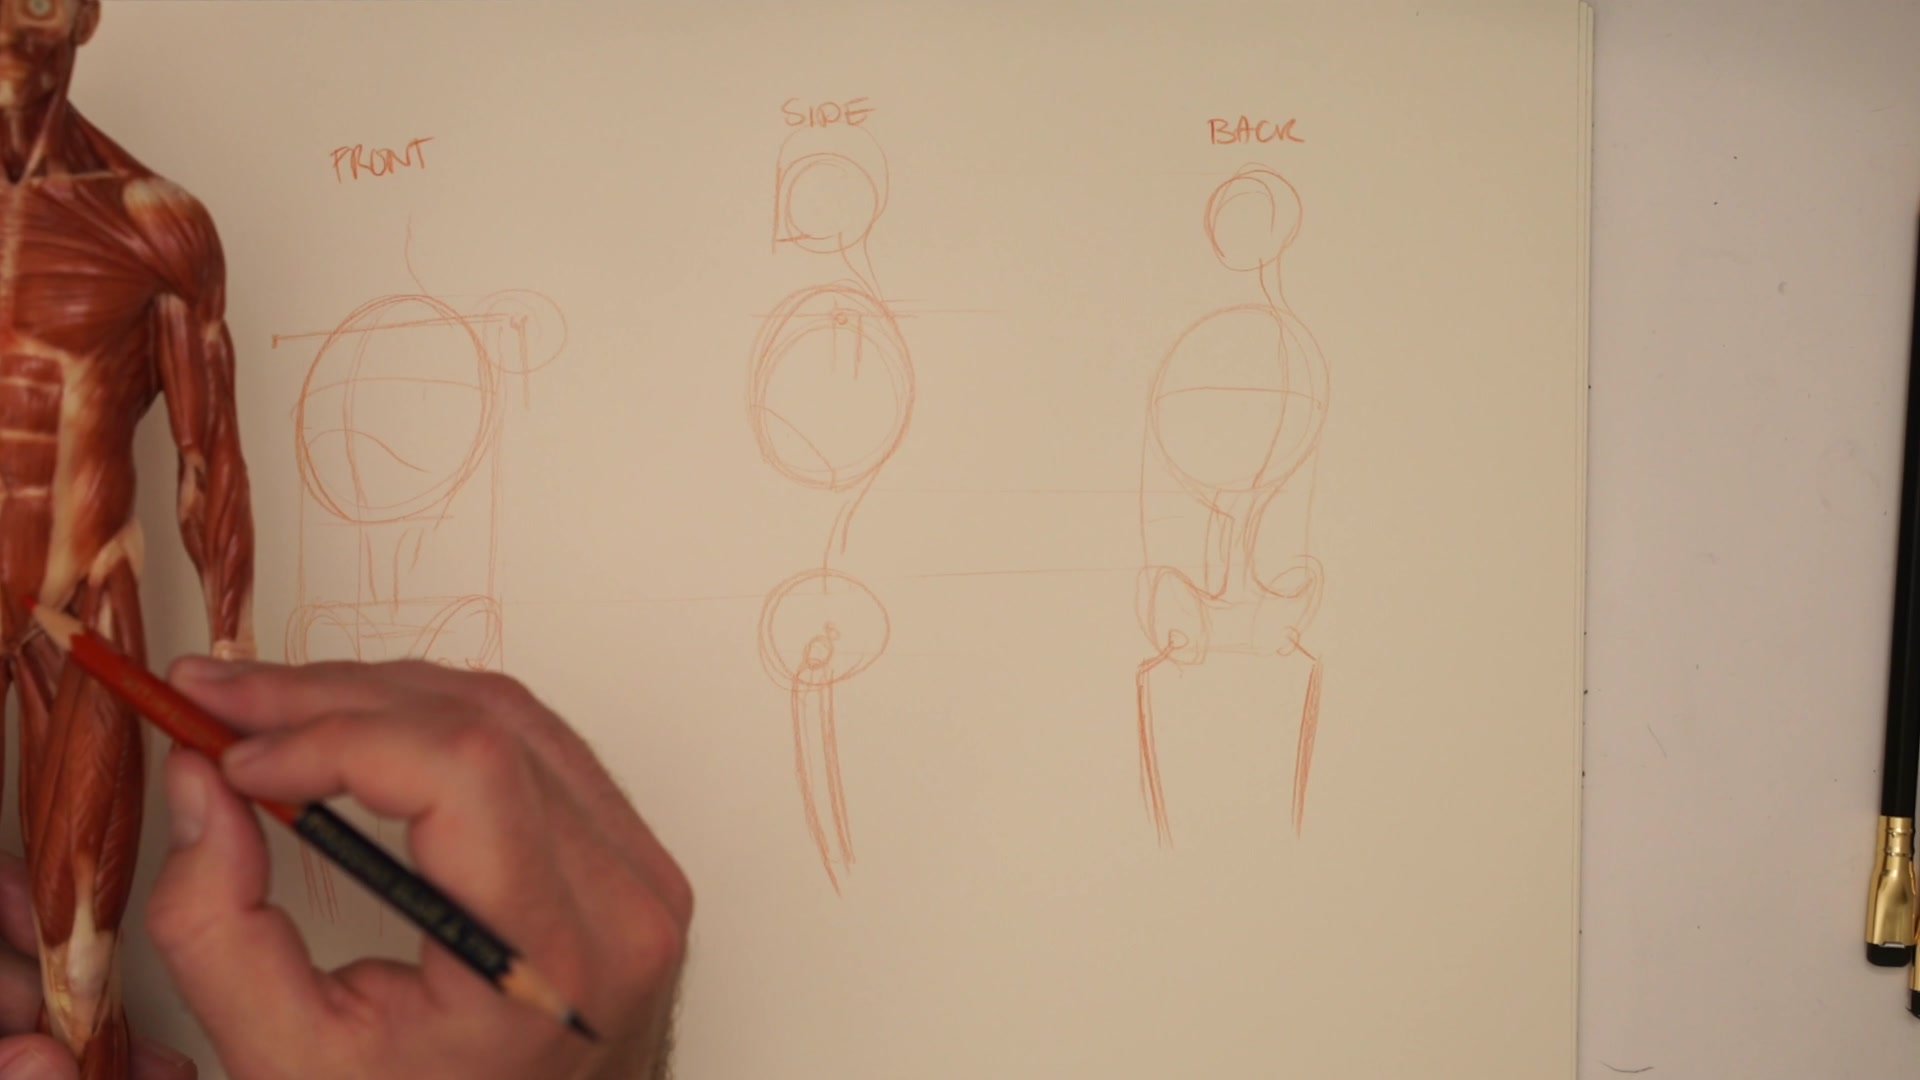
Front, Side, and Back Views
Finding the Lines That Matter
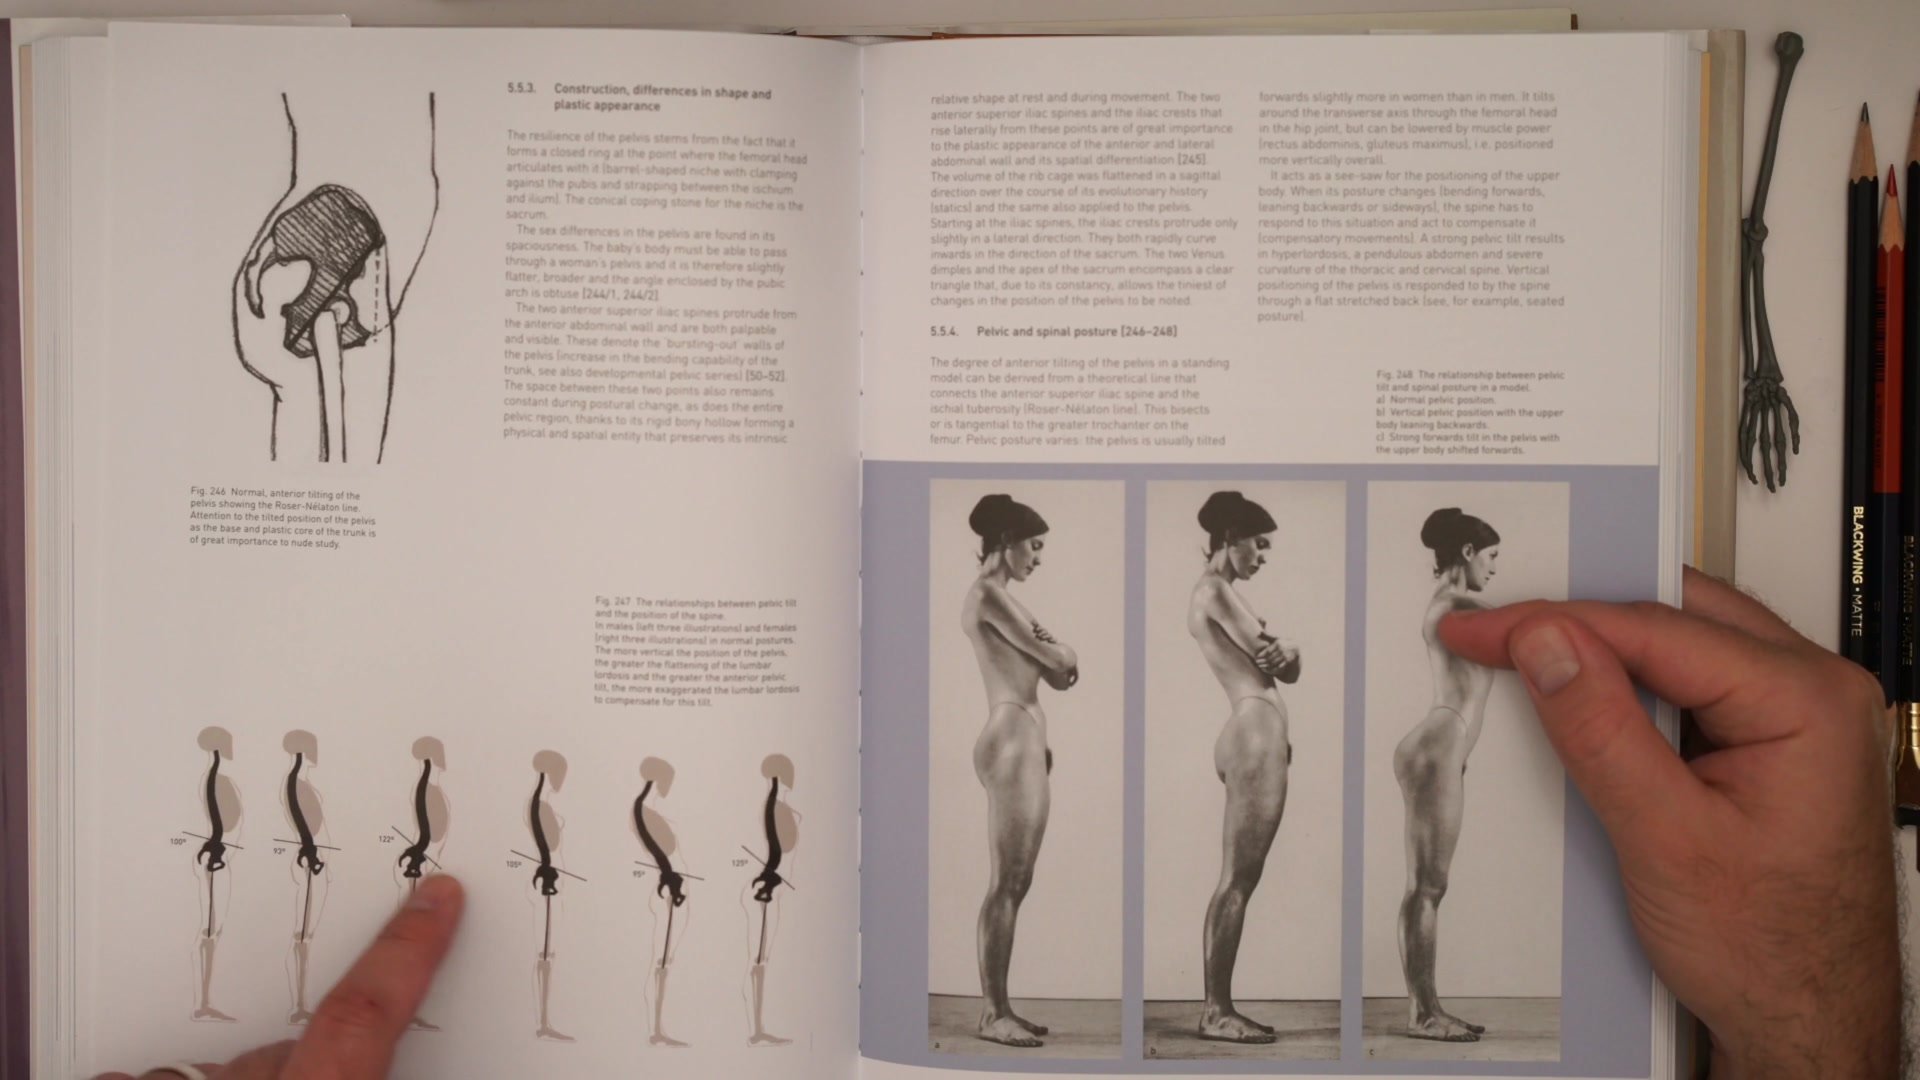
Despite all the anatomical complexity in the pelvic region, finished drawings typically show only a handful of specific lines. The key is that different viewing angles require completely different anatomical markers. From the front, the critical lines are the crease where the legs meet the torso, the hip bone points, and the belly button landmark. From the side, the glute curve, where the pelvis tucks under the rib cage, and the hip bone pivot point define the silhouette. From the back, the center spine line, the V-shaped taper, and the dimples at the top of the pelvis create the major form.
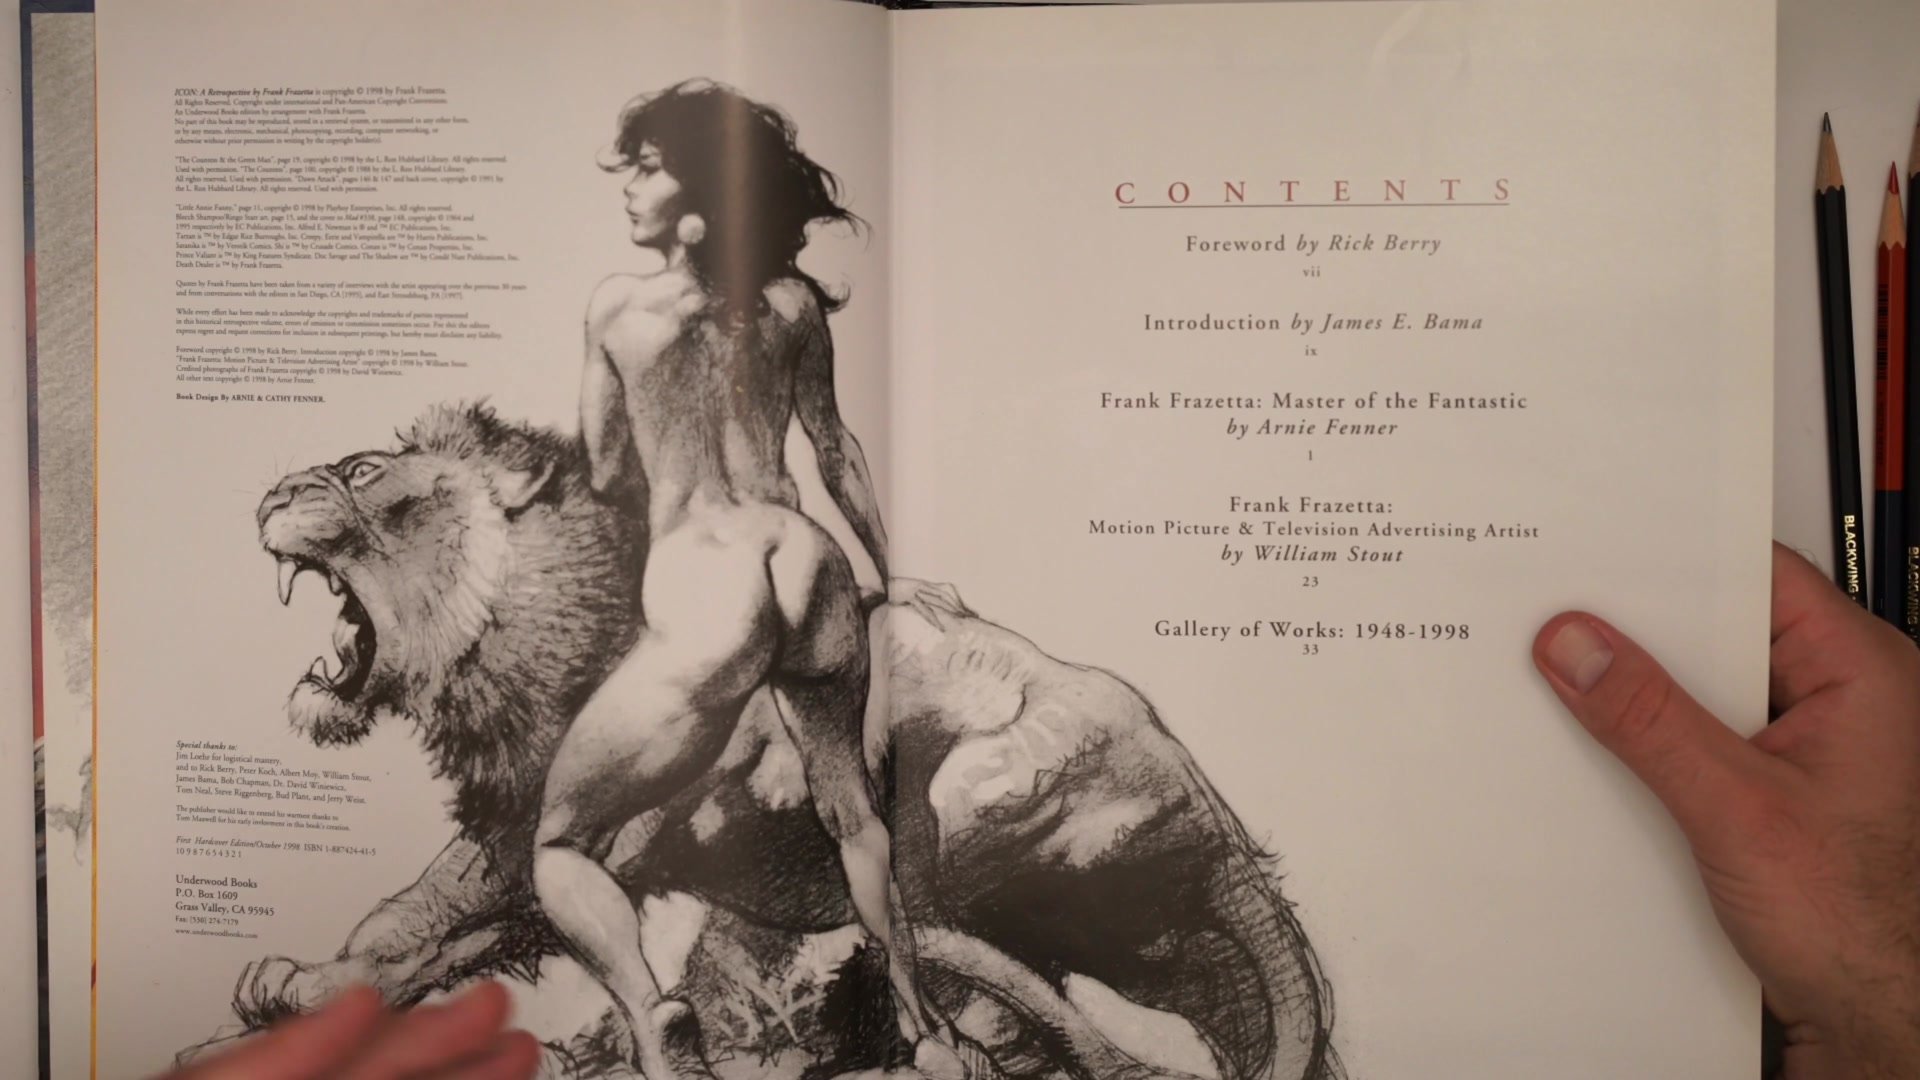
Artists like Frazetta demonstrate this economy of line perfectly. Understanding the full anatomy allows choosing exactly which lines to include for maximum effect. Often the area is partially covered by clothing anyway, and full anatomical rendering only becomes necessary in very specific poses.
Finished Construction

Key Techniques
Primary Form First: Position the three major masses (rib cage, pelvis, upper leg) correctly relative to each other before adding any muscle detail. The pelvic bucket connects the upper and lower body, and getting this arrangement right solves most connection problems.
Interior Hip Socket: The leg pivots from inside the pelvis, not at the visible outer thigh. The femur angles outward from this interior socket, and understanding this mechanical relationship prevents poses from feeling structurally wrong.
Angle-Specific Lines: Front, side, and back views each require completely different anatomical markers. Learning which specific lines matter for each viewing angle proves more immediately useful than memorizing every muscle in the region.
Practice This
Step 1: Sketch a simple standing figure focusing purely on positioning the rib cage, pelvic bucket, and upper leg forms correctly before adding any anatomy.
Step 2: Mark where the hip socket sits inside the pelvis, then angle the leg bone outward from there. Verify the pelvis width relates properly to the rib cage width.
Step 3: Add only the three or four most important surface lines for your chosen viewing angle: leg creases for front, glute curve for side, or spinal center line for back.


