How To Draw Teeth - The Basics
Summary
Drawing Teeth With the Horseshoe Shape
Teeth are one of the most frustrating things to draw, yet they add enormous character and emotion to faces and creatures. The core challenge is knowing the underlying structure well enough to suggest it without overdrawing. Too much detail and teeth look like braces or become unintentionally comedic. Too little and the mouth loses all definition.
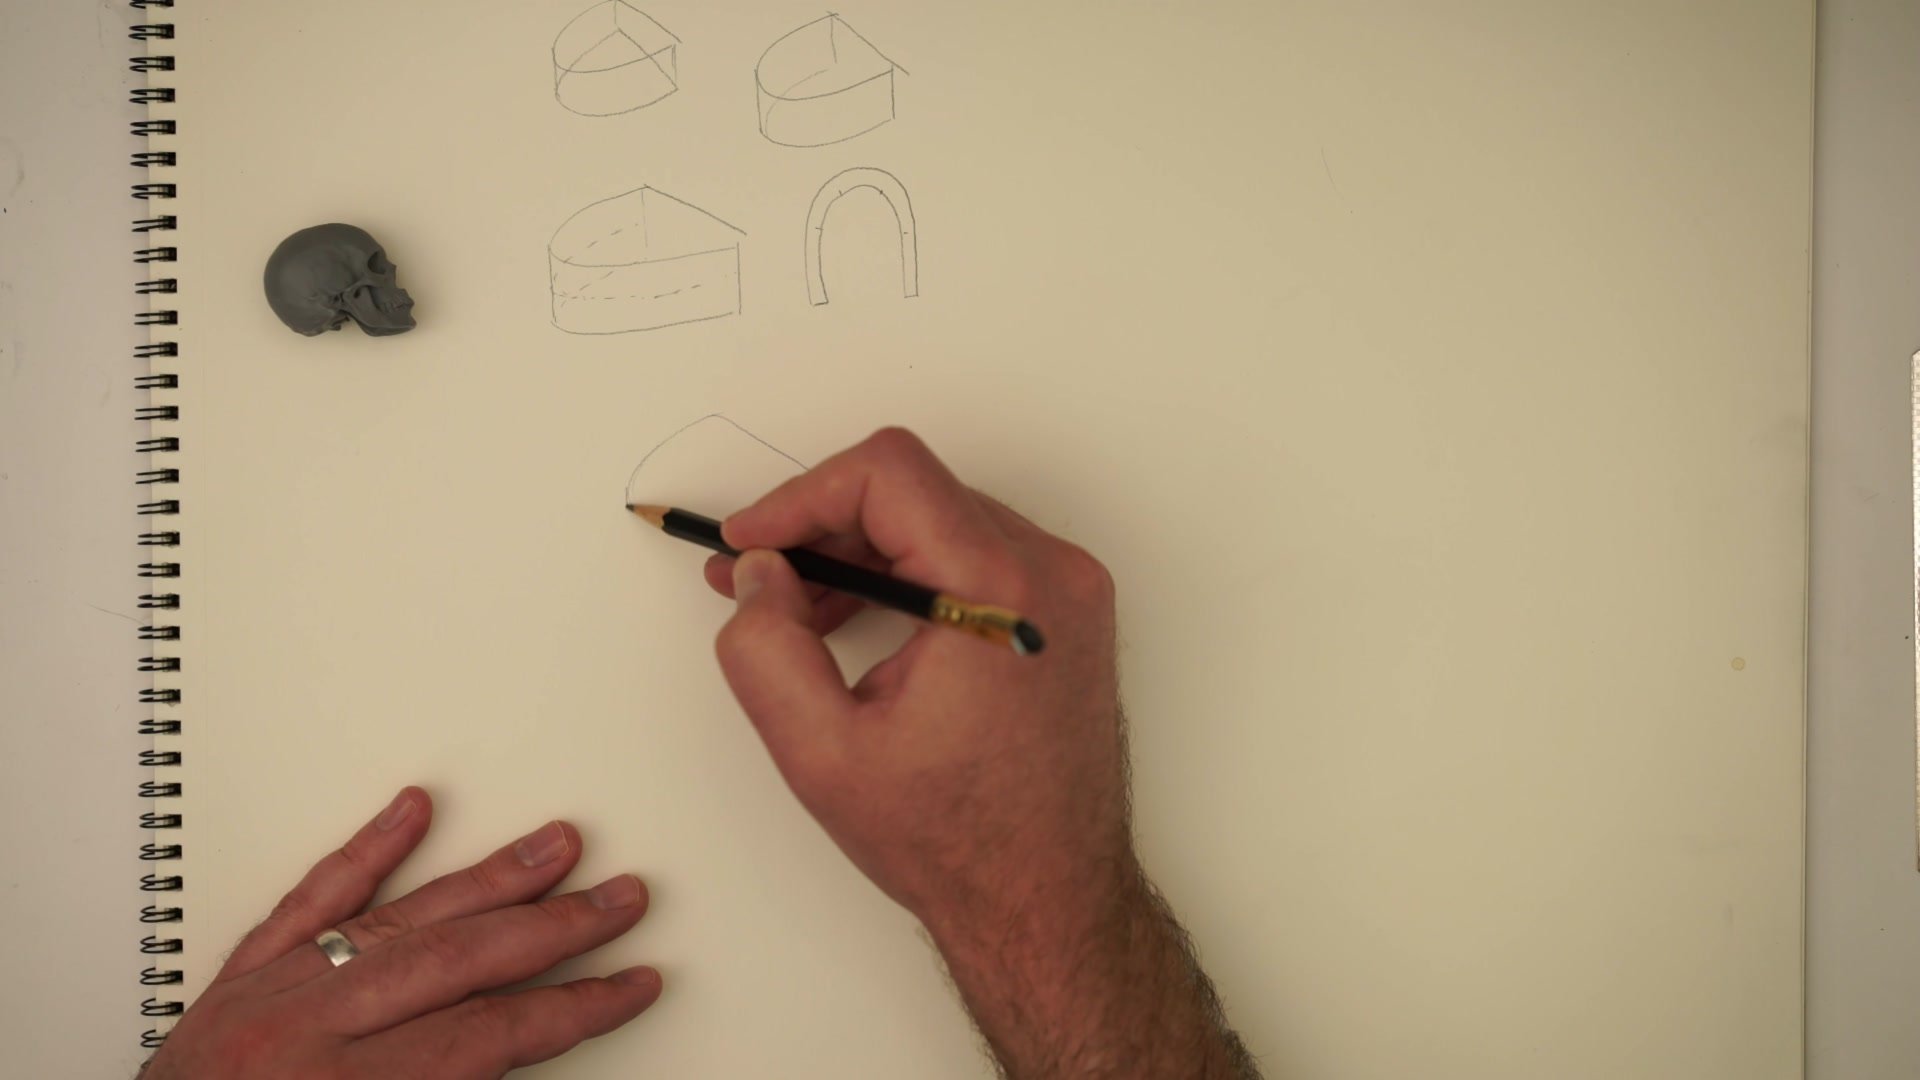
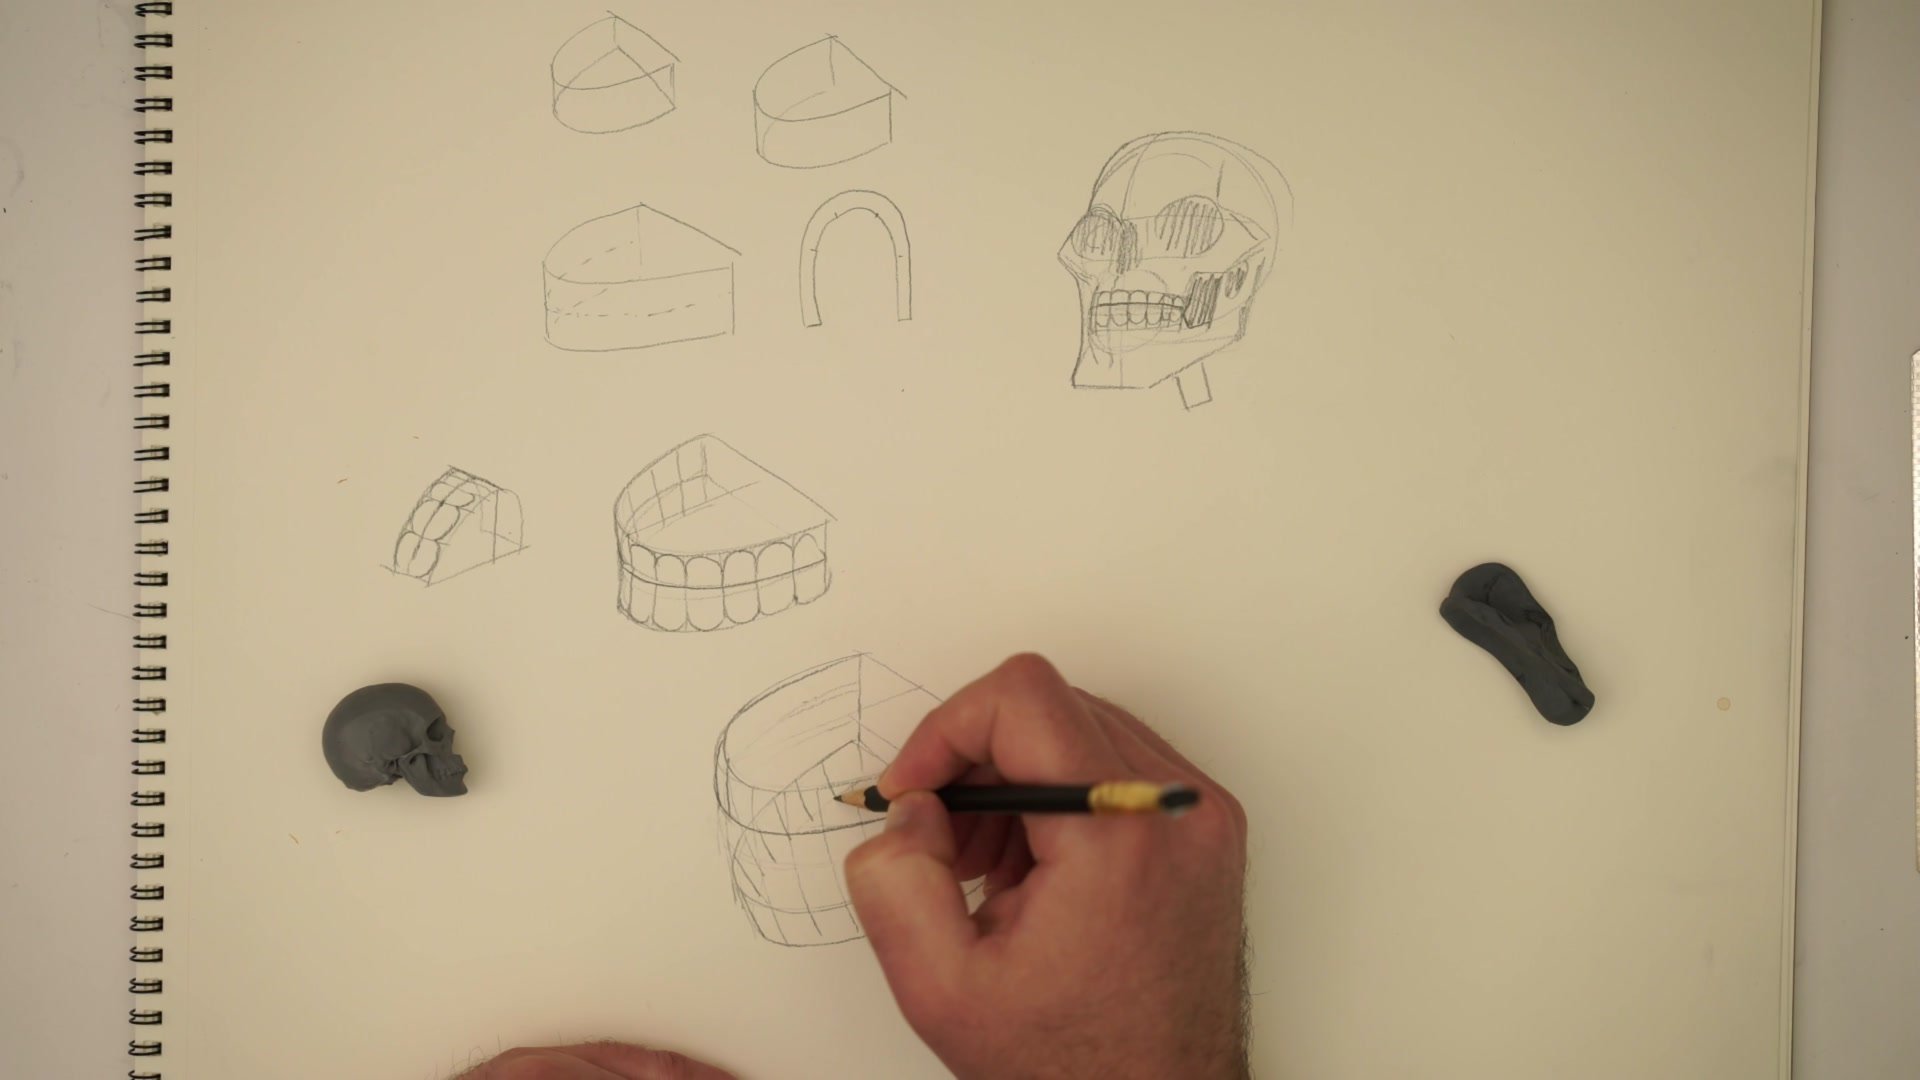
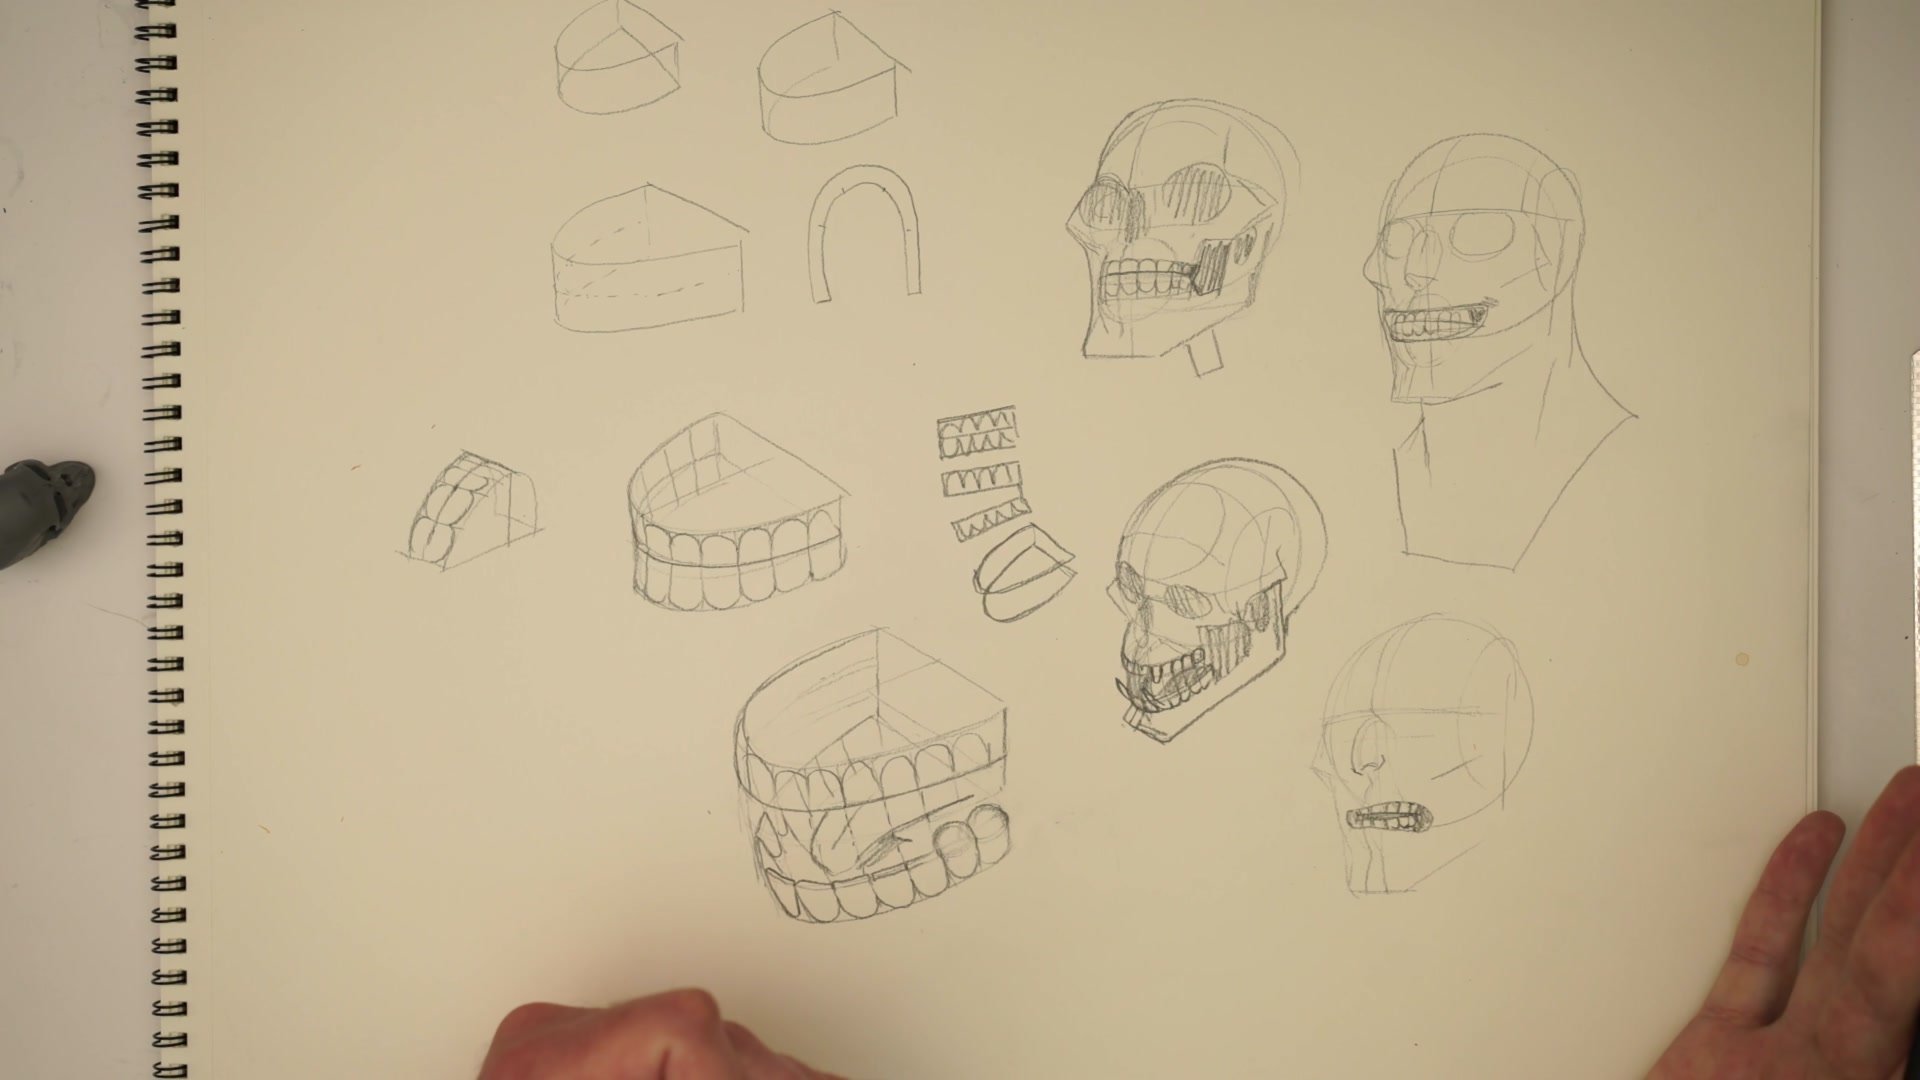
The foundational approach here breaks teeth construction down to a single primary form: the horseshoe shape. Two horseshoe shapes stacked together, one for the upper teeth and one for the lower, provide enough structural information to draw teeth from any angle, open or closed. This method focuses on form drawing rather than anatomical precision, giving a practical framework that works across cartoon, manga, comic, and illustration styles.
Primary Form Construction

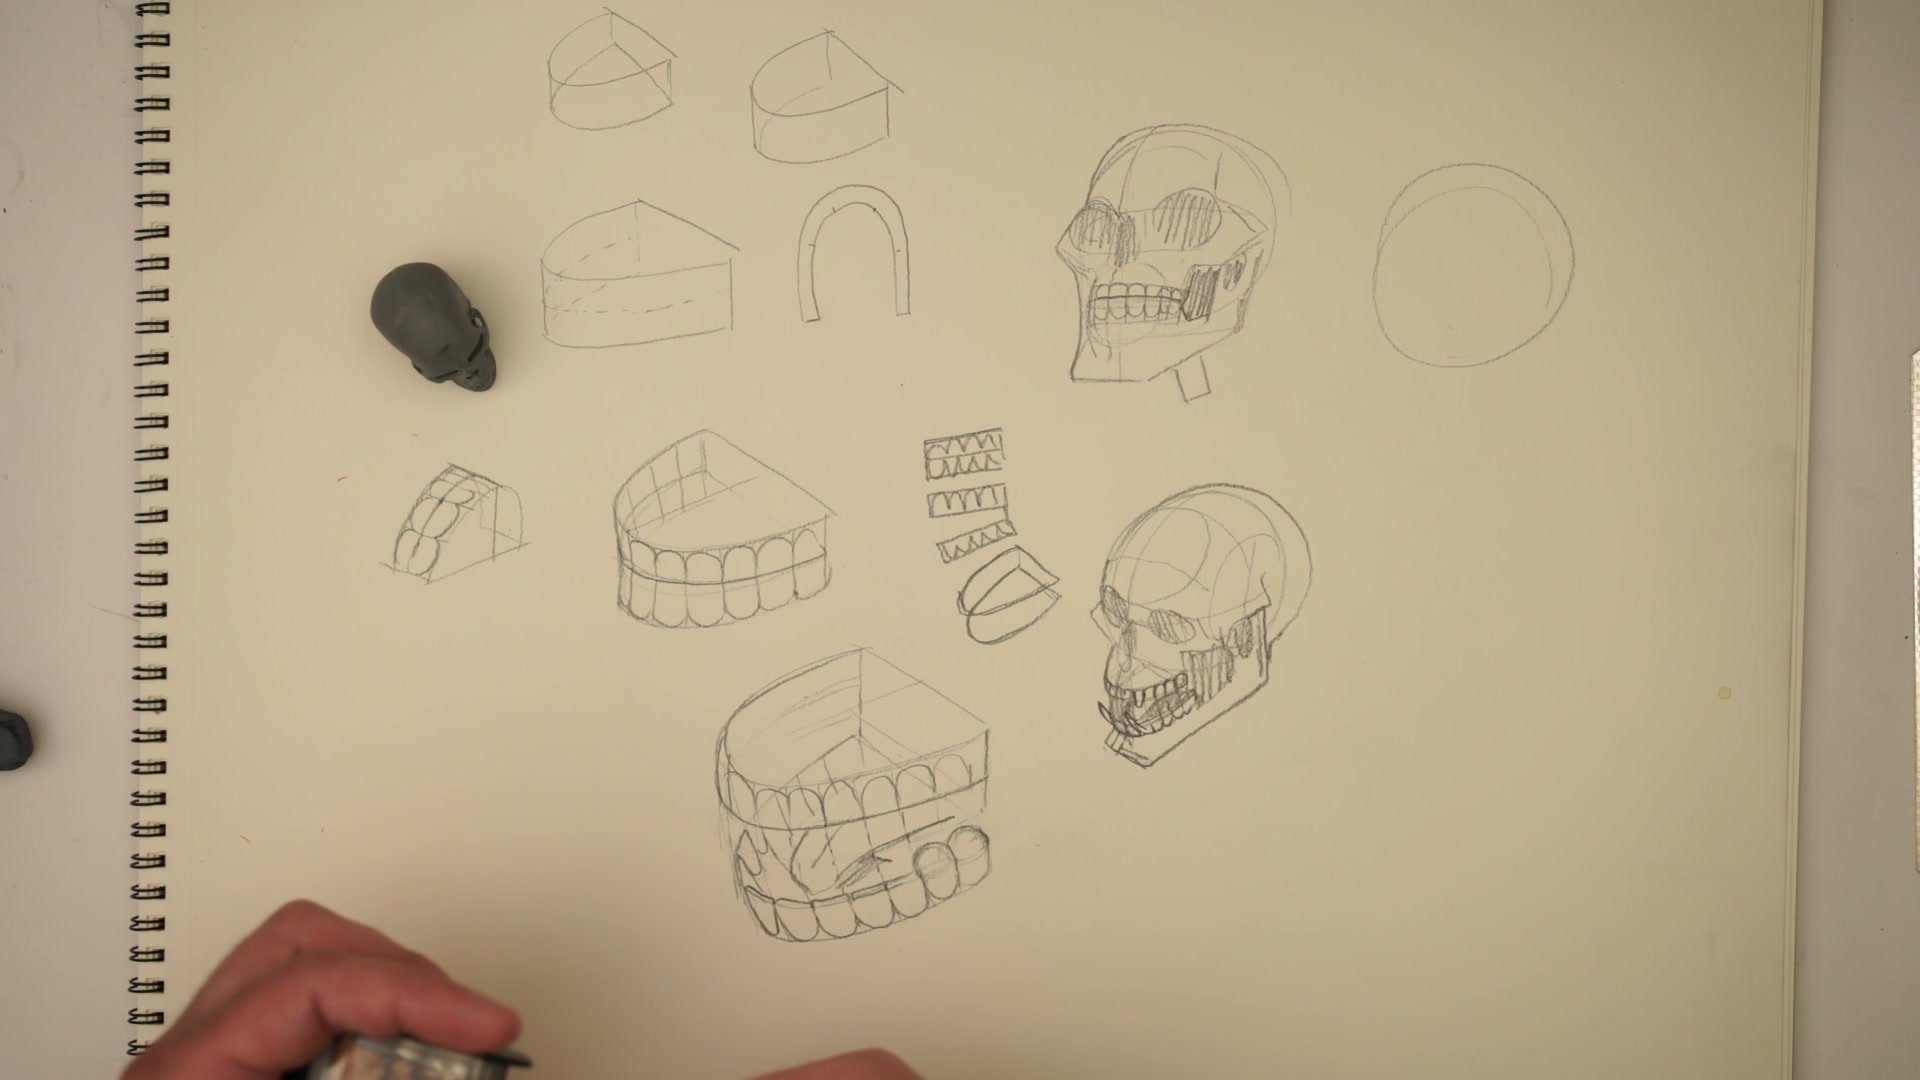
The Horseshoe as Primary Form
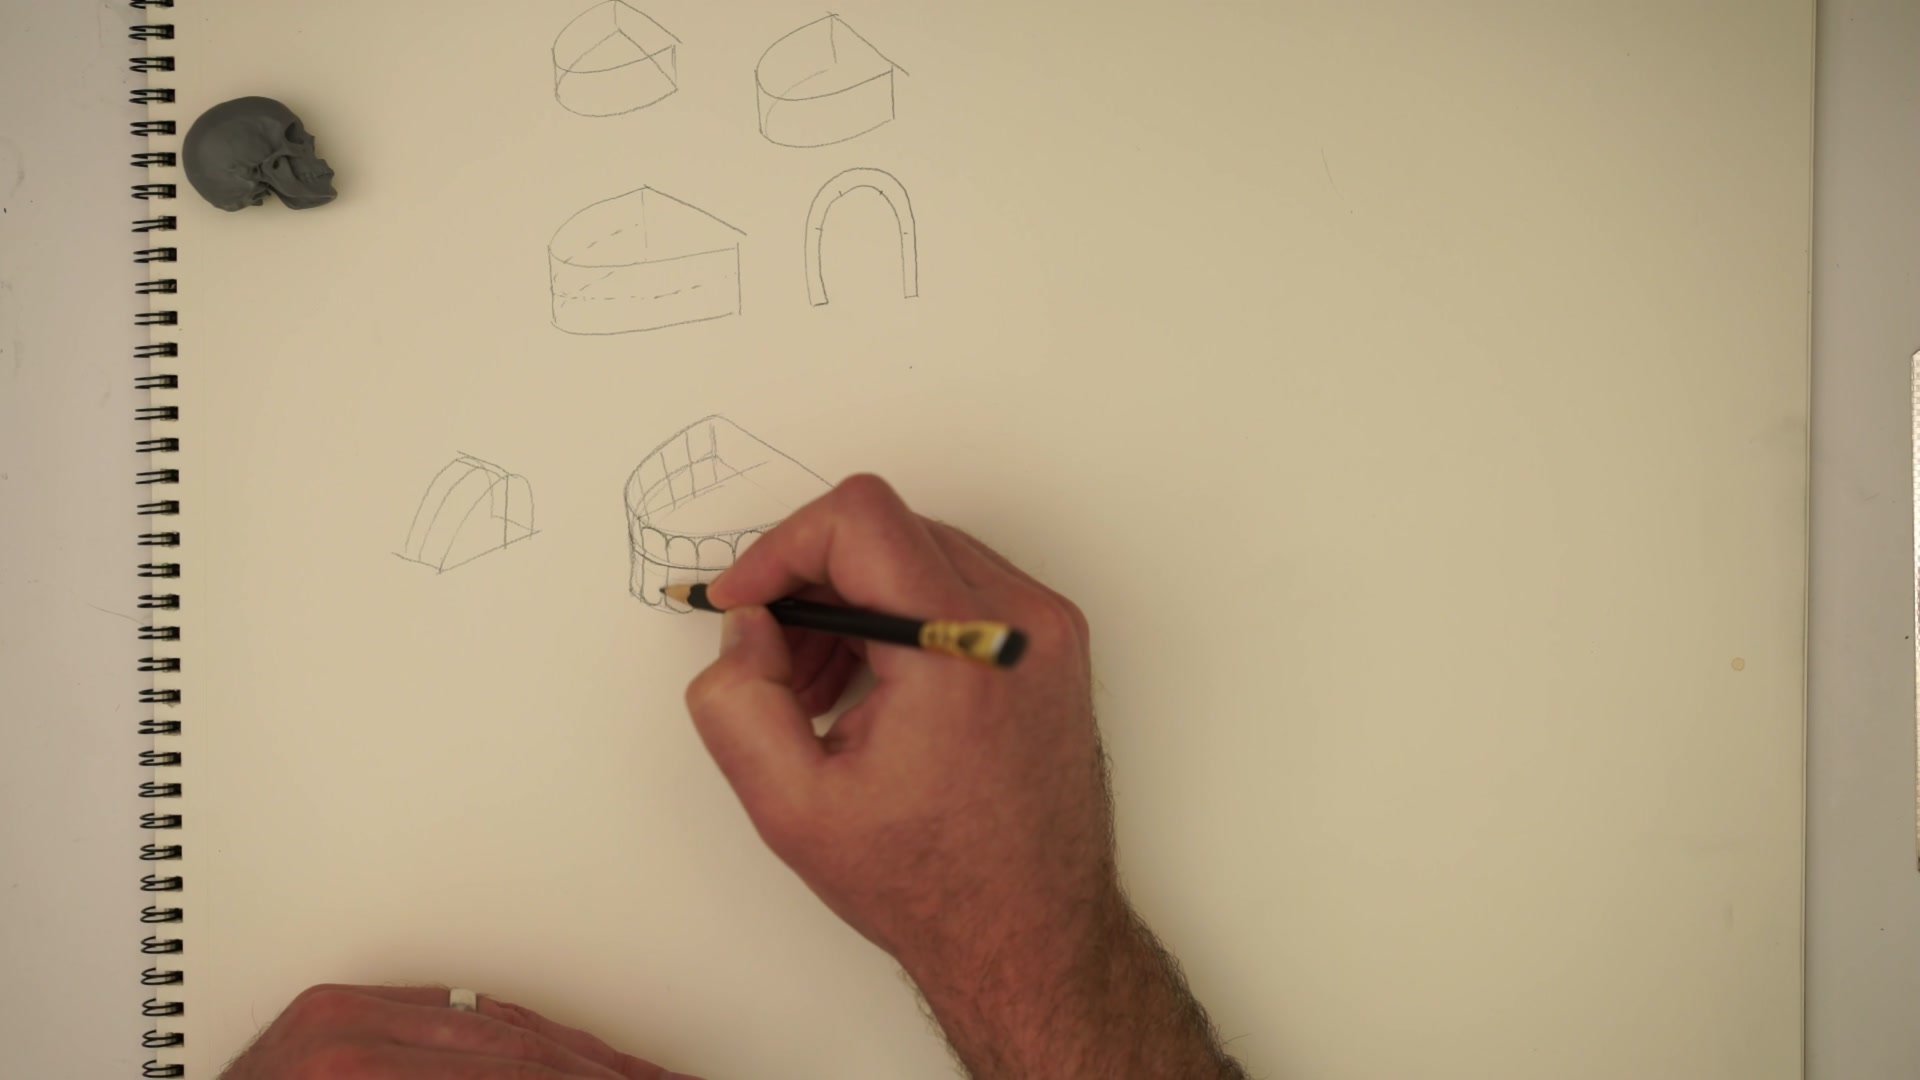
Everything starts with a U-shape. Drawing one horseshoe shape for the upper teeth and closing it off, then drawing another beneath it for the lower teeth, establishes the entire structural foundation. The center line running down the middle divides the form and provides the axis of symmetry needed to place individual teeth along each arch.
This is deliberately not anatomy. The individual teeth drawn at this stage are simplified placeholders, but they serve a critical purpose. By breaking the horseshoe into segments using the center line as a starting point, the form can be rotated and drawn from any angle. The perspective and form drawing skills carry this further than memorizing specific tooth shapes ever could. Once the primary form is understood, adding gum lines and varying tooth sizes becomes a matter of subdivision rather than guesswork.
Placing Teeth in the Skull
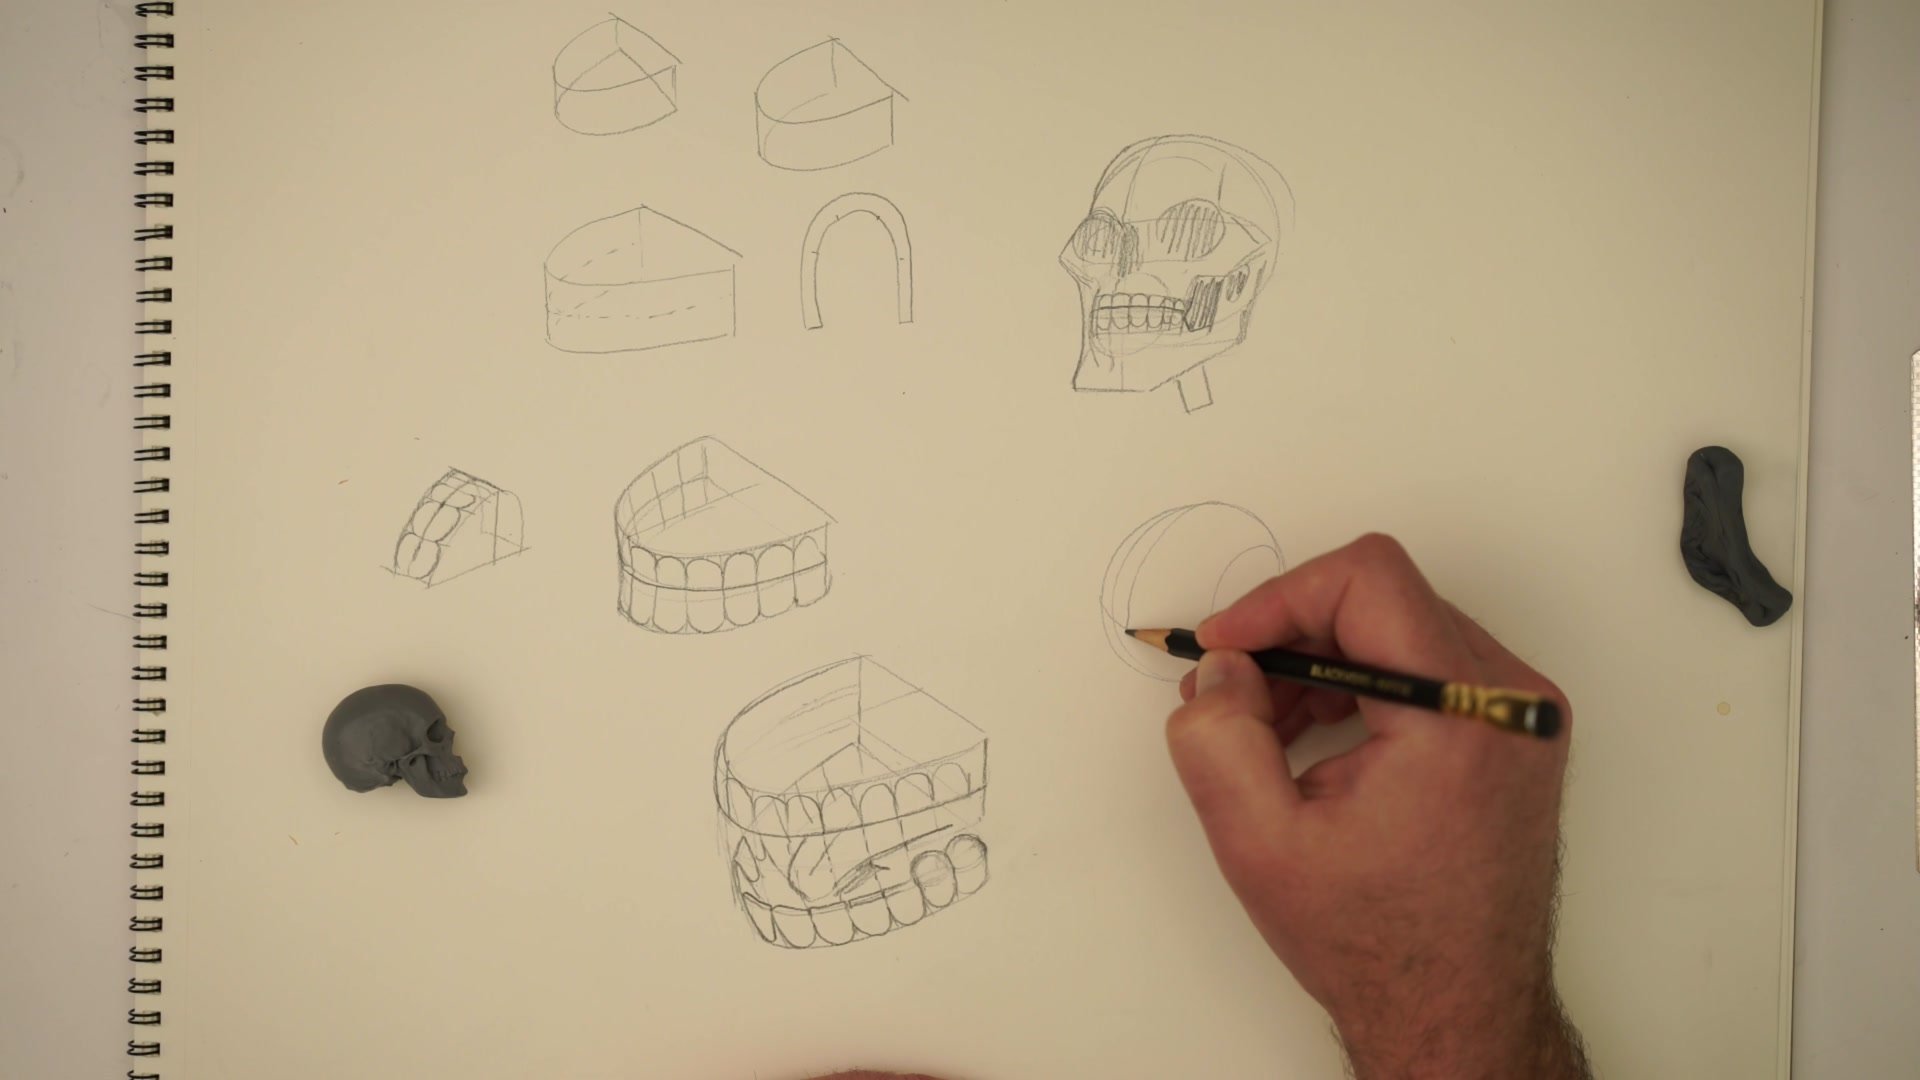
Teeth Within the Skull
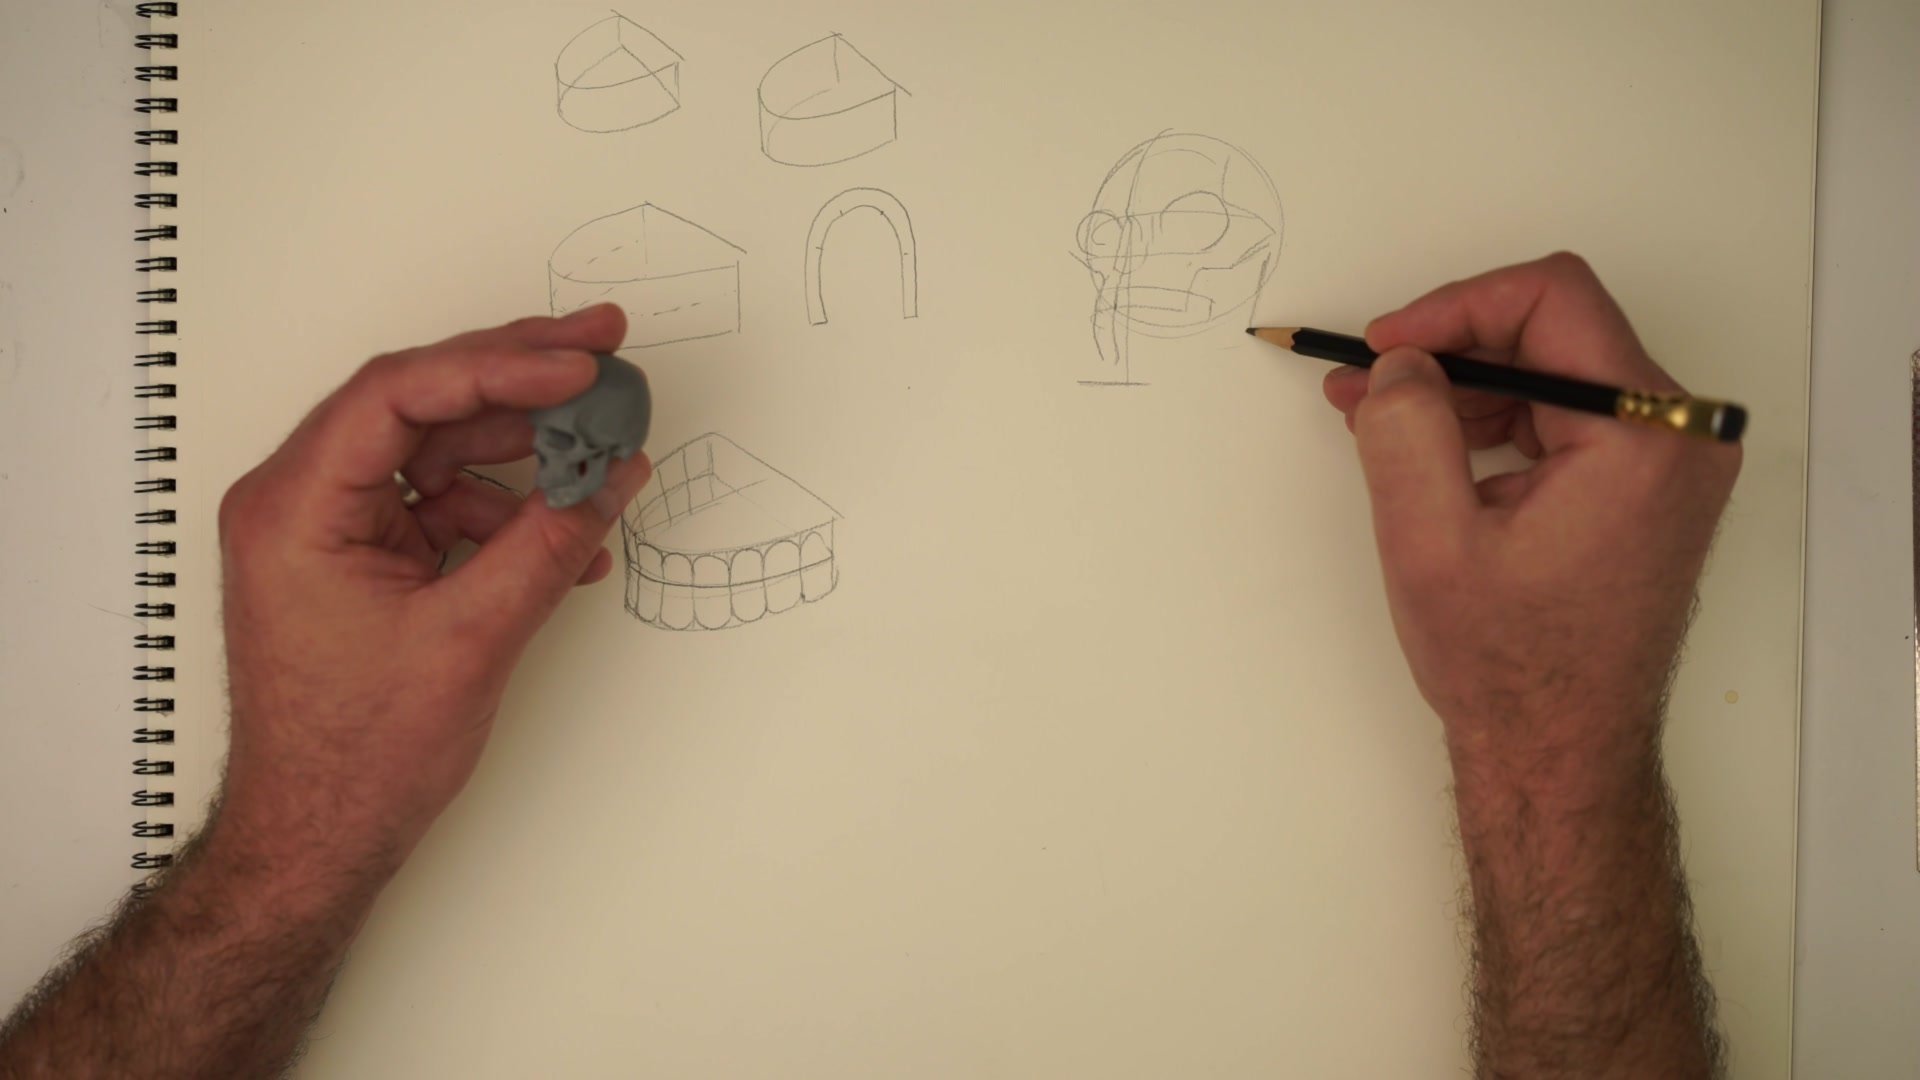
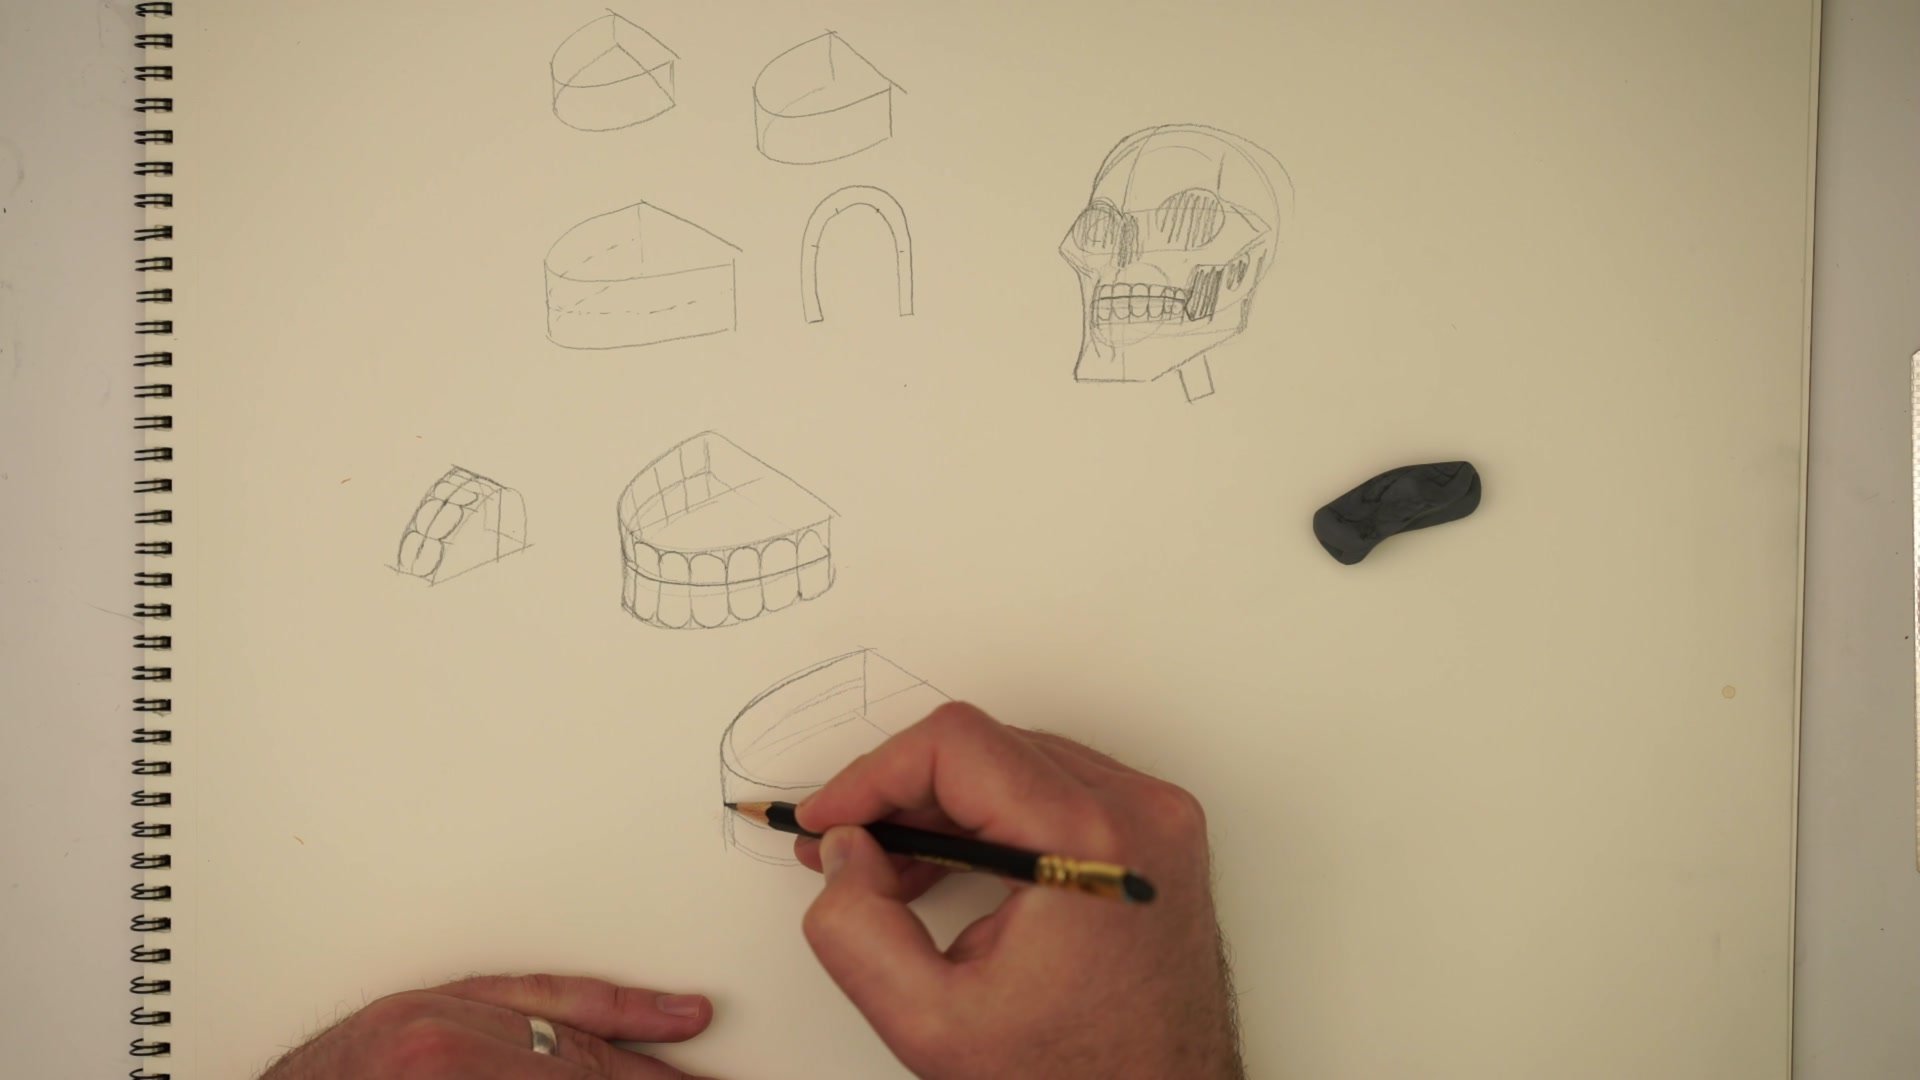
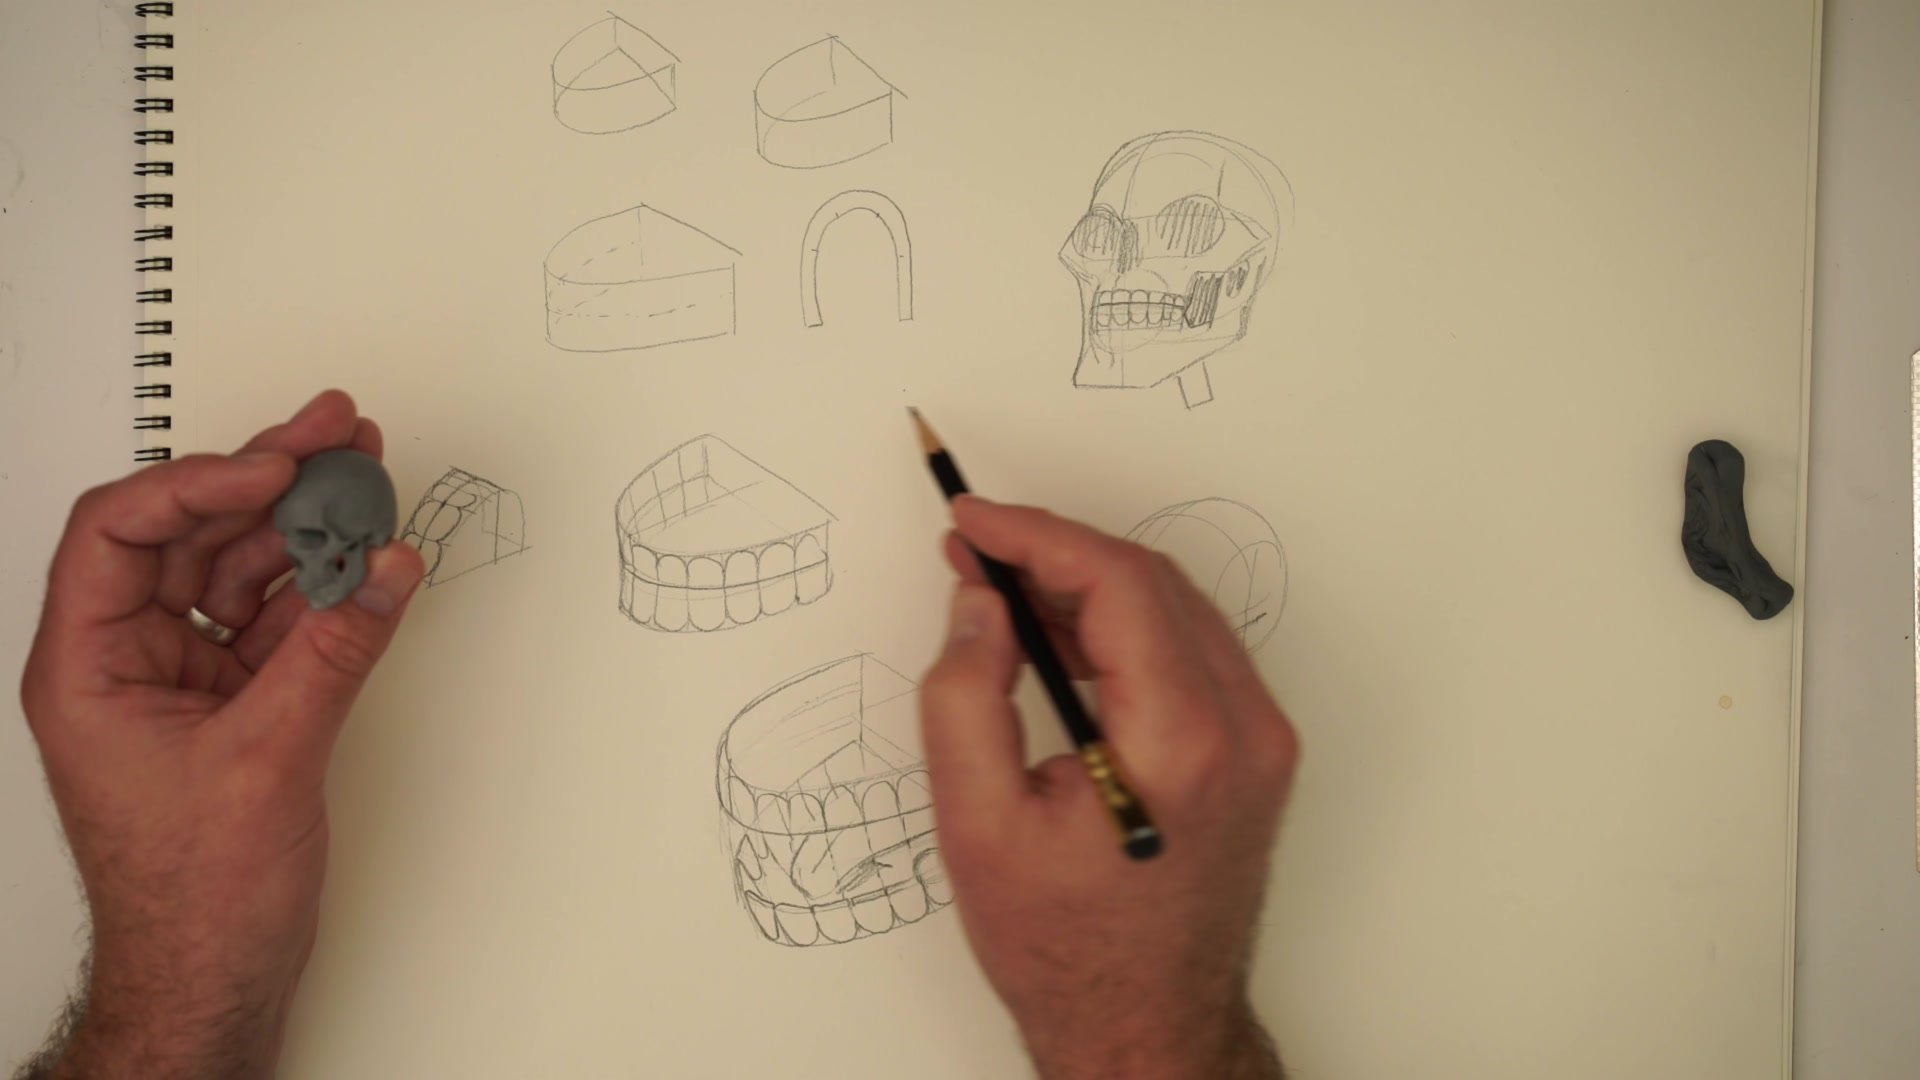
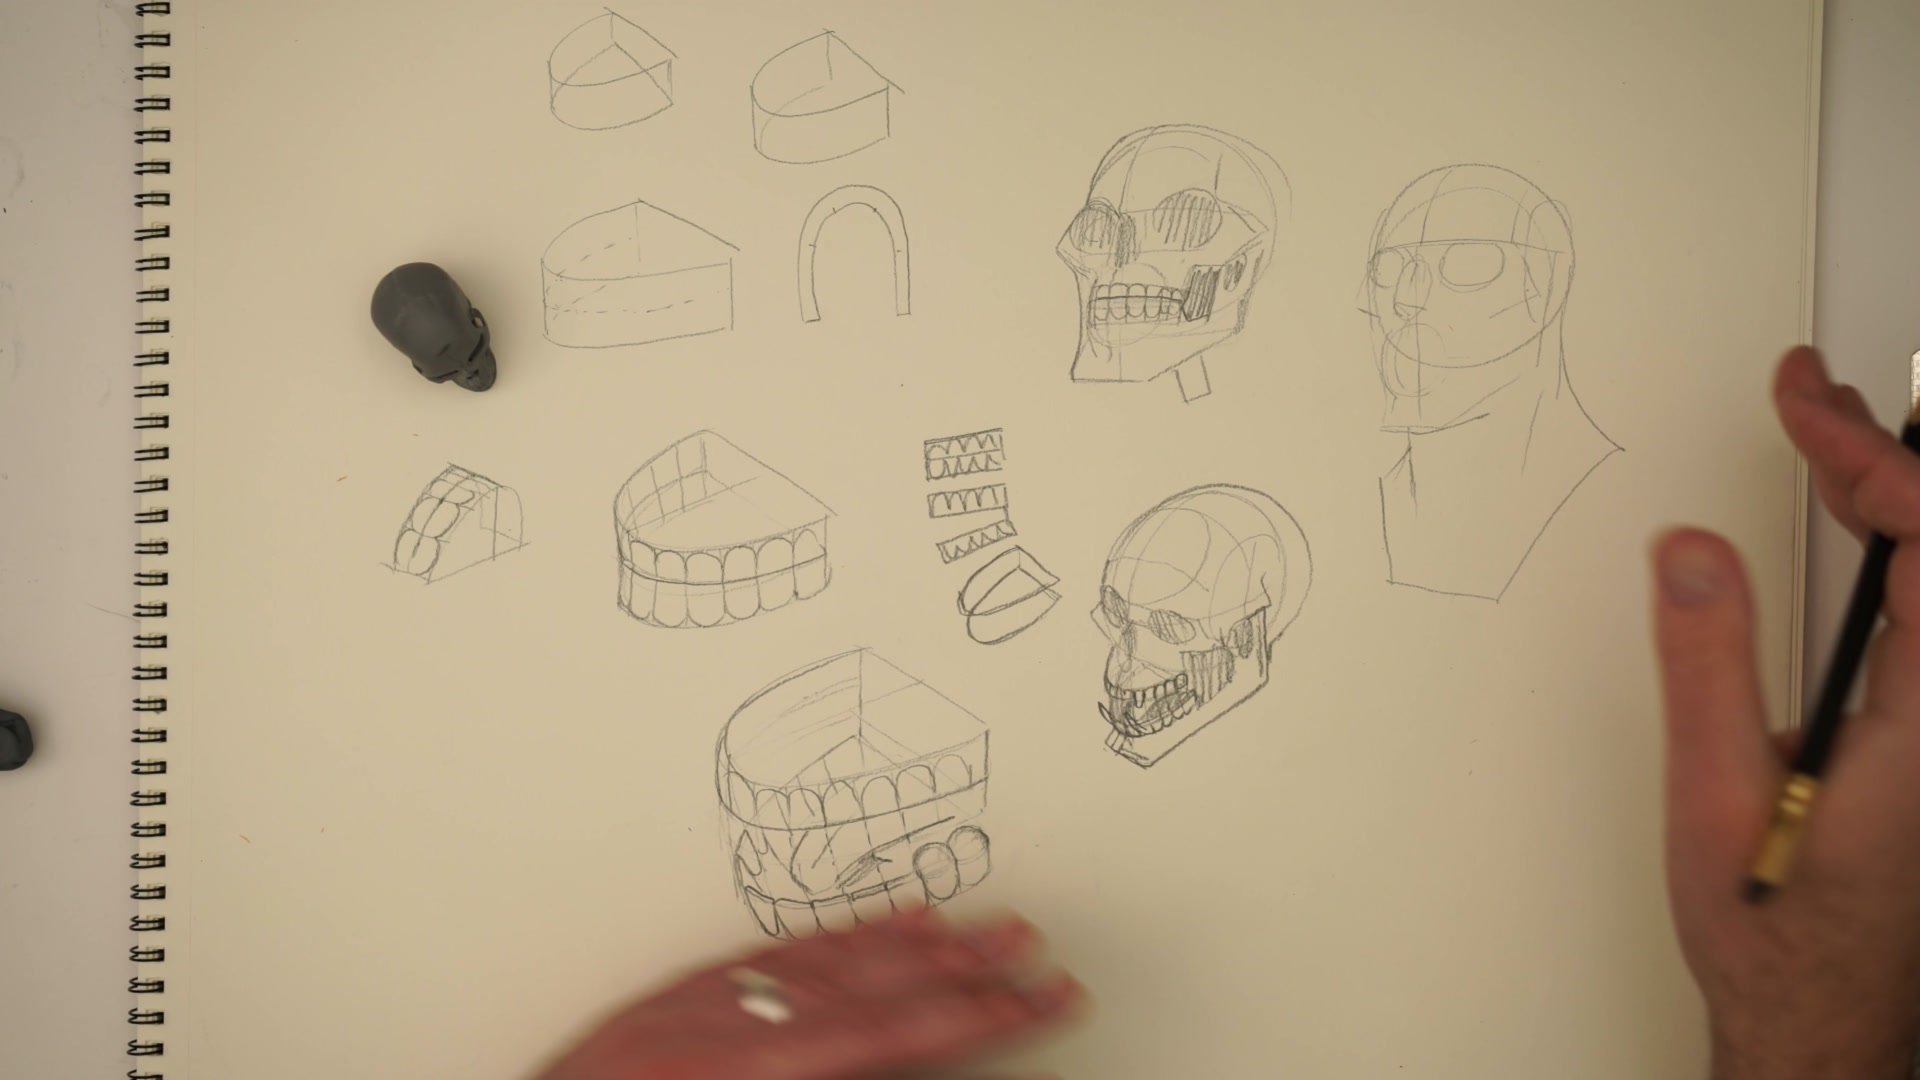
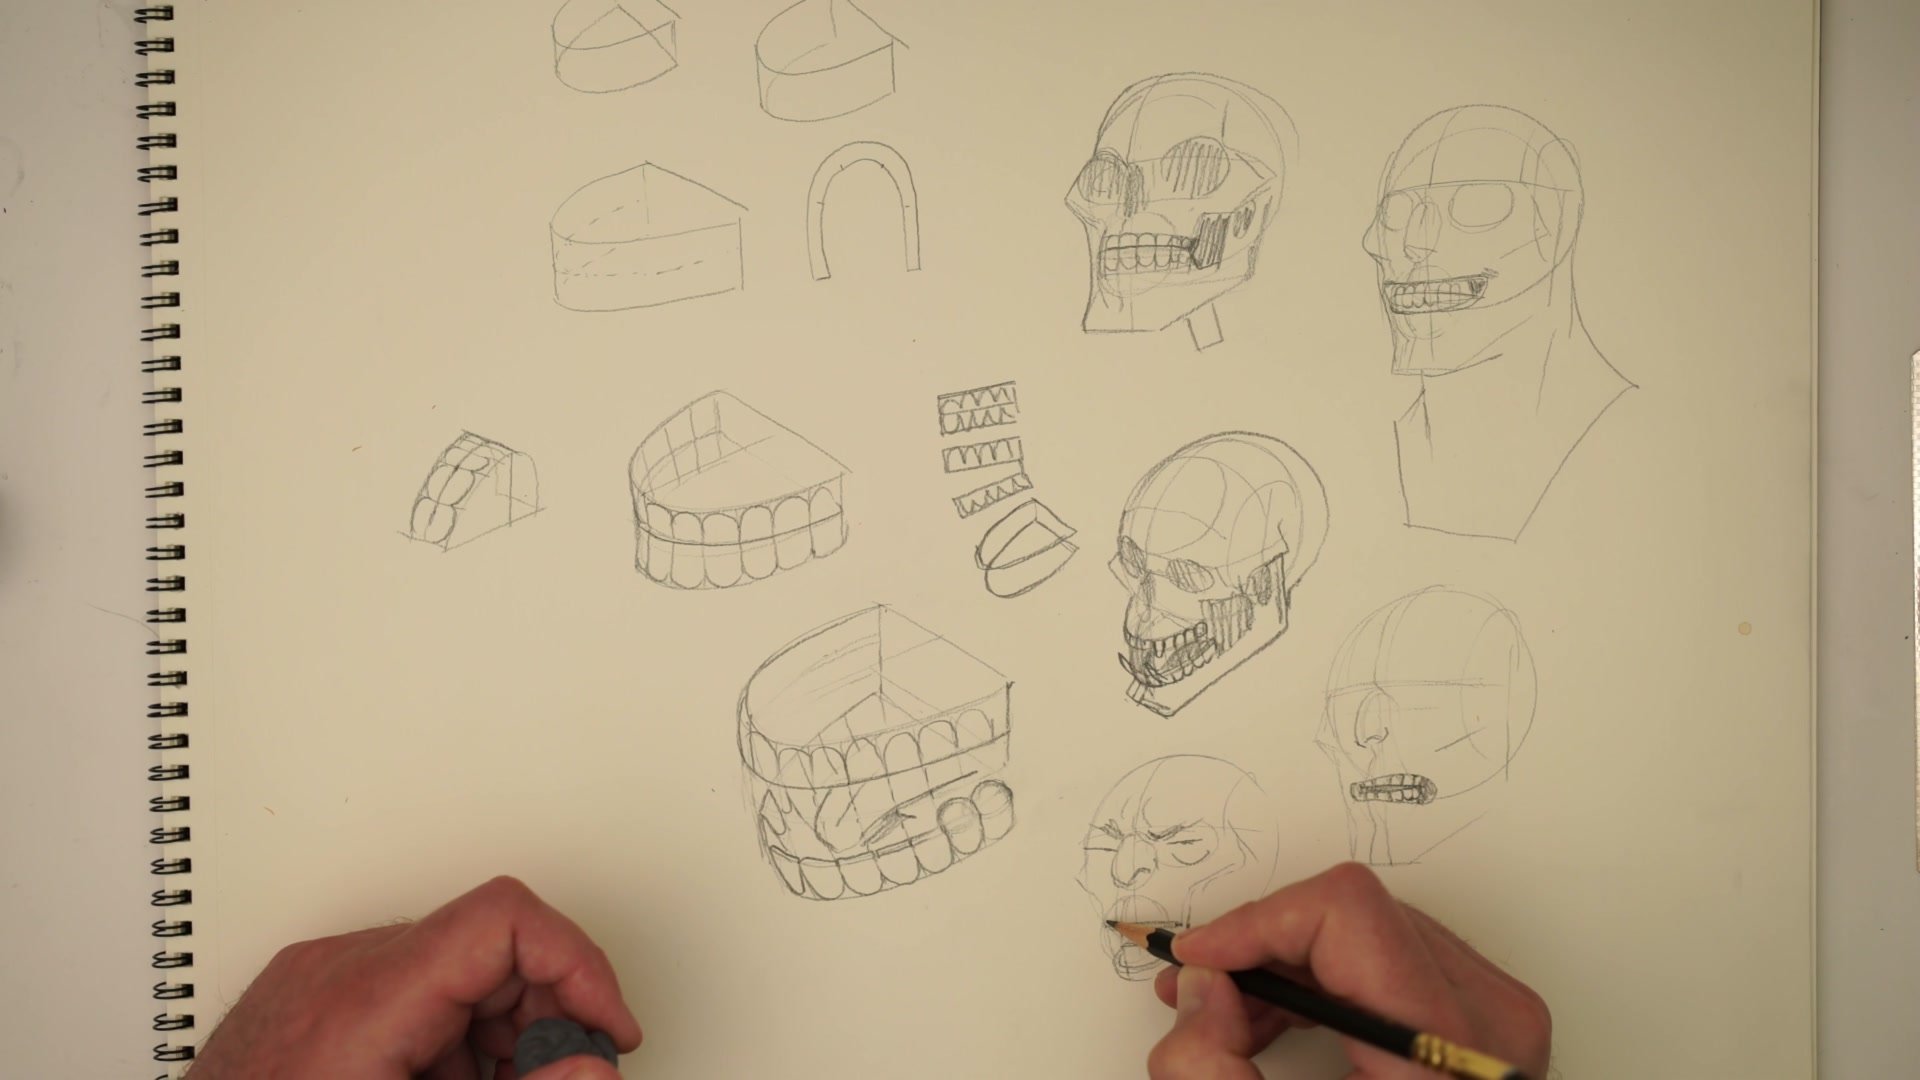
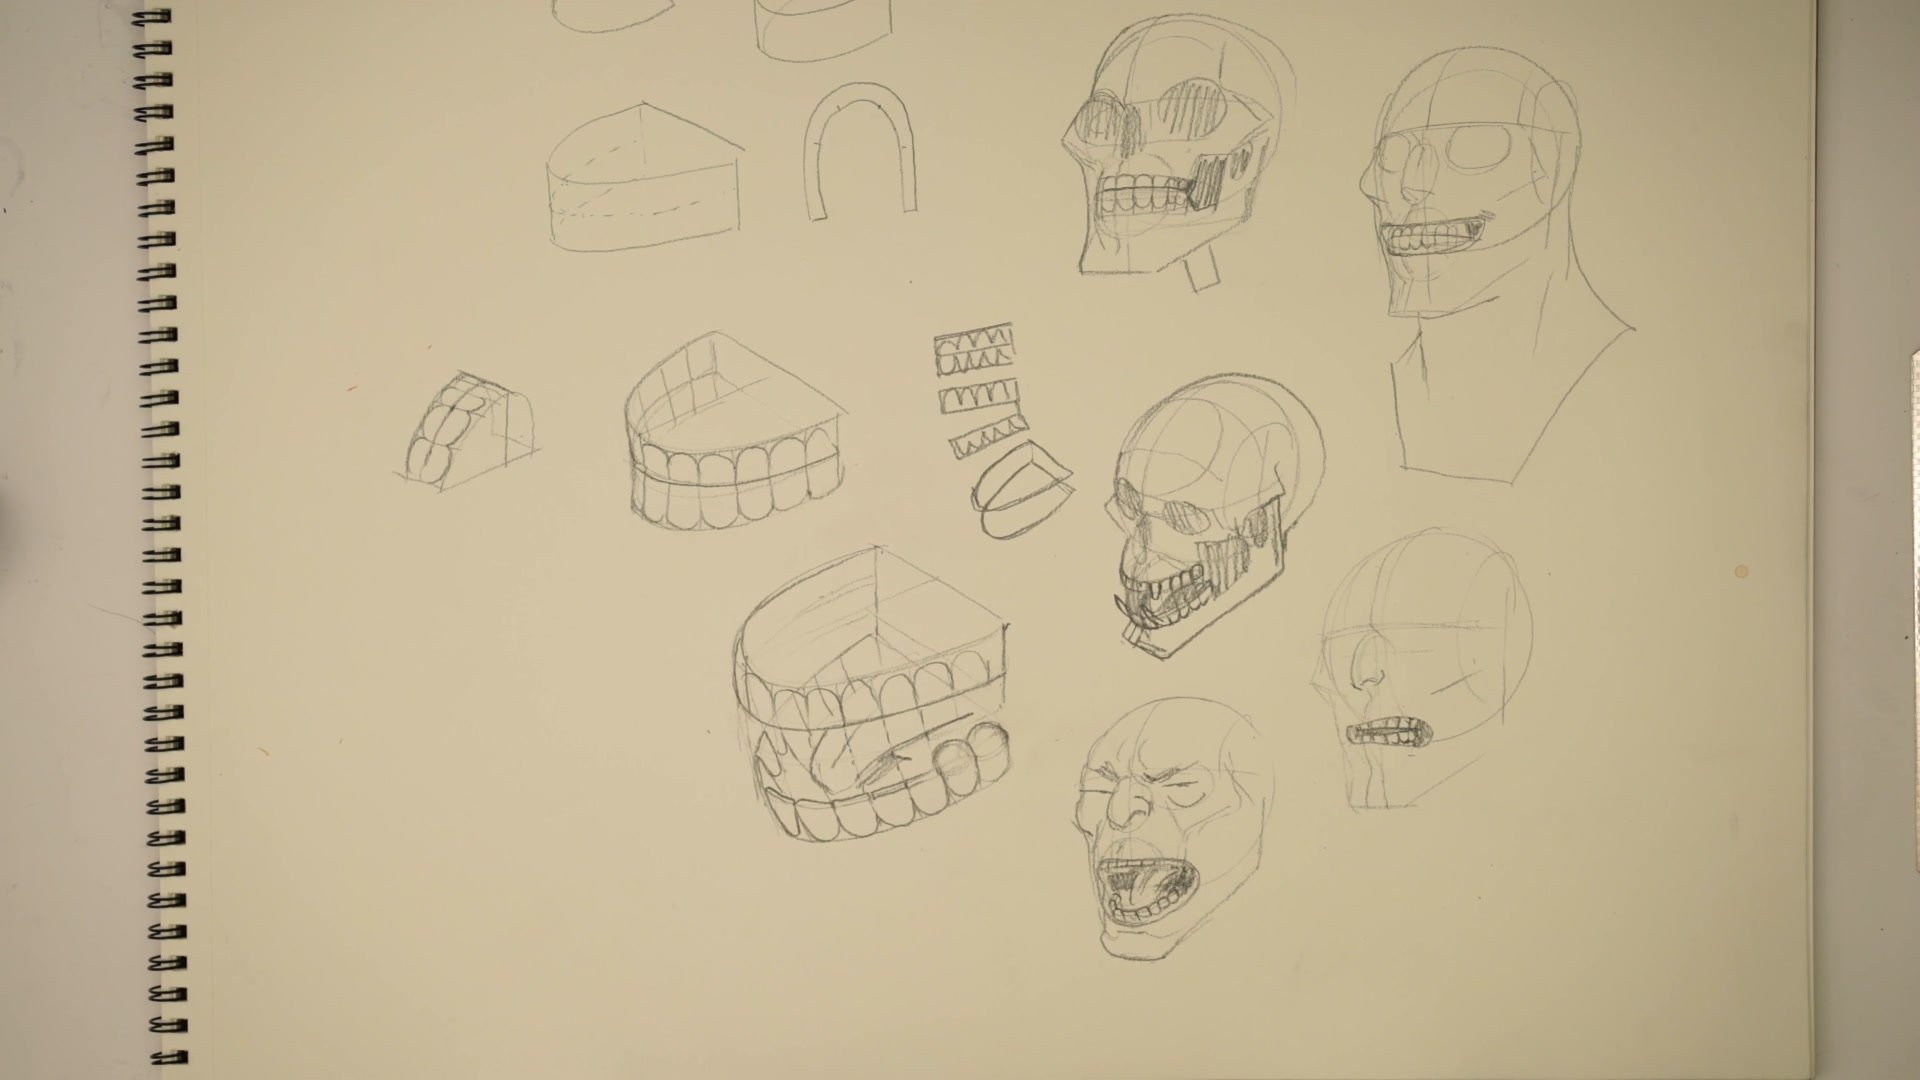
The horseshoe shape only becomes useful when it can be placed convincingly inside a head. Fitting the upper arch into the skull means identifying where the jaw connects and where the horseshoe sits relative to the nasal cavity and the overall cranial structure. The upper horseshoe is fixed to the skull and does not move, while the lower horseshoe rotates with the jaw.
When the mouth opens, the construction follows the same logic. The upper horseshoe stays in position while the lower one rotates downward. Tracking the center line through both arches maintains symmetry even at difficult angles. Drawing the skull from slightly above makes this relationship clearer, revealing how the two horseshoe forms separate and how the teeth become visible from that vantage point. A small skull reference model helps visualize where these forms actually sit within the bone structure.
Open Mouth Construction
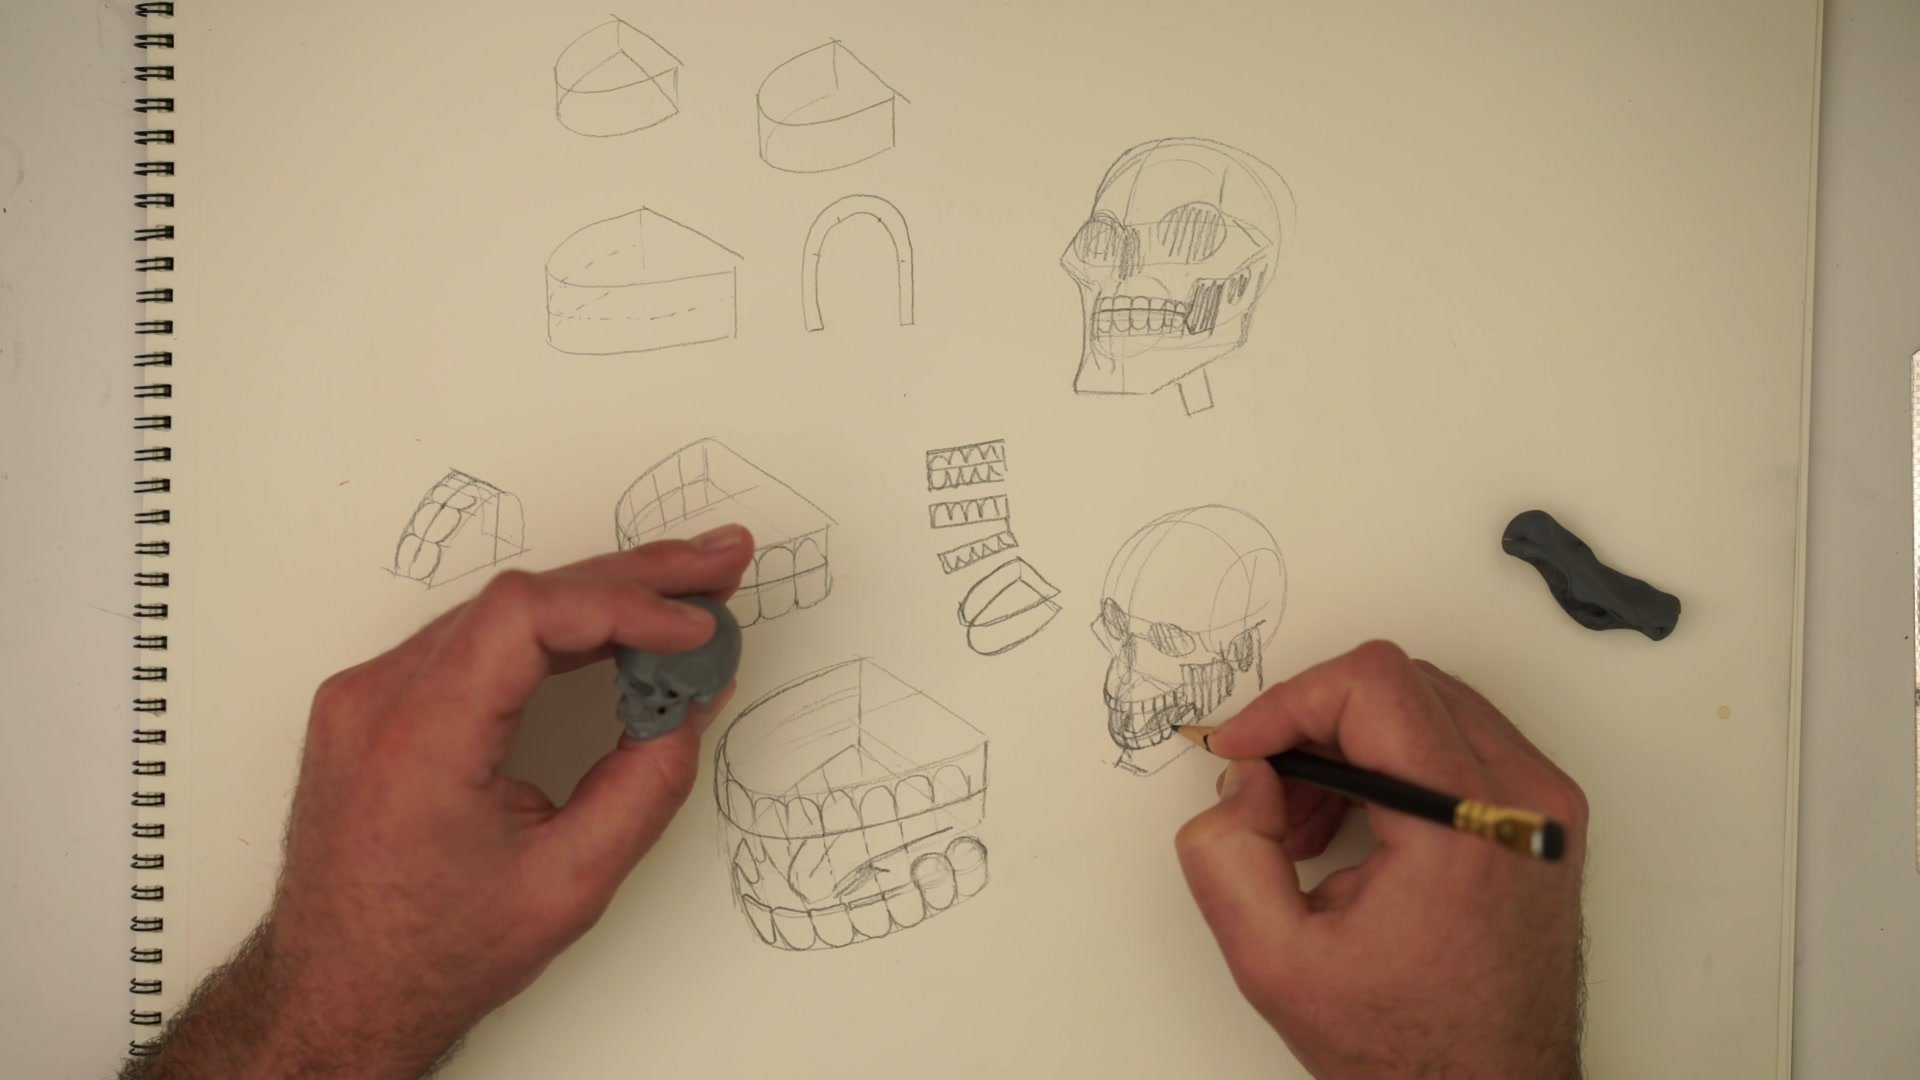
Applying Teeth to Faces
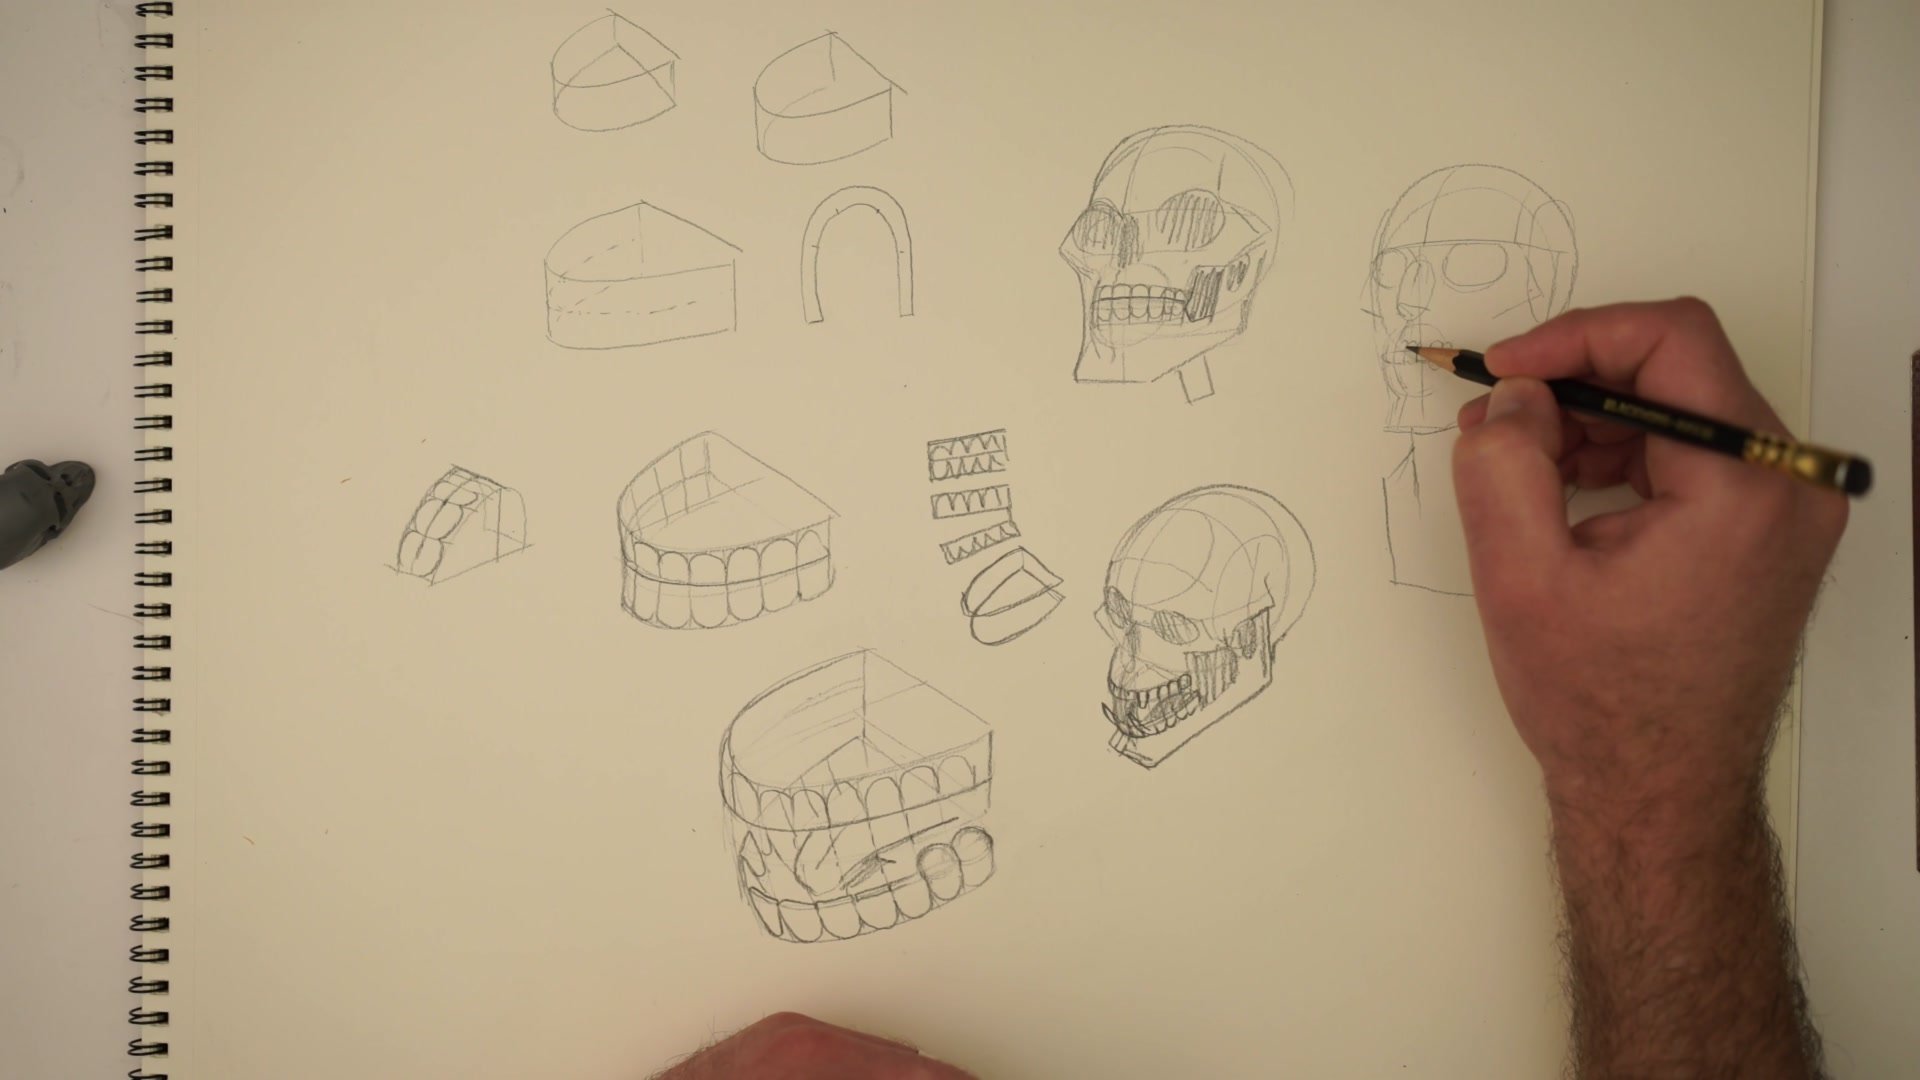
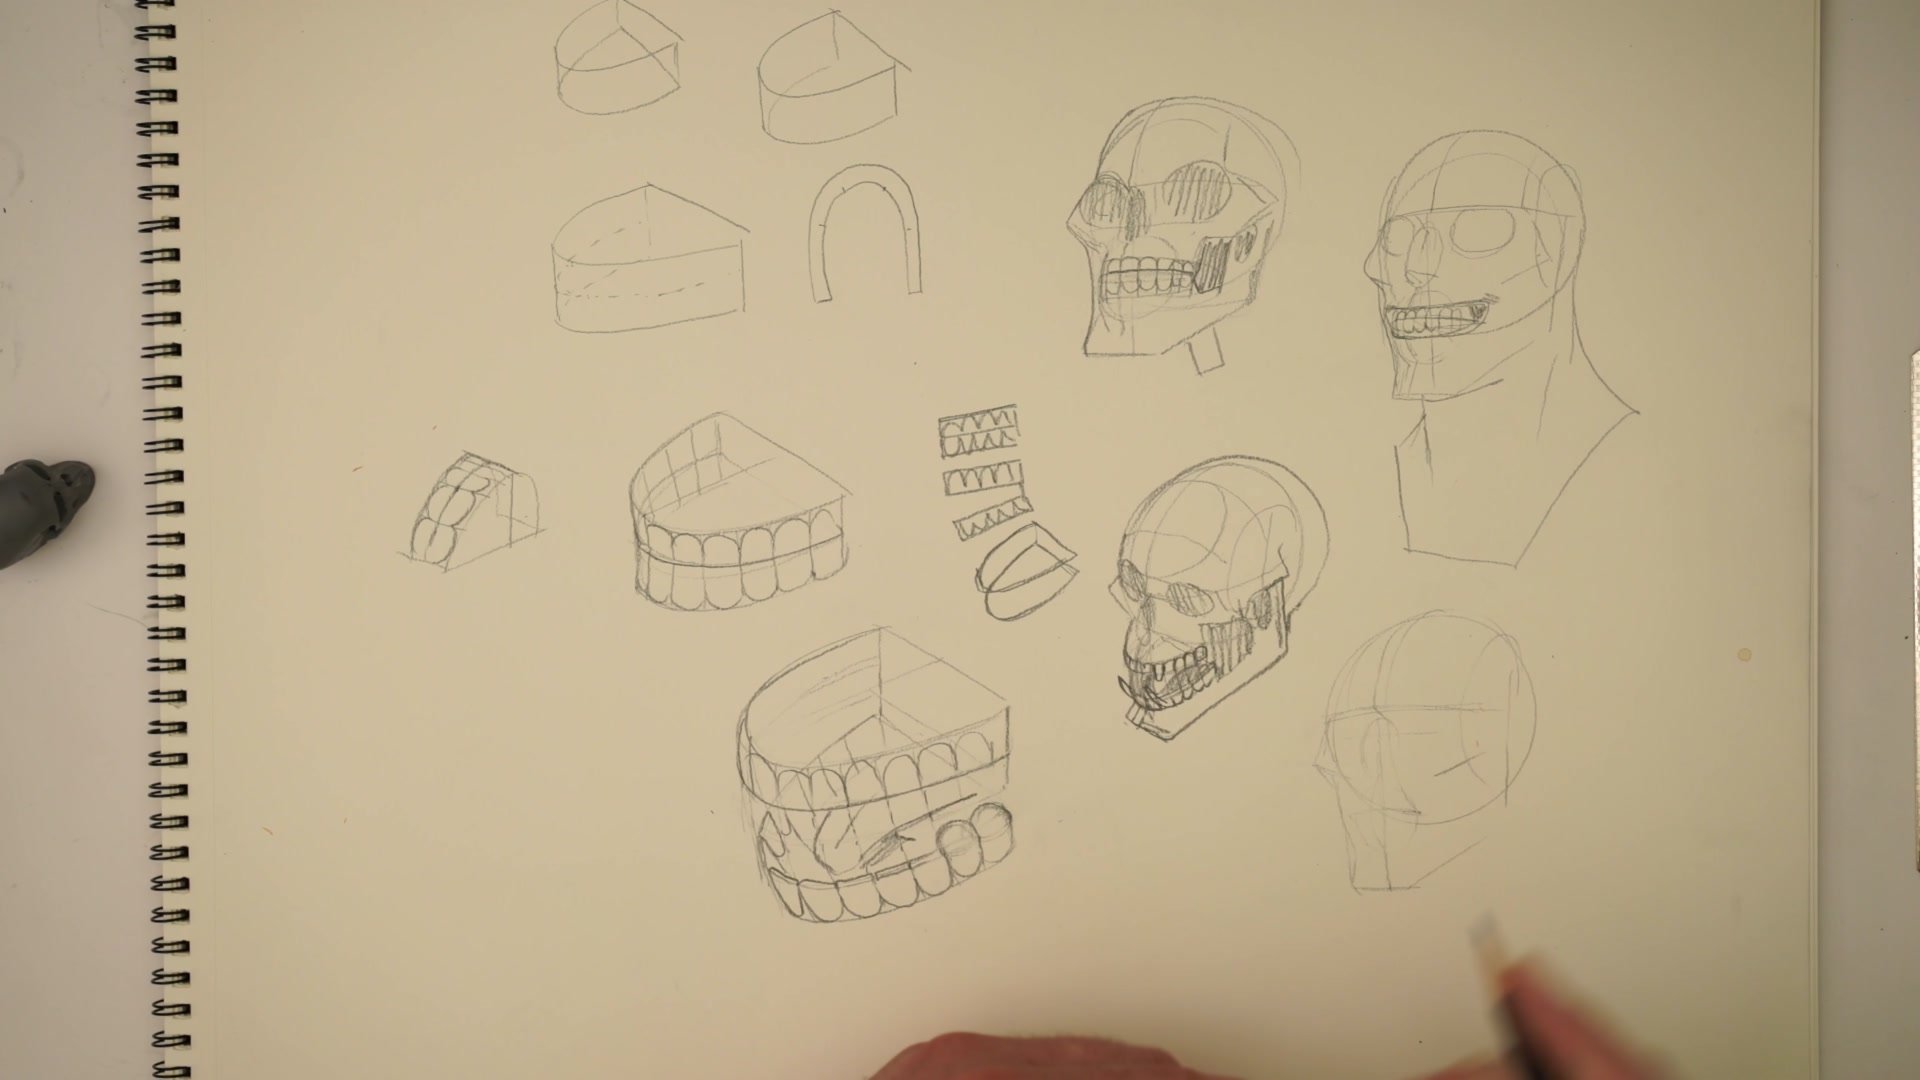
When drawing an actual face rather than a skull, most of the underlying structure becomes invisible beneath lips and skin. The key construction marker is the line where the upper and lower teeth meet, which defines the shape and feeling of the entire mouth. Where that line peaks, how it curves, and where the center line falls determine whether a character looks like they are smiling, grimacing, shouting, or clenching.
The practical decision at this stage is how much to draw. Suggesting teeth with shadow and a few key dividing lines often reads better than rendering every individual tooth. The mound of the mouth, built using a Loomis-style head construction, provides the volume that the teeth and lips sit on. From there, indicating the center line and the separation between teeth is often all that is needed. The subtleties of exactly how much tooth structure shows define the exact character of the expression, which is why understanding the full form underneath gives control over what to suggest on the surface.
Character Application
Key Principles
Horseshoe Primary Form: Two horseshoe shapes stacked together provide all the structural information needed to draw teeth from any angle. Upper arch is fixed to the skull, lower arch rotates with the jaw.
Center Line Controls Symmetry: Finding the center line first and dividing the horseshoe from there keeps teeth symmetrical across angles and prevents lopsided construction.
Suggest Rather Than Render: Drawing every tooth often looks overdone. Understanding the full structure underneath makes it possible to suggest teeth with minimal marks that still read correctly.
Form Before Anatomy: This approach prioritizes drawing teeth as a 3D form that can be rotated in space. Precise anatomical tooth shapes come later, built on top of the primary horseshoe construction.
Practice This
Draw the Horseshoe: Practice drawing pairs of horseshoe shapes from multiple angles, closed and open. Focus on tracking the center line through both arches as the form rotates.
Place in a Skull: Draw simple skull constructions and fit the horseshoe tooth form into the jaw area. Try front view, three-quarter, and from above to see how the form changes.
Apply to a Face: Using a basic Loomis head construction, add the mouth mound and indicate where the teeth separation line falls. Experiment with how much tooth detail to show versus suggest.


